
Tiger Paper Plate Craft
Get ready to ROAR into craft time! This easy tiger paper plate craft is the perfect mix of hands-on fun, early learning, and wild creativity for preschoolers. Whether you’re a parent looking for a fun afternoon project or a teacher adding excitement to a jungle or zoo theme, this craft will have kids smiling from start to finish.

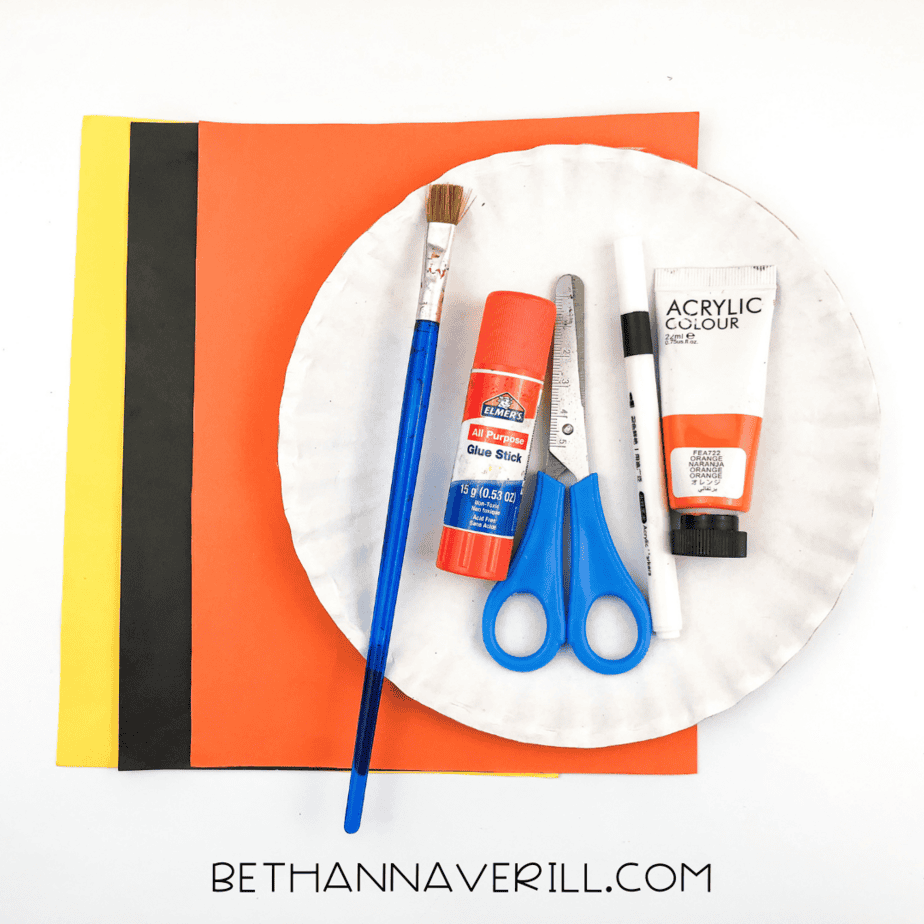
Materials Needed:
Here’s your simple supply list:
- Orange paint
- Paintbrush
- 2 paper plates
- Orange, yellow, and black construction paper
- Black marker
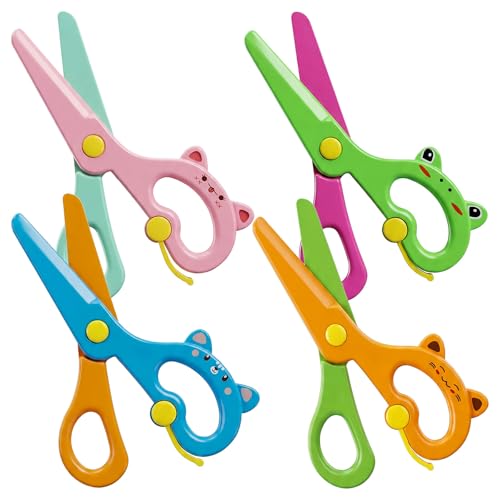
- Scissors
- Glue stick
- Printable Template
These basic materials are easy to find in most homes or classrooms, making this a great go-to project for busy days.
Why This Tiger Paper Plate Craft is a Total Win
The finished tiger is adorable, but the real magic is in the process.
- Fine Motor Boost — Cutting, gluing, and painting strengthen the small muscles kids need for writing, zipping, and buttoning.
- Creative Decision-Making — Should the tiger be silly or fierce? Where do the stripes go? Each choice sparks imagination and builds independence.
- Sequencing Practice — Following the steps from start to finish helps children learn to stick with a task and understand the flow of a project.
If you want to keep the animal fun going, check out these farm animal paper plate crafts to create a whole animal lineup.
How to Make a Tiger Paper Plate Craft
Ready to get crafting? Find the instructions below!
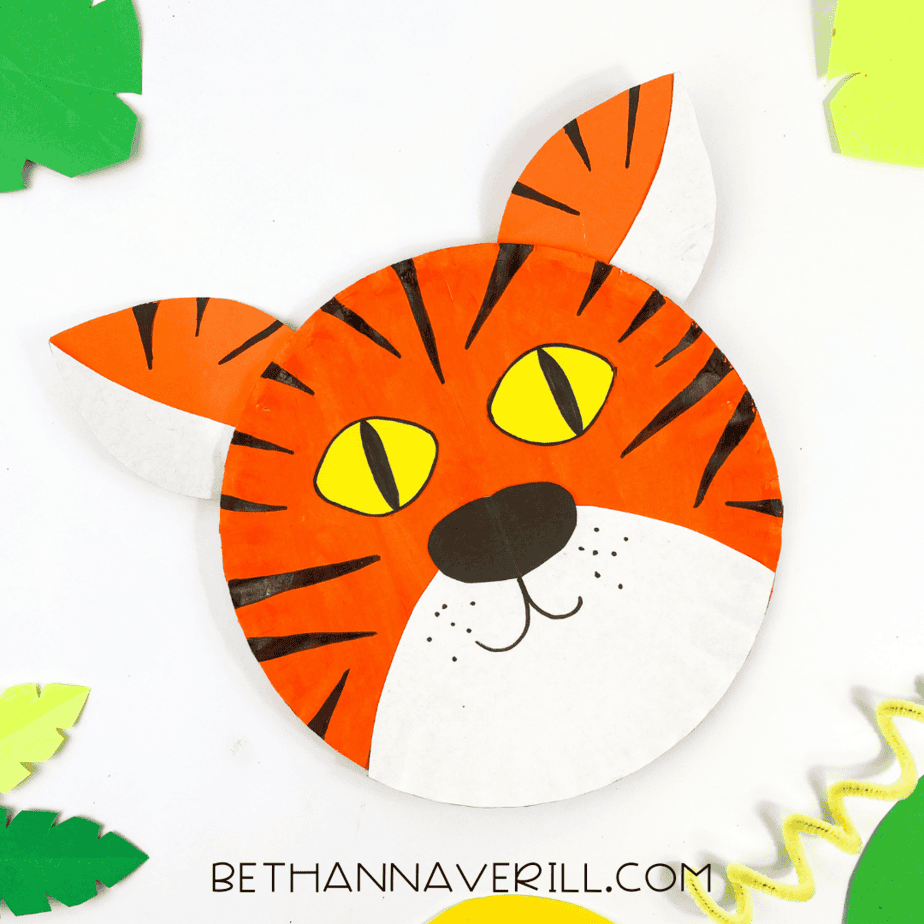
Tiger Paper Plate Craft

This bold and colorful tiger paper plate craft is perfect for jungle themes, zoo units, or animal studies. It encourages kids to follow multi-step directions while building fine motor skills!
Materials
- Orange paint
- 2 paper plates
- Orange, yellow, and black construction paper
- Glue stick
- Black marker
- Template
Tools
- Paint brush
- Scissors
Instructions
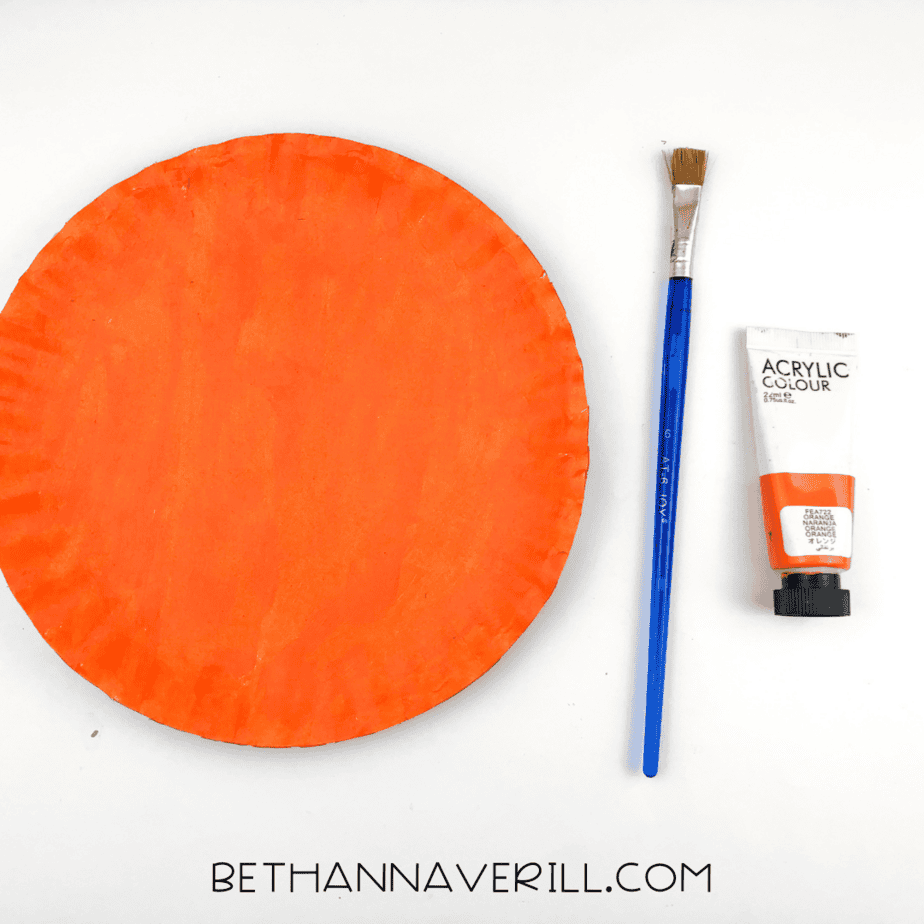
- Gather your supplies.
- Paint the paper plate orange and let it dry completely.
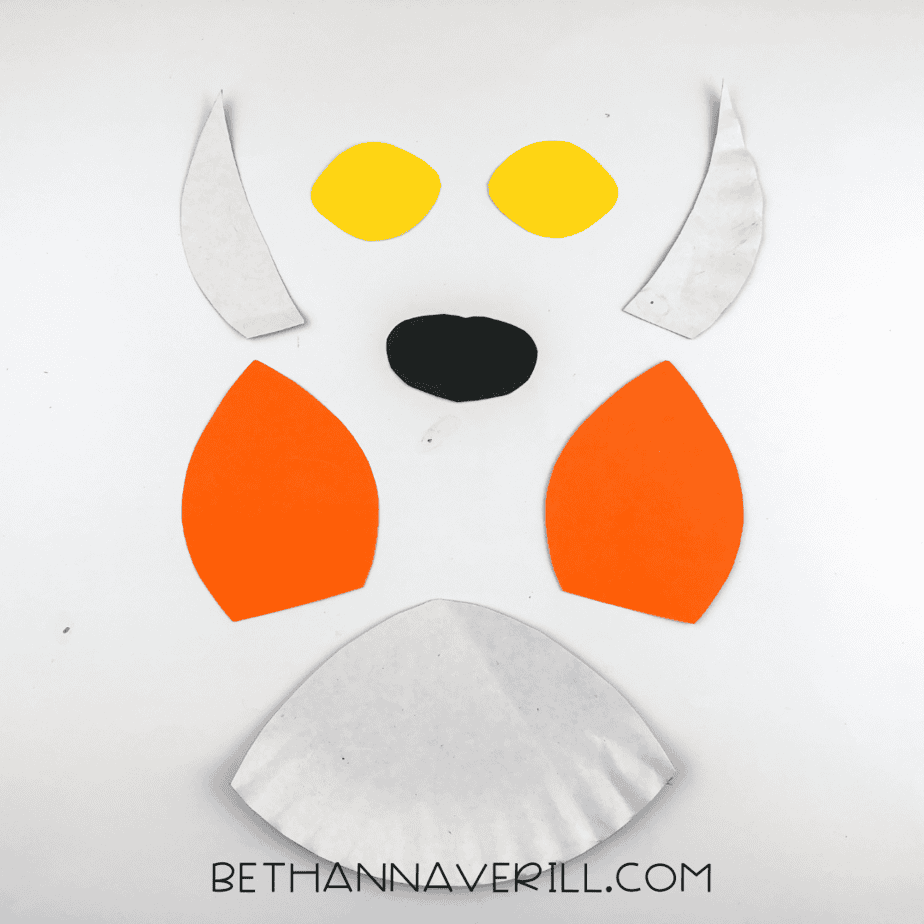
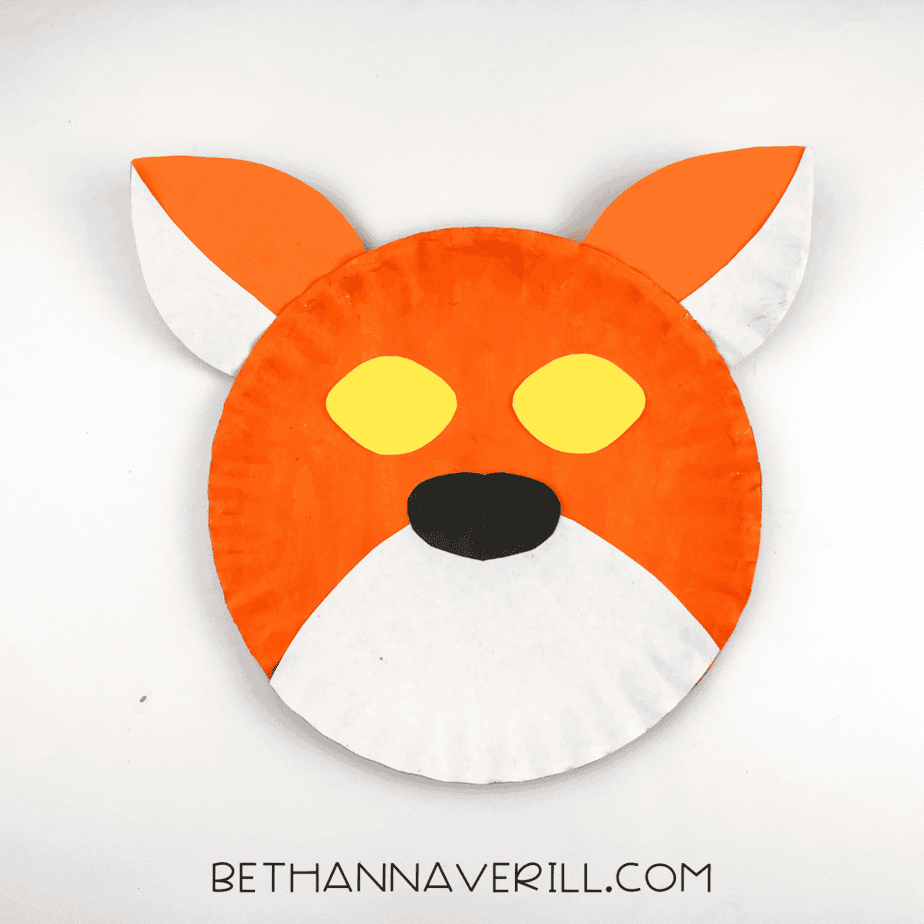
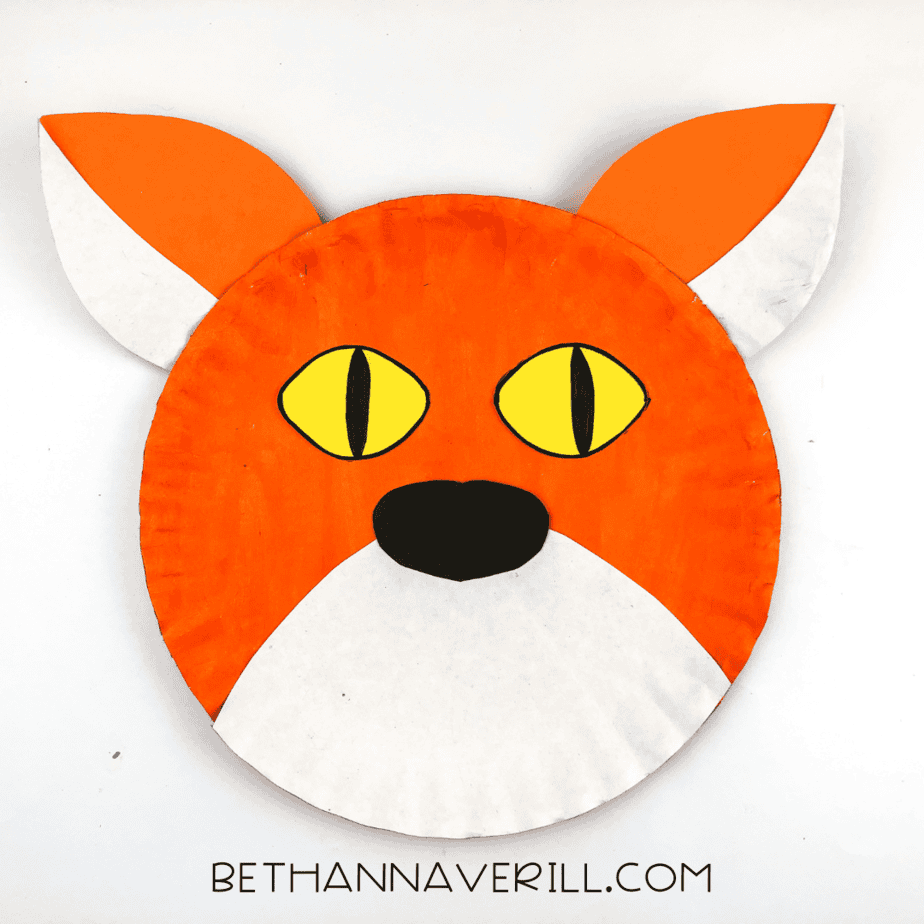
- Using the template, cut out two orange ear shapes, two smaller white inner ears, two yellow eyes, two black slits for pupils, one white snout, and one black nose.
- Glue the orange ear pieces to the top back of the plate.
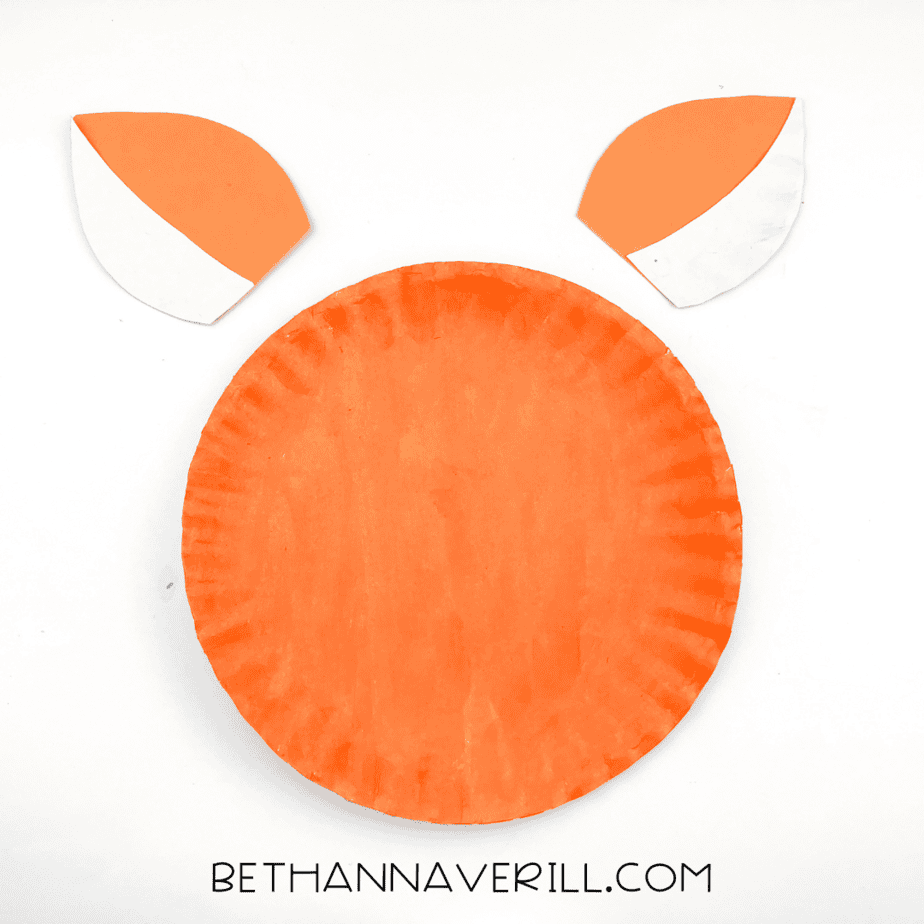
- Glue the white inner ears on top of the orange ear pieces.
- Attach the white snout to the bottom center of the plate.
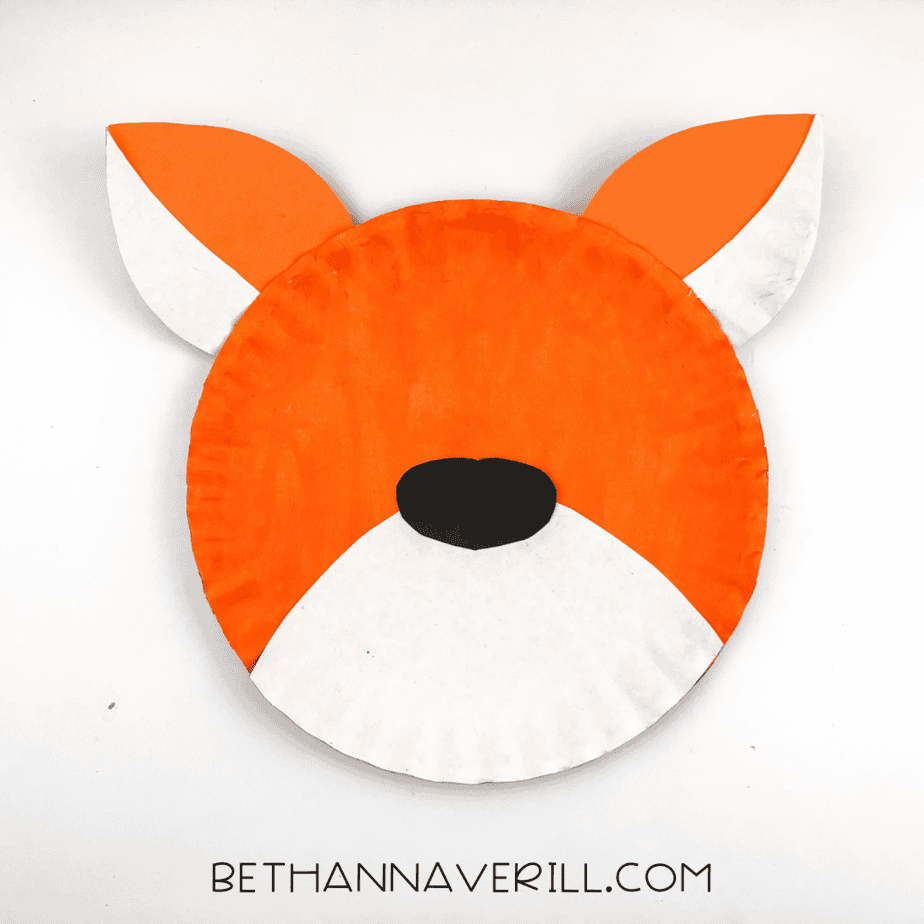
- Glue the black nose above the snout.
- Add the yellow eyes above the nose, spaced evenly apart.
- Glue the black slits vertically in the center of each yellow eye to make pupils.
- Use a black marker to draw tiger stripes around the face and on the ears.

- Add a mouth and dots on the snout using the marker to finish your tiger face.
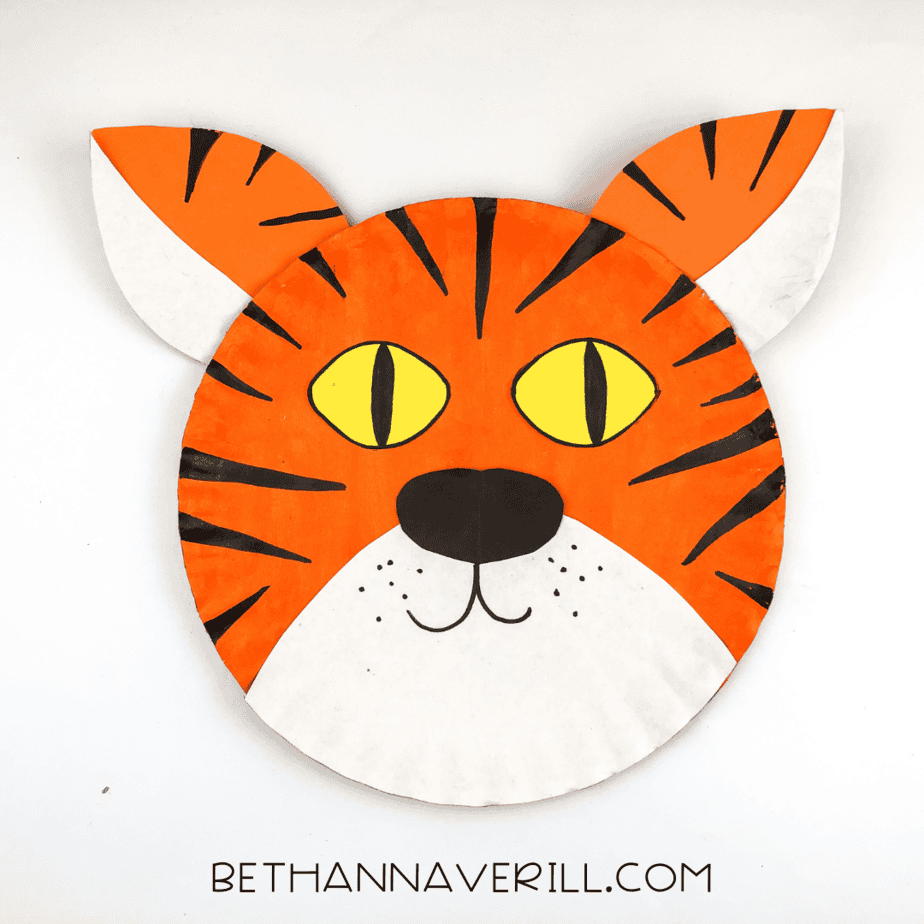
- Hang your tiger on display!
Recommended Products
As an Amazon Associate and member of other affiliate programs, I earn from qualifying purchases.


Tips for a Smooth Crafting Experience
Prep the Space
Cover the table with newspaper or a craft mat. Set up a tray or small bin with all the supplies within easy reach so you’re not scrambling mid-project.
Support Without Taking Over
For little hands still learning scissors, pre-cut the small shapes and let them work on larger ones. Encourage them to try assembling or decorating, even if it’s messy — that’s part of learning.
Celebrate the Effort
Focus on the fun, not the perfection. Crooked stripes or upside-down ears just make the tiger more unique. Praise the effort: “I love how you decided where to put the stripes!”
Spark Conversation
Ask playful questions as they work:
- What should we name this tiger?
- Does it live in a jungle or a zoo?
- Is it a loud tiger or a quiet one?
Adding a little storytelling makes the experience even more engaging.
Using Templates for Extra Help
Printable templates can make the project even smoother. Simple outlines for the ears, nose, muzzle, and eyes help little ones focus on assembling and decorating instead of struggling with tricky shapes.
Templates are also great if you want to save time or create a classroom craft station where everyone can jump in without waiting for cutting help.
Fun Ways to Make It Unique
Encourage kids to add their own twist:
- Creative Colors — Tigers don’t have to be orange. Why not try a rainbow tiger, a glitter tiger, or even a polka-dot tiger?
- Extra Details — Add yarn for whiskers, pom-poms for noses, or googly eyes for a silly face.
- Make It Wearable — Turn the tiger into a mask by cutting eye holes and adding a string or stick for pretend play.
- Build a Scene — After finishing the tiger, create trees, leaves, or more animals to turn the craft area into a mini jungle.
Keep the Fun Going
When the tiger is done, keep the momentum going. Ask your child what animal they want to make next. Could you create a tiger family, a jungle of animals, or even a whole zoo?
If you’re looking for more inspiration, explore our Zoo Activities for Kids for fun ideas.
So gather your supplies, roll up your sleeves, and let the craft adventure begin. In the world of preschool art, the wilder the better!
Please Share This Tiger Paper Plate Craft
Your shares are how this site grows and I am sincerely grateful. Know a friend who’d like this? Please share it on Facebook or save it to your favorite kids’ activity board on Pinterest.


