
Puffin Paper Plate Craft
There’s just something about puffins…they look like penguins who decided to level up their fashion game. And this puffin paper plate craft? Total show-off material.
Between the bold orange beak and those goofy little feet, your kids will be giggling before the glue gun even warms up. It’s simple, it’s colorful, and it turns a basic paper plate into the cutest bird on the planet.

Materials You’ll Need for This Puffin Paper Plate Craft
Before your puffin officially waddles onto the craft table, grab everything you need in one quick swoop.
- Paper plate
- Wiggle eyes
- Black, yellow, and orange cardstock
- Black craft paint
- Glue gun + glue sticks
- Paintbrush
- Scissors
- Pencil
- Black permanent marker
- Puffin patterns

How to Make This Paper Plate Puffin Craft
Ready to get crafting? Find the instructions below!
Puffin Paper Plate Craft

Make this cute puffin paper plate craft with paint, cardstock, and a simple template. A fun, colorful bird craft kids can customize with bright beaks, wiggly eyes, and bold arctic-style details.
Materials
- Paper plate
- Wiggle eyes
- Black, yellow, and orange cardstock
- Black craft paint
- Glue gun + glue sticks
- Pencil
- Black permanent marker
- Puffin patterns
Tools
- Paintbrush
- Scissors
Instructions
- Gather all supplies.

- Download and print the Puffin patterns, then cut out with scissors. Trace the puffin body once onto the outside of a paper plate with a pencil.

- Cut out the puffin body pattern with scissors making sure to cut inside the traced lines for a clean, finished project.

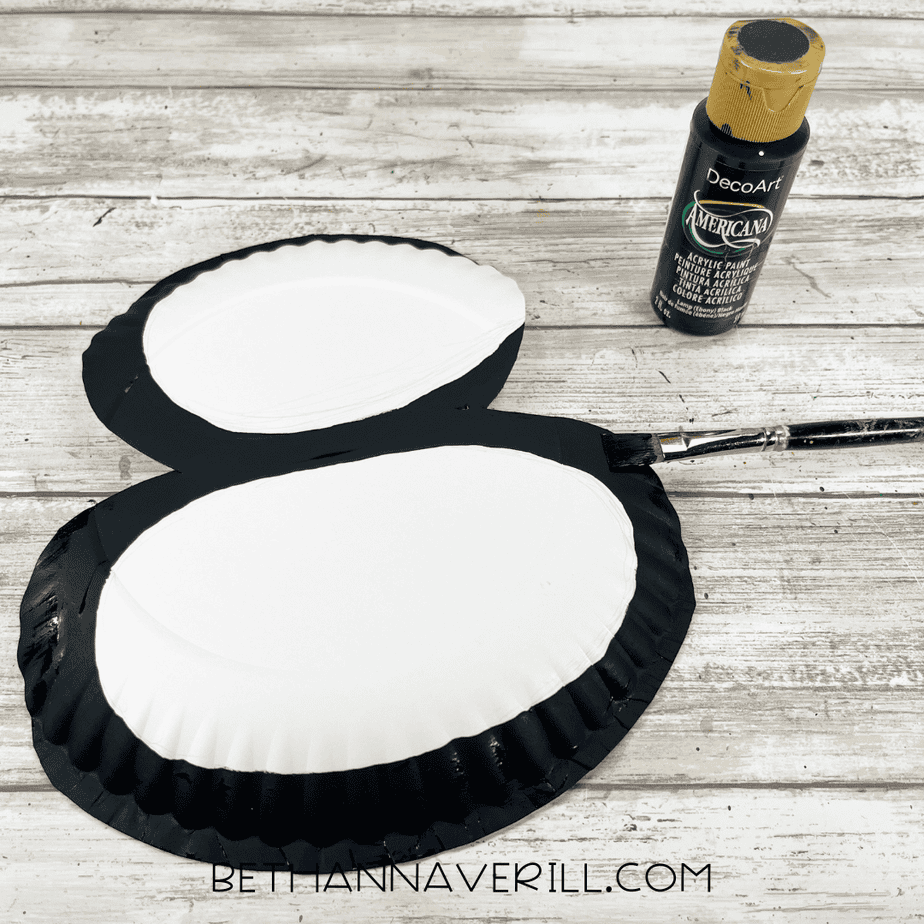
- Using the photo as a guide, paint the edge of the puffin body with black acrylic craft paint. Set aside to dry and apply a second coat, if necessary.
- Trace the wing pattern twice onto black cardstock, trace the beak once and the feet twice onto orange cardstock, trace the beak accent once onto yellow cardstock with a pencil. You could also use colored craft foam, construction paper, or craft felt for this project.

- Cut out the patterns with scissors making sure to cut inside the traced lines for a clean, finished project.

- Attach the beak accent to the beak with a glue gun and glue sticks. Glue the wings to either side, andthe feet to the bottom of the puffin. TIP: You can use liquid craft glue for this project, but you will have to wait for it to dry. Draw a line around the edge of the beak accent, and through the center of the beak with a black marker.

- To finish, attach two wiggle eyes and the beak to the puffin’s face with a glue gun and glue sticks.

- Hang your finished puffin on display!

Recommended Products
As an Amazon Associate and member of other affiliate programs, I earn from qualifying purchases.


Why Kids Will Love This Puffin Paper Plate Craft
This little puffin has serious “look what I made!” energy, and kids eat that up. Between the bold colors, the chunky beak, and those goofy wiggle eyes, there’s just something extra fun about bringing this bird to life.
Kids get to paint, trace, cut, glue, and basically assemble their own adorable arctic buddy from scratch. It’s hands-on without being complicated, colorful without being messy, and cute enough that it will end up taped to a bedroom door, fridge, or classroom wall for the next six months.
Plus, puffins are already funny-looking in the best way… so no matter how wobbly the cutting or crooked the beak, every single puffin turns out charming!
Grab This Paper Plate Puffin Craftivity Now!
Use code PUFFIN to get this packet for 75% off.
Please Share This Puffin Paper Plate Craft
If this puffin waddled its way into your kiddo’s heart (or at least onto your fridge), I’d love for you to share it! Pin it to your favorite kids’ craft board, send it to a teacher friend who needs an easy win, or share it in your parenting groups. Every share helps more families find simple, colorful projects they can actually finish…no chaos, no glitter explosions, just happy little puffins all around.


