
Spring Glitter Slime Recipe for Kids
Full disclosure, I'm writing this with glitter stuck to my elbow and slime in my hair, because I just finished making this pastel masterpiece of a slime with my son who is now barefoot, shirtless, and covered in spring slime. And it's totally fine.
I don't know what spring looks like to you and your family, but in the Averill household, it means sunshine, open windows, and kids who somehow, hilariously, always tend to be sticky before we even open the glue.
So what's a little more?
This recipe is sparkly, stretchy, and I'd say over the top . . . but in the best way. It's one of those glitter filled magical afternoon type recipes for us, and we love it.
It's an impressively basic recipe, like, five minutes and your done, basic. You're going to love it. Let's do it.

Searching for more spring activities? Check out all these spring themed activities for kids. If you wanted a dough instead of slime, I have an amazing rose petal play dough that is perfect for spring.
Why This Slime Is a Must for Spring
Aside from the fact that it’s ridiculously pretty and fun to squish, this slime is actually a great way to sneak in some learning. (Shhh. We don’t have to tell them that part.)
Here’s what’s really going on:
- 💪 Fine motor work (hello, kneading and stretching)
- 👀 Visual stimulation (so! much! sparkle!)
- 🎨 Creative expression (let them pick the colors or add spring-themed bits)
- 🧠 Sensory regulation (because sometimes we all need to smoosh something, okay?)
Plus, it stores in a zip-top bag, which means you can use it again tomorrow. Or later today. Or in 6 minutes when your child forgets they already played with it.
Love seasonal activities as much as we do? Pair your spring slime with this sweet sunflower craft for a sunny display of creativity! It’s bright, cheery, and perfect for a summer or garden unit.
What You’ll Need for Glitter Spring Slime
Honestly? Not much. You probably have most of this already, especially if you’ve made slime before or have a craft closet that’s 12% glitter.
Spring Slime
Mix up a batch of spring sensory fun in a few minutes! This easy spring slime recipe uses simple ingredients and fun sparkles for unforgettable sensory play.
Materials
- 5 oz Clear Elmer's Glue
- 1/2 C Warm water
- 1 Tsp baking soda
- 2 Tbsp Contact Solution (contact solution should contain Boric Acid)
- 1 Tbsp spring colored glitter (pink, purple, green, and yellow)
Tools
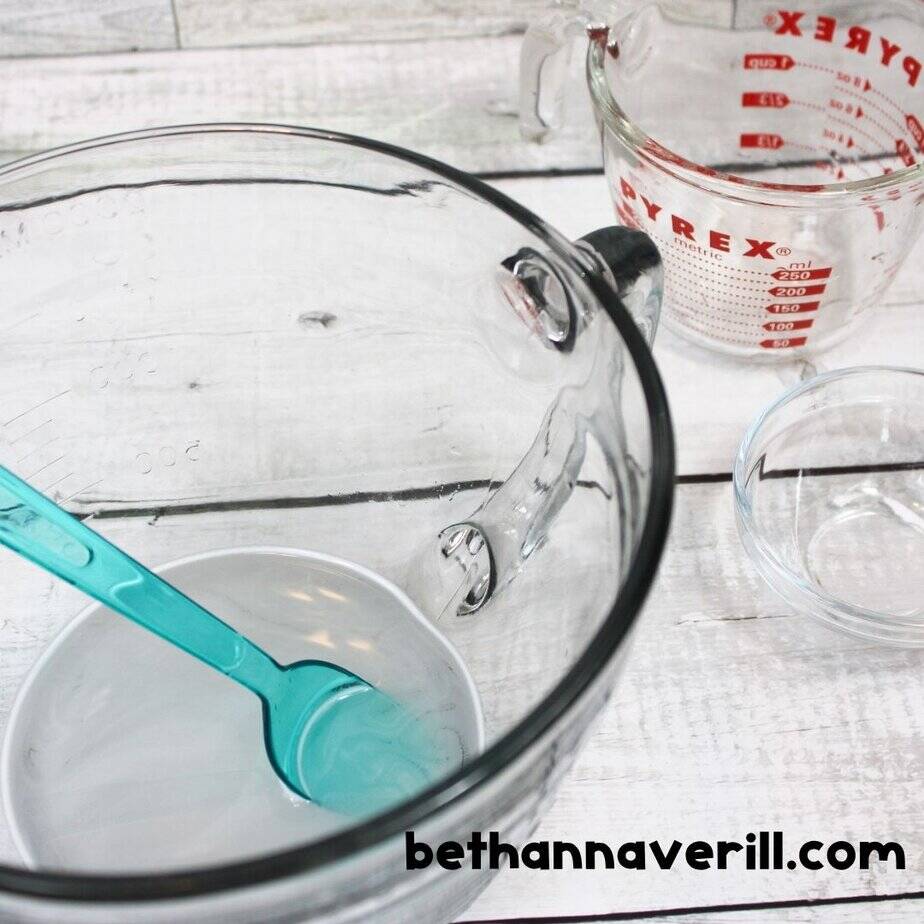
- Bowl
- Spoon
- Measuring cup and spoons
Instructions
- Gather all the supplies needed.

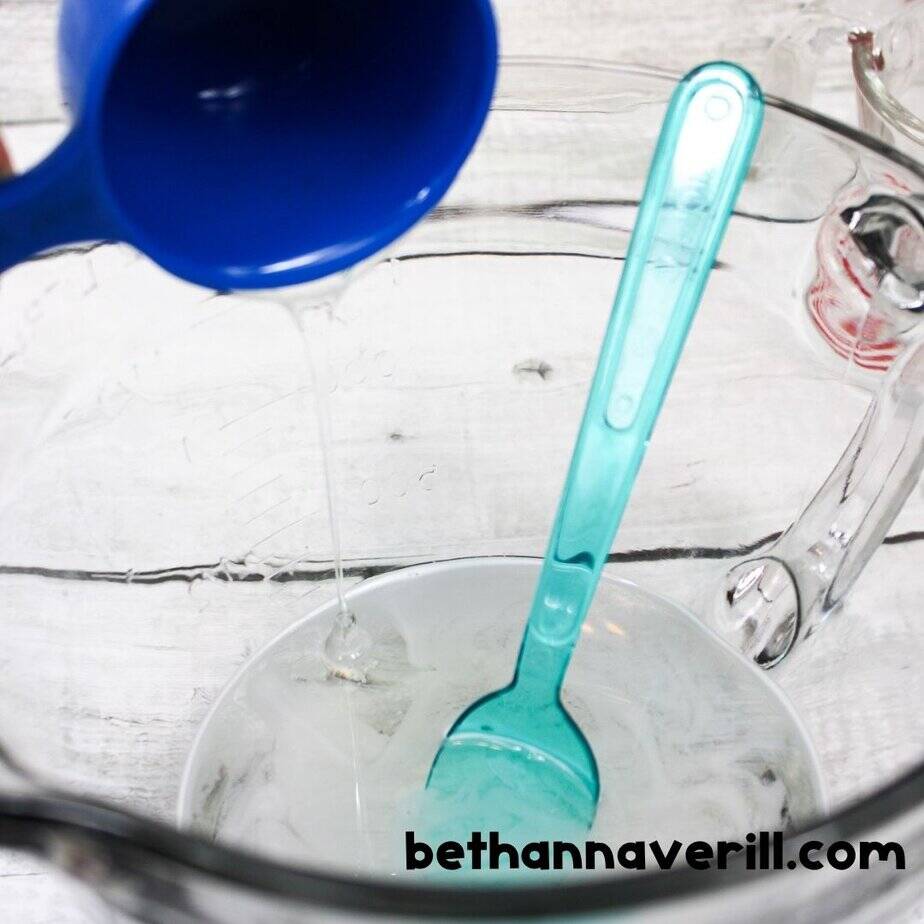
- Pour warm water into the bowl
- Add baking soda and stir until mixed.
- Add the clear glue to the baking soda mixture and stir.
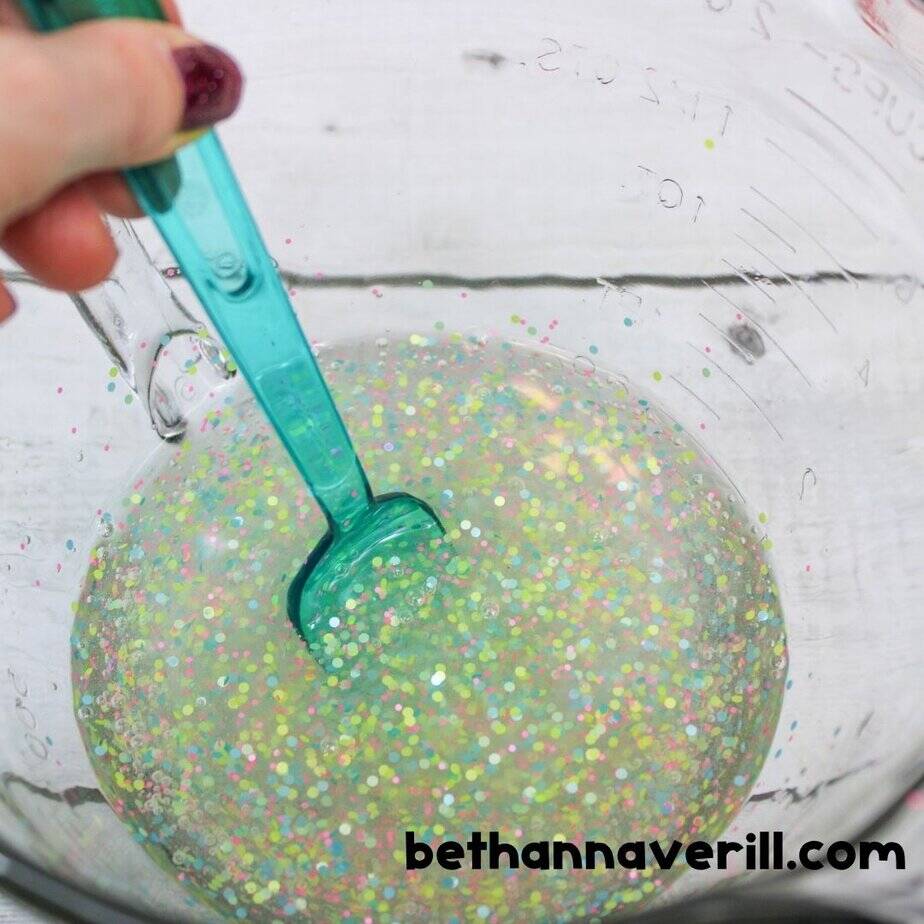
- Add in glitter and stir to incorporate fully.

- Knead contact solution into the slime until it's no longer sticky and pulls away from the sides of the bowl.
- You may need to knead to incorporate all the ingredients well.
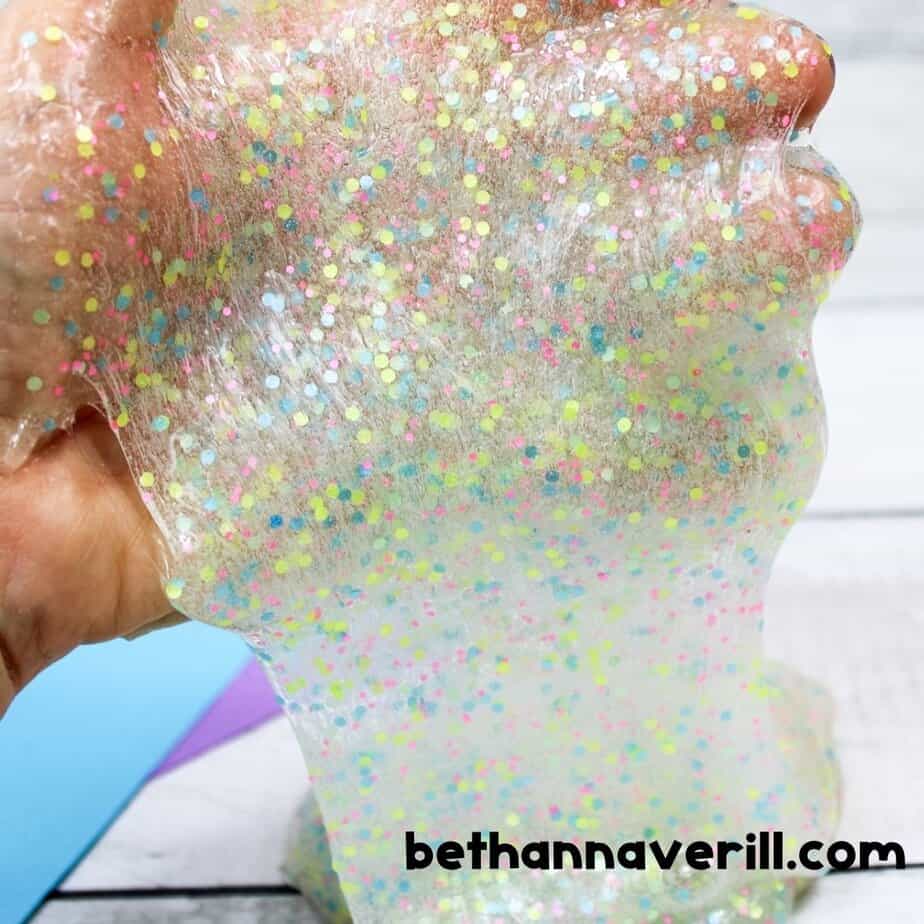
- Enjoy

Notes
Slime can be stored in a resealable ziplock baggie or an airtight plastic container.
Why Slime is the Perfect Sensory Activity for Kids
I love how many different skills slime helps kids work on. Working on the texture, stretch, and using those tiny muscles in their hands really gives them a fine motor muscle workout.
Fun Ideas for Spring Slime
Once you’ve made the slime, here are a few ways to keep the fun going:
- Spring Sensory Tray: Toss it on a tray with flower buttons, fake grass, or little chicks, like in my Butterfly Playdough Tray.
- “I Spy” Challenge: Hide small spring items in the slime and have them dig around to find them.
- Color Hunt: Ask which colors they see in the glitter. Bonus: count how many pieces of each, haha, that would take them days.
- Slime Stretch Contest: Who can stretch their slime the longest without it breaking? (Spoiler: it’s never the adult.)
Safety Tips and Cleanup Advice
Playing with spring themed slime is as exciting as it sounds, but it’s important to make sure everyone is safe.
Take a few precautions and set up a plan for cleanup, so everyone focuses on the fun instead of accidental hiccups.
Ensuring Safe Play
Making and playing with slime can be super fun and overstimulating, especially for kids. However, given some of the ingredients involved, you really have to be ready for anything.
Here’s how you can keep things safe for everyone:
- Supervise Playtime: ALWAYS supervise children while they’re making or playing with slime.
- Designate a Safe Area: Keep the activity in a space that’s easy to clean, like a kitchen table lined with a protective cover or a craft area. It minimizes stress for you and mess for your home.
- Know Ingredients: Review the ingredients list for potential allergens. If your child has sensitive skin or allergies, double-check to ensure nothing will trigger a reaction.
Cleaning and Storage
Once the fun winds down, it’s time to clean up.
Don’t worry—this part doesn’t have to be a chore. A few simple steps can save you a headache later.
- Wipe Surfaces Immediately: If slime lands on your table, walls, or floors, wipe it up right away with a damp cloth. Tackle it quickly before it dries to avoid leaving annoying residue.
- Trash Disposal: Never wash leftover slime or glue down the sink! It can clog your drains. Instead, toss excess into the trash.
- Small Tools, Big Difference: Plastic scrapers are amazing for getting stuck-on slime off non-porous surfaces. Just be gentle to avoid scratches.
- Use White Vinegar for Residues: For areas where the slime stubbornly sticks (like your favorite rug—yes, it happens), a little white vinegar can work magic. Apply a small amount with a clean rag and gently rub the residue away.
The best advice? Don’t let the messiness overshadow the fun. By staying prepared, you can wrap up slimy playtime in the easiest way possible.
Please Share This Spring Glitter Slime Recipe How to
Your shares are how this site grows and I am sincerely grateful. Know a friend who’d like this? Please share it on Facebook or save it to your favorite kids’ activity board on Pinterest.


