
Snowy Owl Paper Plate Craft
If you’ve got a kiddo who’s deep in a winter-animal obsession right now, this snowy owl paper plate craft is about to become their new favorite thing. It’s big, it’s goofy, it flaps, and it’s made out of nothing but a paper plate and your child’s very wiggly handprints…which automatically makes it ten times cuter.
We whipped this one together on a chilly afternoon, and honestly? It turned into the sweetest little mix of fine motor practice, bird anatomy chat (“Why are owl eyes so BIG?”), and straight-up giggles as my kid tried to make the owl “hoot” at the dog.
If you’re looking for a winter craft that’s simple, classroom-friendly, and adorable enough to tape to every door in your house…this is your moment. Let’s make an owl!

Materials for Your Snowy Owl Paper Plate Craft
Before you flap into crafting mode, gather these super simple supplies so your snowy owl comes together without any fuss.
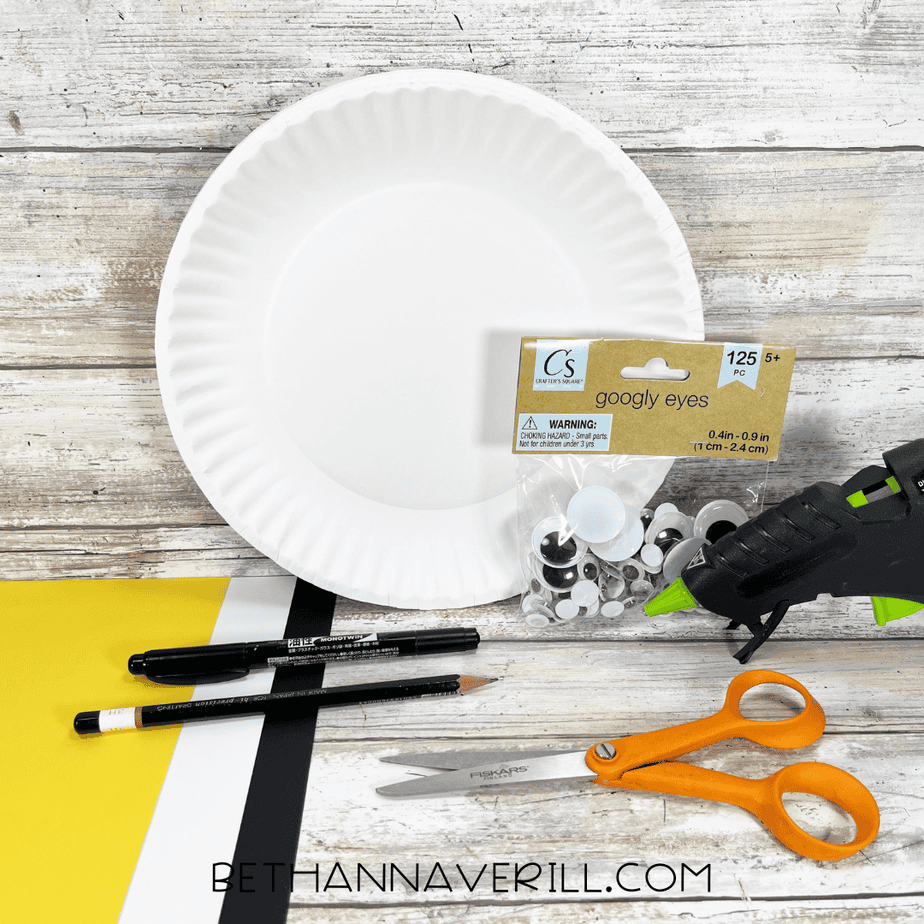
- Paper Plate
- Wiggle Eyes
- Cardstock, Black, White, Yellow
- Glue Gun and Glue Sticks
- Paintbrush
- Scissors
- Pencil
- Permanent Marker, Black
- Owl Patterns

How to Make This Paper Plate Snowy Owl Craft
Ready to get crafting? Find the instructions below!
Snowy Owl Paper Plate Craft

Make this snowy owl paper plate craft with simple supplies like cardstock, wiggle eyes, and a paper plate. A fun winter animal activity that builds fine motor skills and turns out adorable every time.
Materials
- Paper Plate
- Wiggle Eyes
- Cardstock, Black, White, Yellow
- Glue Gun and Glue Sticks
- Pencil
- Permanent Marker, Black
- Owl Patterns
Tools
- Paintbrush
- Scissors
Instructions
- Gather all supplies.
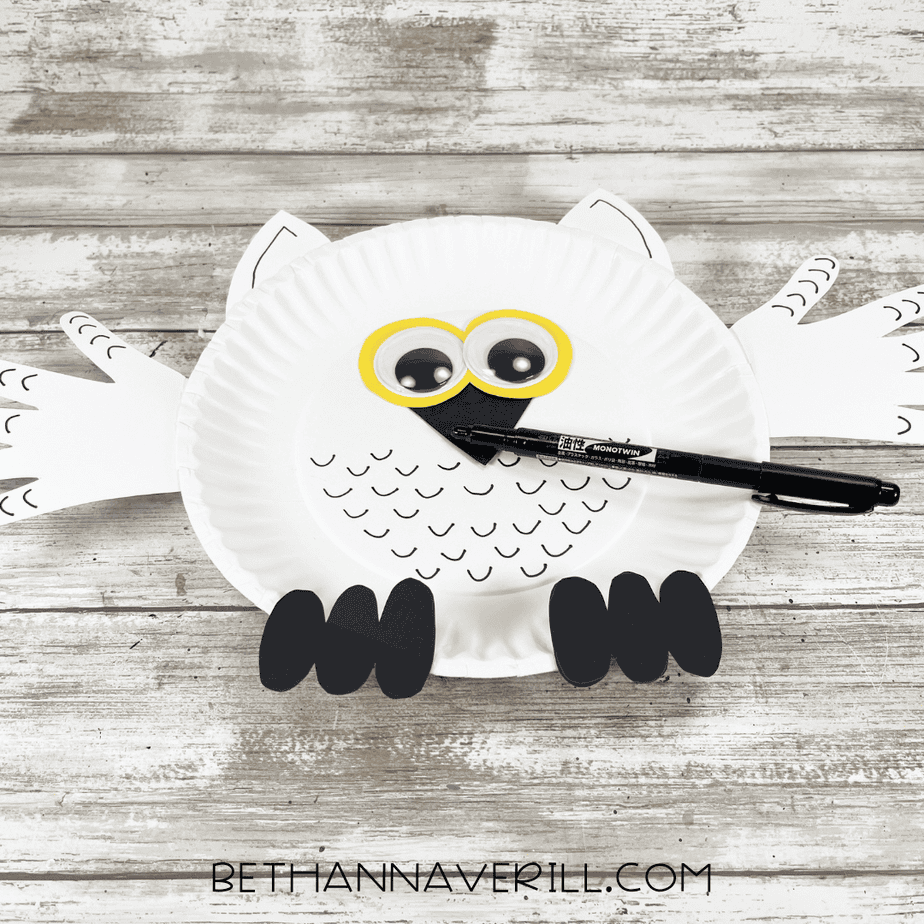
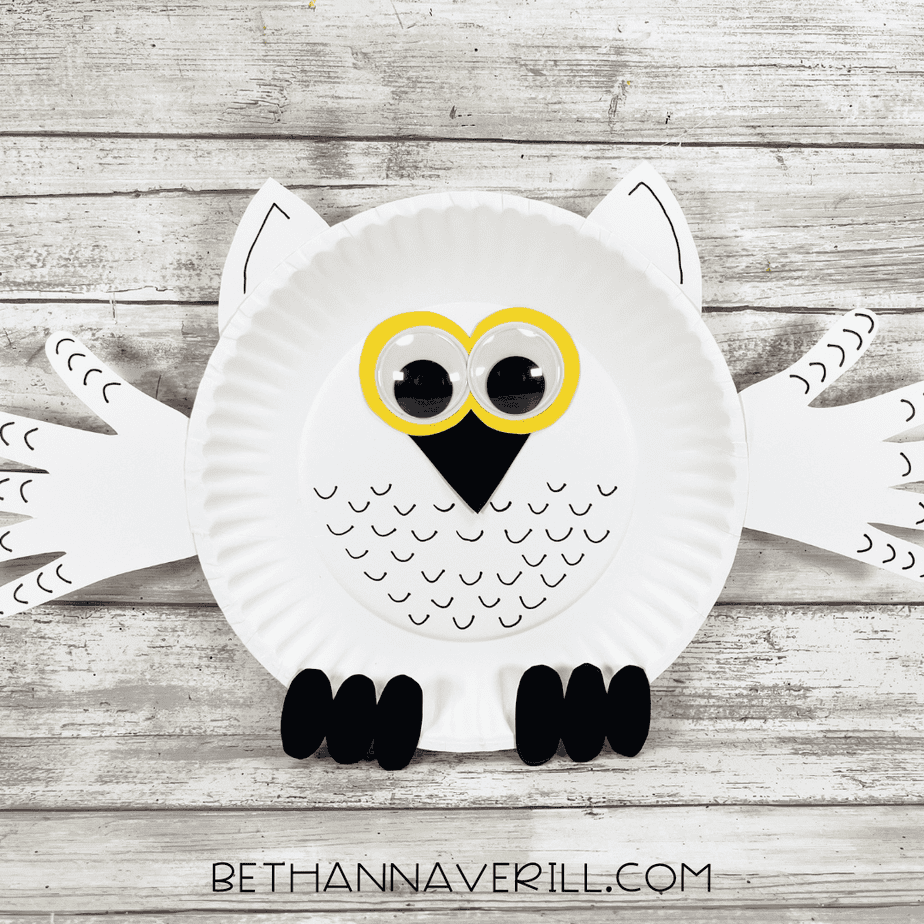
- Download and print the snowy owl patterns, then cut out with scissors. Trace the beak once and the talons twice once on black cardstock. Trace the wings twice and the ears twice on white cardstock. Trace the eyes once onto yellow cardstock with a pencil. You could also use colored craft foam, construction paper, or craft felt for this project.
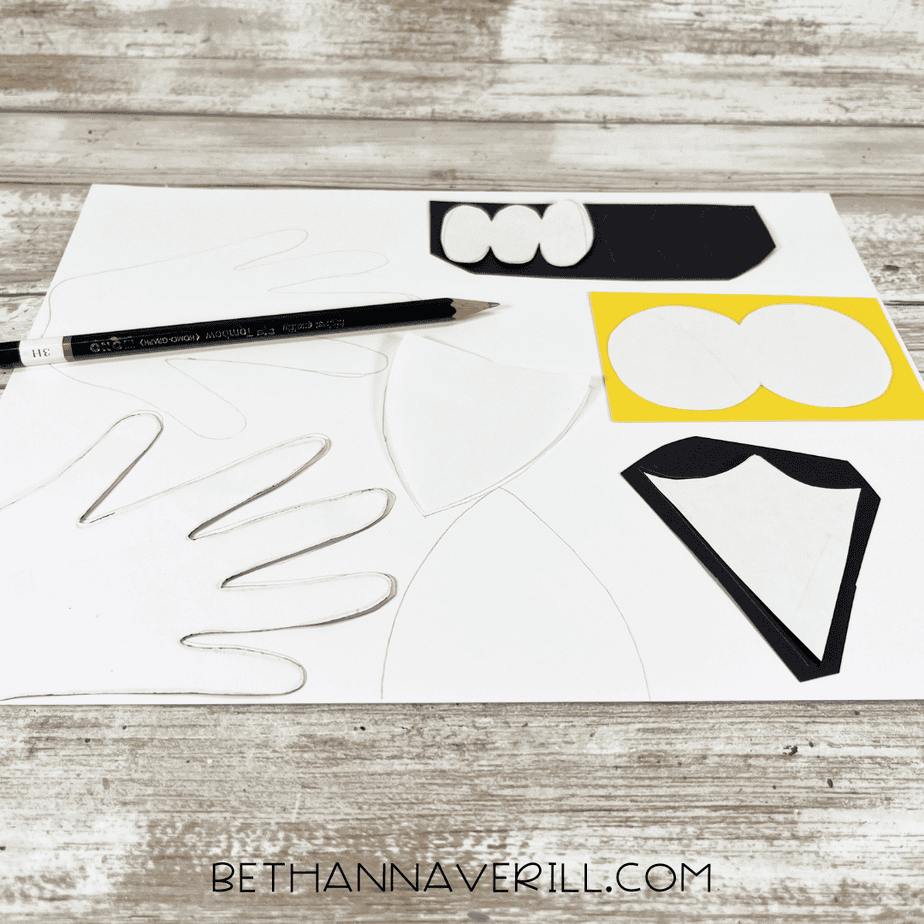
- Cut out the snowy owl patterns with scissors making sure to cut inside the traced lines for a clean, finished project.
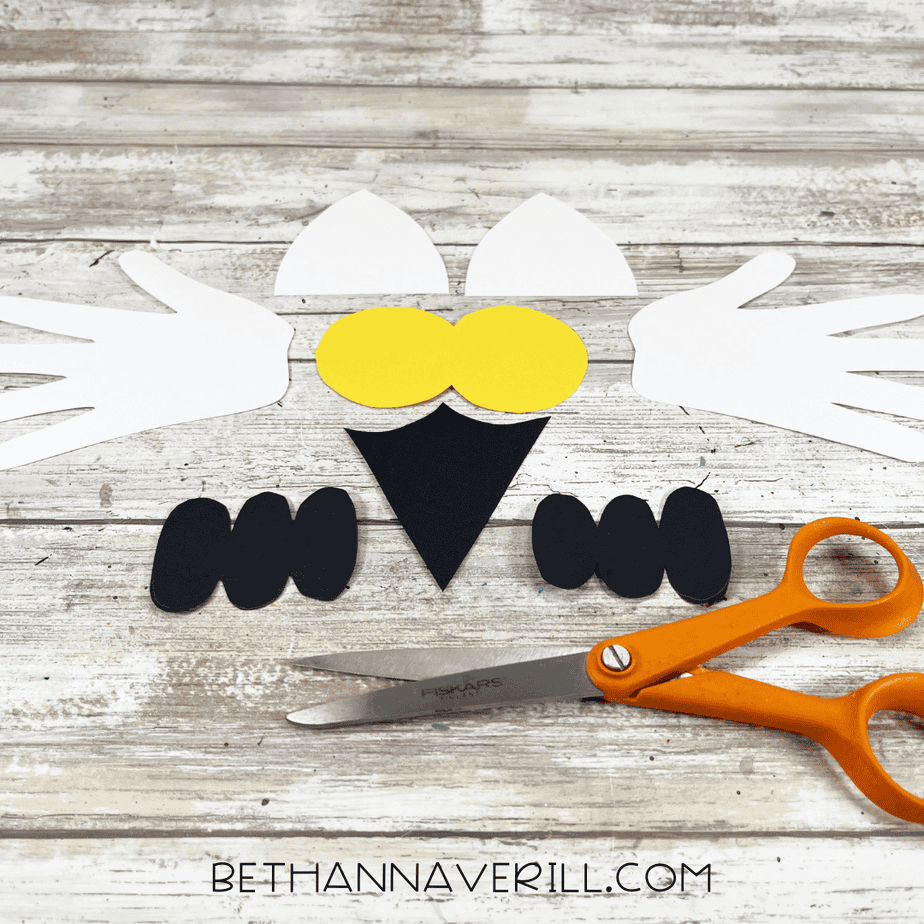
- Attach the ears, wings, and talons to the edge of the paper plate with a glue gun and glue sticks. Glue the eyes and beak to the inside of the paper plate. TIP: You can use liquid craft glue for this project, but you will have to wait for it to dry.
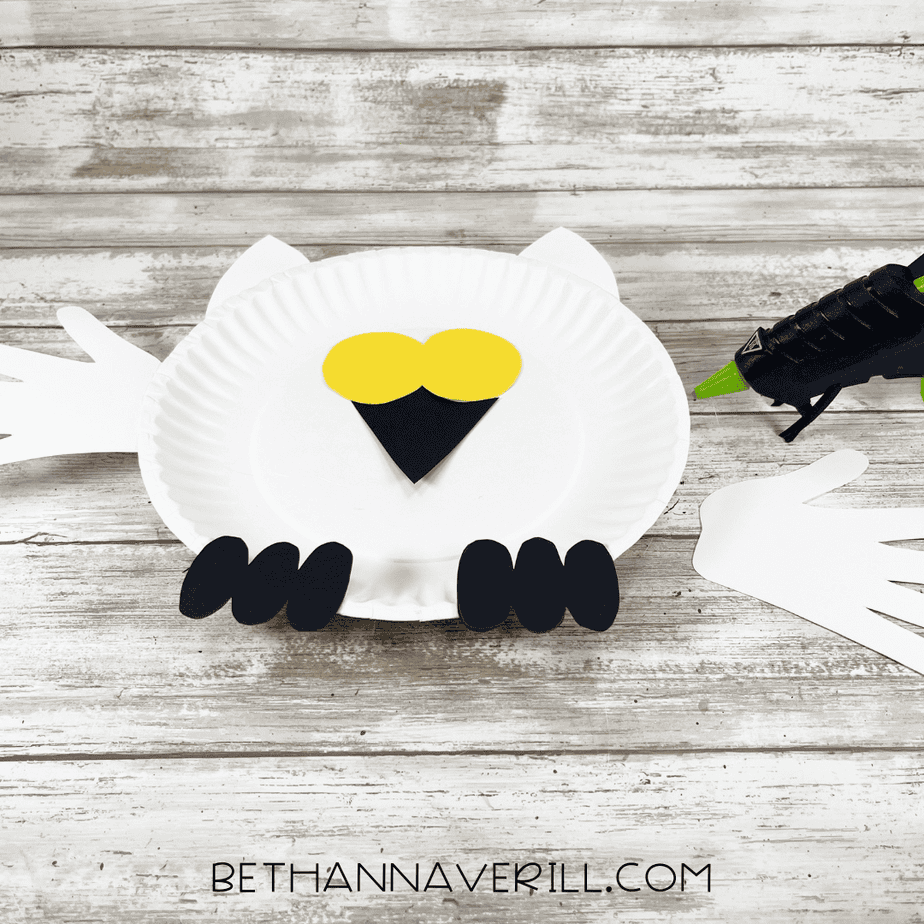
- Attach two wiggle eyes to the snowy owl’s face with a glue gun and glue sticks.

- Using a black marker, draw rows of half circles on the wings and body to represent the snowy owl’s feathers. To finish, outline the snowy owl’s ears with the black marker.
- Hang your finished owl on display!
Recommended Products
As an Amazon Associate and member of other affiliate programs, I earn from qualifying purchases.


Why We Loved Making This Snowy Owl Paper Plate Craft
This snowy owl craft checks so many boxes at once! It’s fun, it’s hands-on, and it sneaks in plenty of preschool learning without ever feeling like a lesson. Between tracing those little handprint wings, cutting out shapes, and placing the big owl eyes just right, kids get a solid dose of fine motor practice while thinking they’re simply making the world’s cutest winter bird.
We also loved how easy it was to tie in quick chats about snowy owls and winter habitats. Kids get curious fast: “Why are the eyes yellow?” “Why is the owl white?” “Do they actually live in the snow?” Suddenly the whole craft turns into a mini nature study without you lifting a finger.
And honestly? Watching the plain paper plate turn into a fluffy, wide-eyed owl never stops being satisfying. It’s simple, it looks impressive when it’s done, and it’s one of those projects kids immediately want to show off.
Get This Paper Plate Snowy Owl Craftivity Now!
Use code SNOWY to snag this printable packet for 75% off.
Please Share This Snowy Owl Paper Plate Craft
If your kiddo loved making this snowy owl, please share it! Pin it to your favorite craft board or pass it along to another parent or teacher who needs an easy winter activity. Every share helps more families discover simple, creative projects their kids will actually enjoy.


