
Arctic Fox Paper Plate Craft
This Arctic Fox Paper Plate Craft brings all the snowy-day cuteness without anyone actually freezing their toes off. One paper plate, a splash of paint, and suddenly you’ve got this big-eyed winter fluffball staring up like, “Hey, are we going on an adventure or what?”
It’s quick, it’s quirky, and it’s exactly the kind of craft that makes kids pause mid-chaos and go, “Oooooh, can I make mine SUPER fluffy?” So basically… a win.

Materials You’ll Need for This Arctic Fox Paper Plate Craft
Grab your supplies before you start. This little snow fox comes together fast, and you don’t want to be hunting for scissors mid–craft-session:
- Paper plate
- Wiggle eyes
- Gray, black, and pink cardstock
- Gray and white craft paint
- Glue gun and glue sticks
- Paintbrush
- Scissors
- Pencil
- Arctic fox patterns

How to Make This Paper Plate Arctic Fox Craft
Ready to get crafting? Find the instructions below!
Arctic Fox Paper Plate Craft

Make this adorable Arctic Fox Paper Plate Craft using a paper plate, paint, cardstock, and simple pattern pieces. A fun winter animal activity that builds fine motor skills and turns out irresistibly cute every time.
Materials
- Paper plate
- Wiggle eyes
- Gray, black, and pink cardstock
- Gray and white craft paint
- Glue gun and glue sticks
- Pencil
- Arctic fox patterns
Tools
- Paintbrush
- Scissors
Instructions
- Gather all supplies.

- Download and print the fox patterns, then cut out with scissors. Trace the fox head once onto the inside of a paper plate with a pencil.
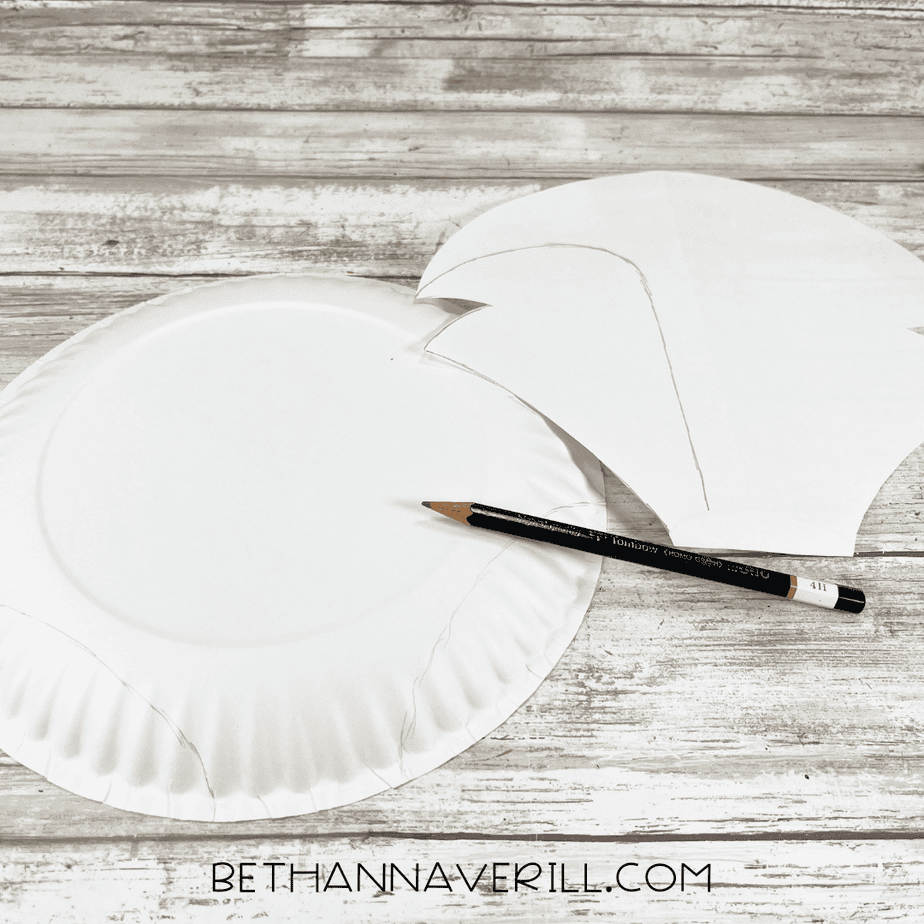
- Cut out the fox head pattern with scissors making sure to cut inside the traced lines for a clean, finished project.

- Trace the bridge of the fox’s nose onto the inside of the paper plate with a pencil.
- Paint the bridge of the fox’s nose with gray acrylic craft paint. Set aside to dry and apply a second coat, if necessary.

- Trace the outer ear pattern twice onto gray cardstock, trace the nose once onto black cardstock, trace the inner ear twice onto pink cardstock with a pencil. You could also use colored craft foam, cardstock, or craft felt for this project.

- Cut out the patterns with scissors making sure to cut inside the traced lines for a clean, finished project.

- Attach the inner ears to the outer ears with a glue gun and glue sticks. Glue the nose to the bottom center of the fox’s head, then ears to the top right and left of the paper plate. TIP: You can use liquid craft glue for this project, but you will have to wait for it to dry.

- Attach two wiggle eyes to the fox's face with a glue gun and glue sticks.

- To finish, tip the ears with white acrylic craft paint to mimic the fur on the fox.

- Hang your finished arctic fox on display!

Recommended Products
As an Amazon Associate and member of other affiliate programs, I earn from qualifying purchases.


Why We Loved Making This Arctic Fox Paper Plate Craft
We loved this craft because it sneaks in so much preschool learning without any “sit down and focus” energy. Kids are busy painting, tracing, and gluing…but behind the scenes they’re working those fine motor muscles, practicing early scissor control, and matching shapes and colors as they build their little fox.
There’s also a fun bit of early science woven in. Talking about Arctic animals, cold-weather adaptations, or why this fox has such big fuzzy ears turns the whole project into a mini winter unit without feeling like a lesson. Kids just think they’re making something cute…and honestly, they’re right.
And of course, that transformation moment, when the painted plate suddenly looks like a real Arctic fox, always gets the best reaction. Simple steps, hands-on learning, and a finished craft that’s adorable enough to display all season long.
Grab This Paper Plate Arctic Fox Craftivity Now!
Use code FOX at checkout to snag 75% off.
Please Share This Arctic Fox Paper Plate Craft
If you enjoyed making this little Arctic fox, I’d love for you to share it! Pin it to your favorite craft board or pass it along to a parent or teacher who needs an easy winter activity. Every share helps more families find simple, creative projects that kids actually enjoy.


