
Raccoon Craft Stick Project
If your kids love woodland animals (or you just think raccoons are basically masked bandits with cuteness superpowers), this raccoon craft stick project is going to be a hit. It’s quick, inexpensive, and makes a fun addition to animal-themed lessons, story time activities, or rainy-day crafting.
This is a simple, 20-minute project that turns basic craft sticks into a mischievous little critter, without the overturned trash cans.

What You’ll Need for This Popsicle Stick Raccoon Craft
Alright, crafty crew, let’s gear up for raccoon-making magic:
- 4 jumbo popsicle sticks
- Gray acrylic paint
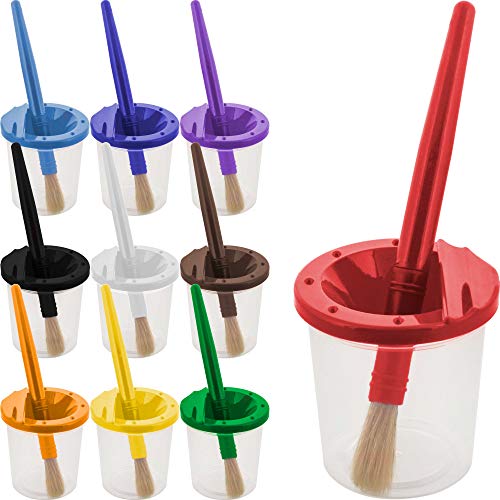
- Paintbrush
- Gray construction paper
- White construction paper
- Black construction paper
- Scissors
- Glue stick
- Black marker
How to Make a Popsicle Stick Raccoon
Ready to get crafting? Find the instructions below!
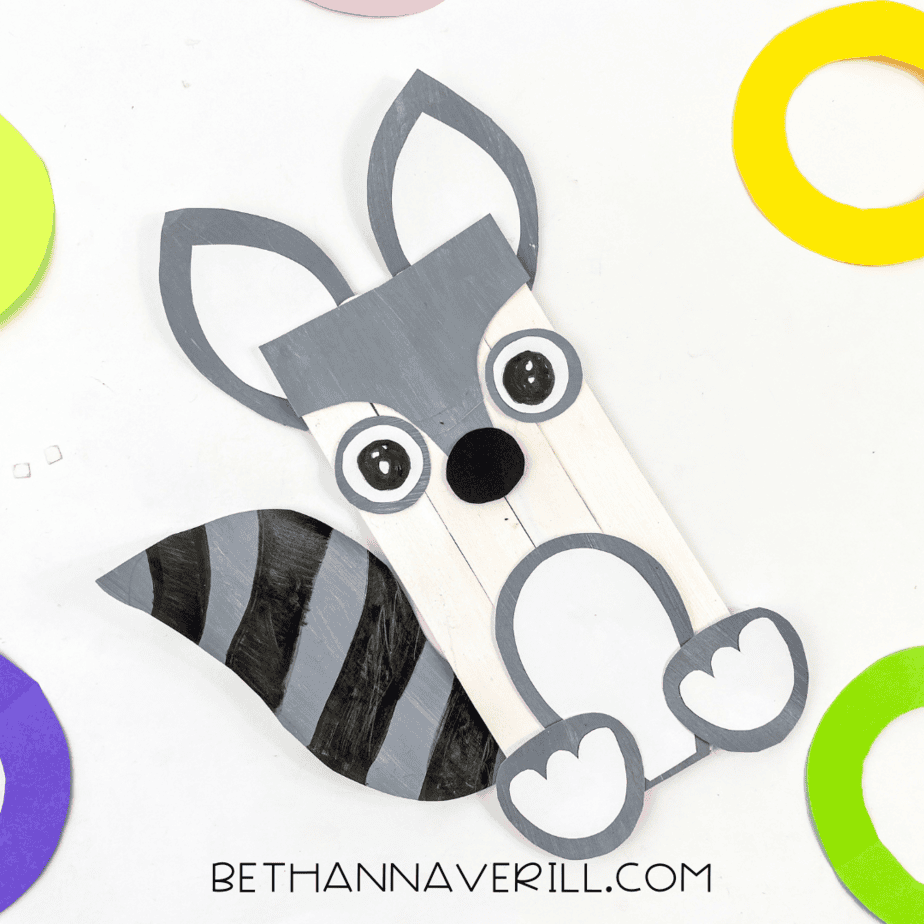
Raccoon Craft Stick Project

Turn popsicle sticks into an adorable raccoon with a gray paper mask, ears, belly, and striped tail. Easy woodland animal craft for preschool & kindergarten.
Materials
- 4 jumbo popsicle sticks
- White acrylic paint
- Gray construction paper
- White construction paper
- Black construction paper
- Glue
- Black marker
Tools
- Scissors
- Paintbrush
Instructions
- Gather your supplies. Clear a little workspace so your raccoon has room to come to life.

- Line up 4 jumbo popsicle sticks side-by-side and glue them into a solid panel. Let it set so the panel doesn’t wiggle.
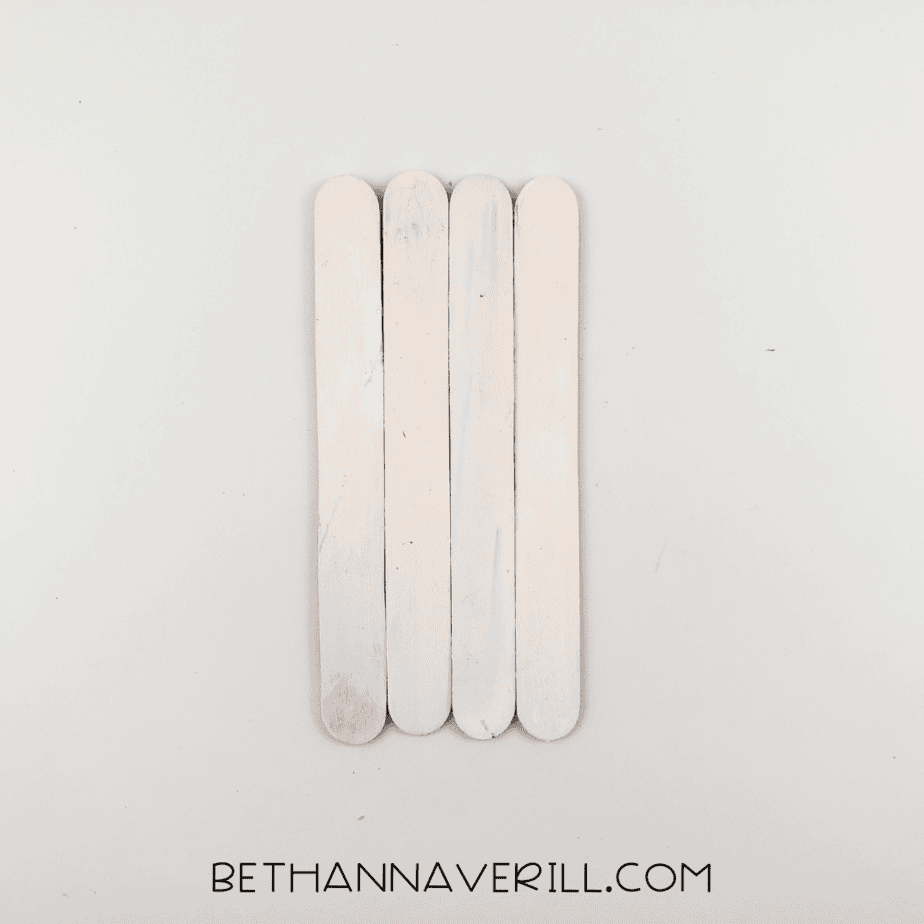
- Paint the front of the panel white for that soft raccoon tummy and face area. Set aside to dry completely.
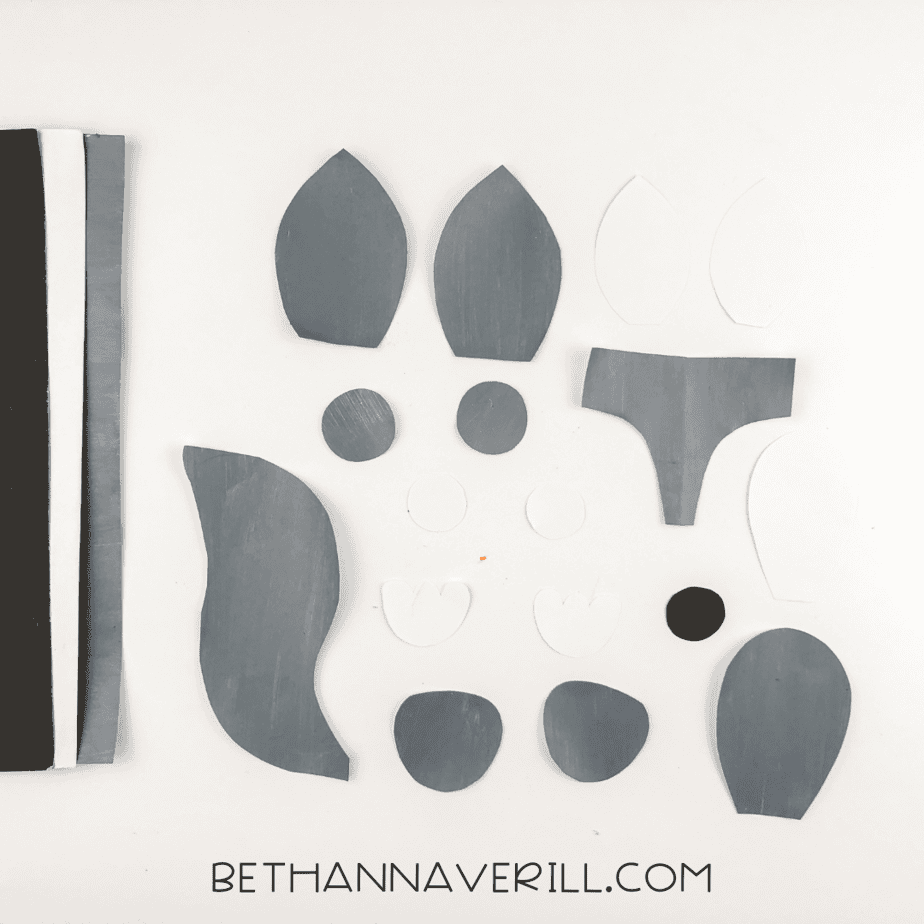
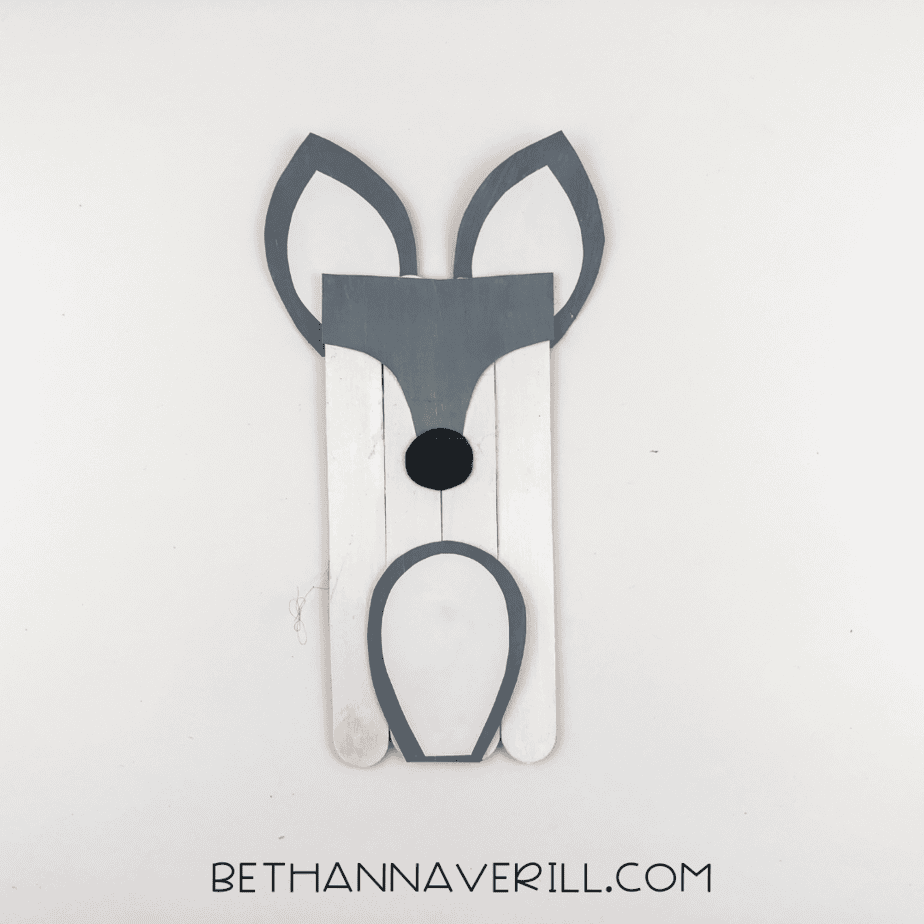
- While it dries, cut your paper pieces: from gray—two tall ear shapes, a mask piece (wide at the top with a dip in the middle), a long curved tail, a belly outline oval, two paw outlines, and two thin eye rings. From white—two ear centers, a belly oval, two paw pads with three little toe bumps each, and two small eye circles. From black—one small round nose.
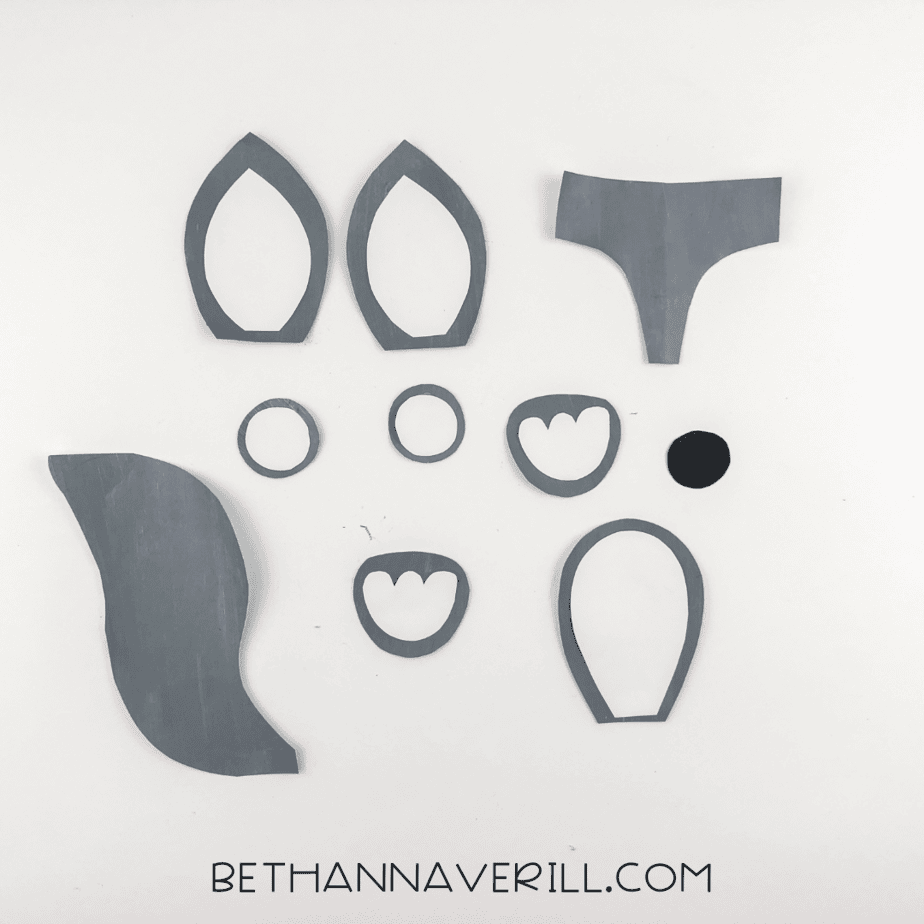
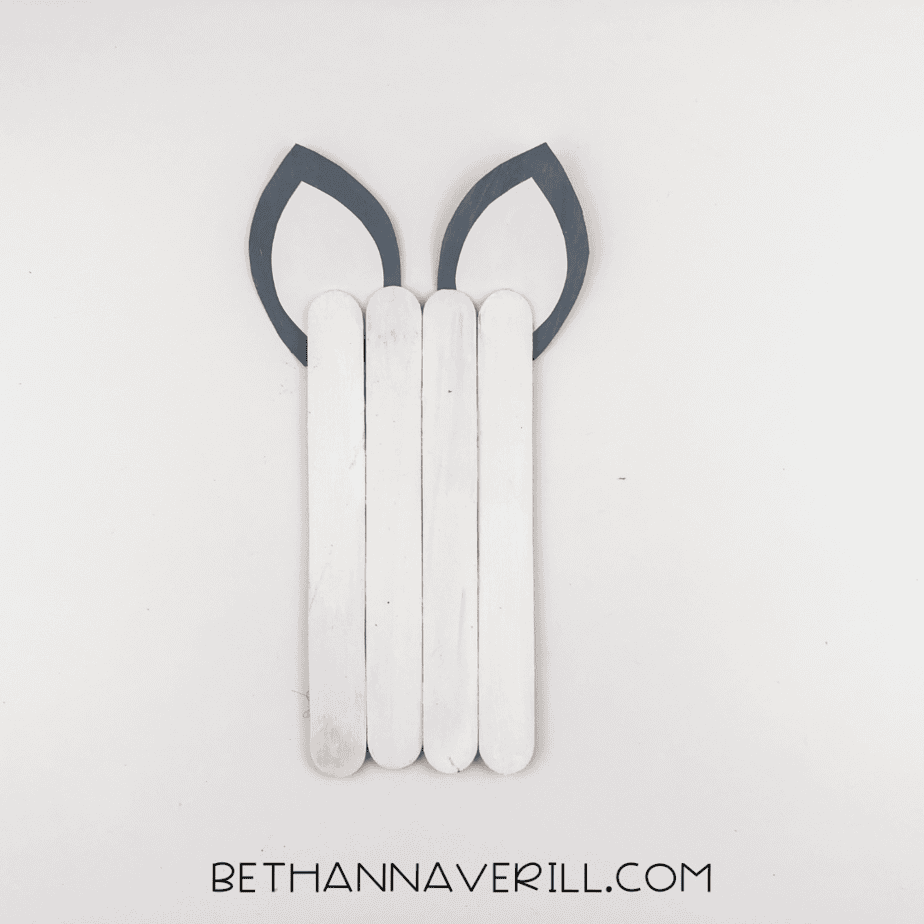
- Make the ears first: glue the white ear centers onto the gray ear shapes. Flip your stick panel over and attach the ears peeking out from the top.
- Flip it back. Glue the gray mask across the top of the panel so it dips toward the center seam. Add the black nose right where the mask meets the “muzzle.”

- Build the belly: glue the white belly oval onto the lower half, then frame it with the gray belly outline. Instant woodland cutie.
- Add paws by layering each white paw pad onto a gray paw outline and gluing them near the bottom corners.
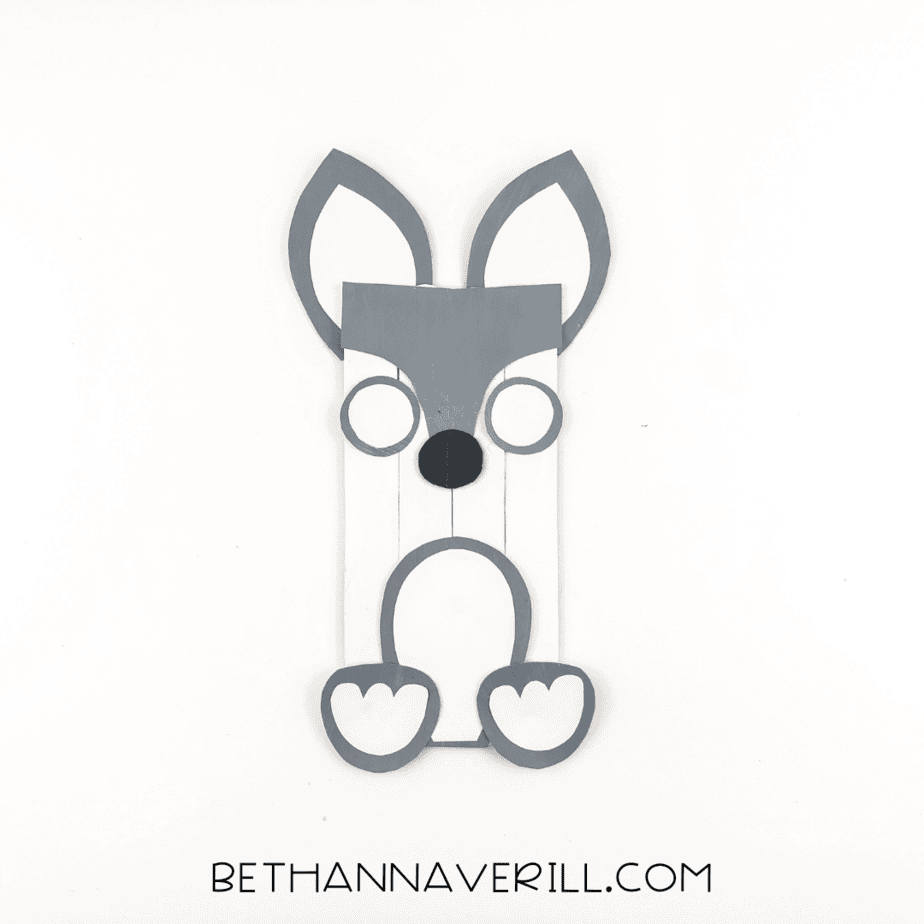
- Do the eyes: glue on the gray eye rings, tuck the white eye circles inside.
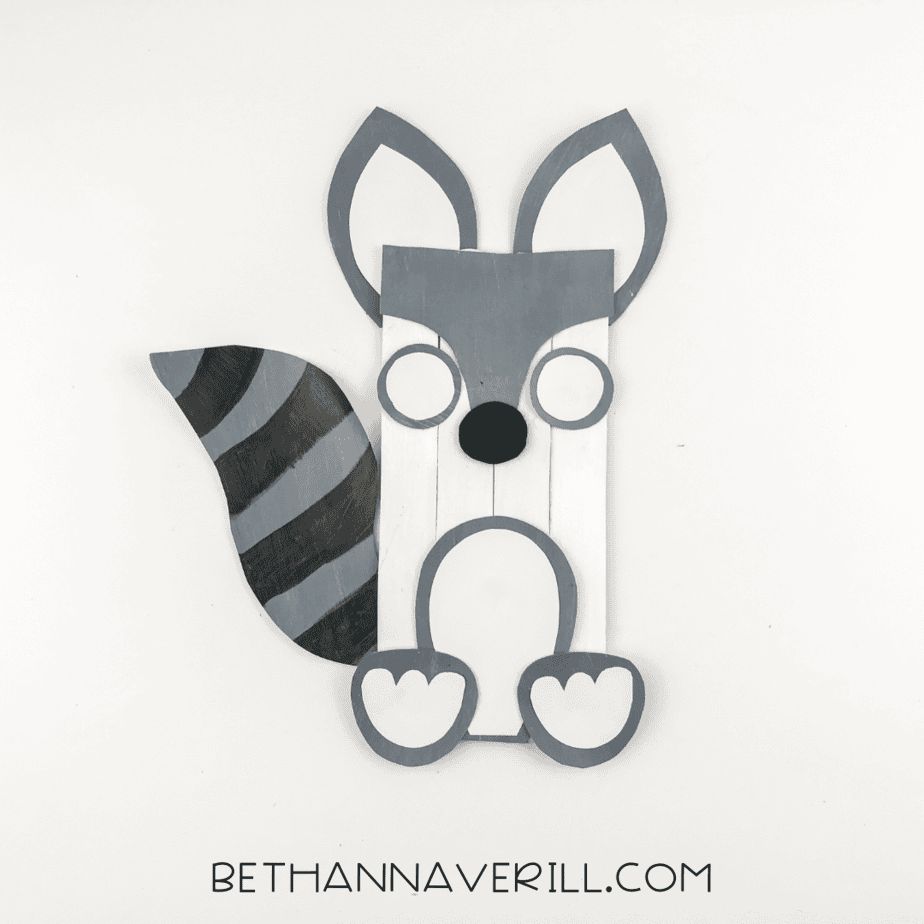
- Tail time: glue the gray tail along the left side (tuck behind the panel). Use the black marker to add bold stripes down the tail.
- Then using the same black marker draw glossy pupils on your raccoon. A tiny white highlight dot will make them sparkle.
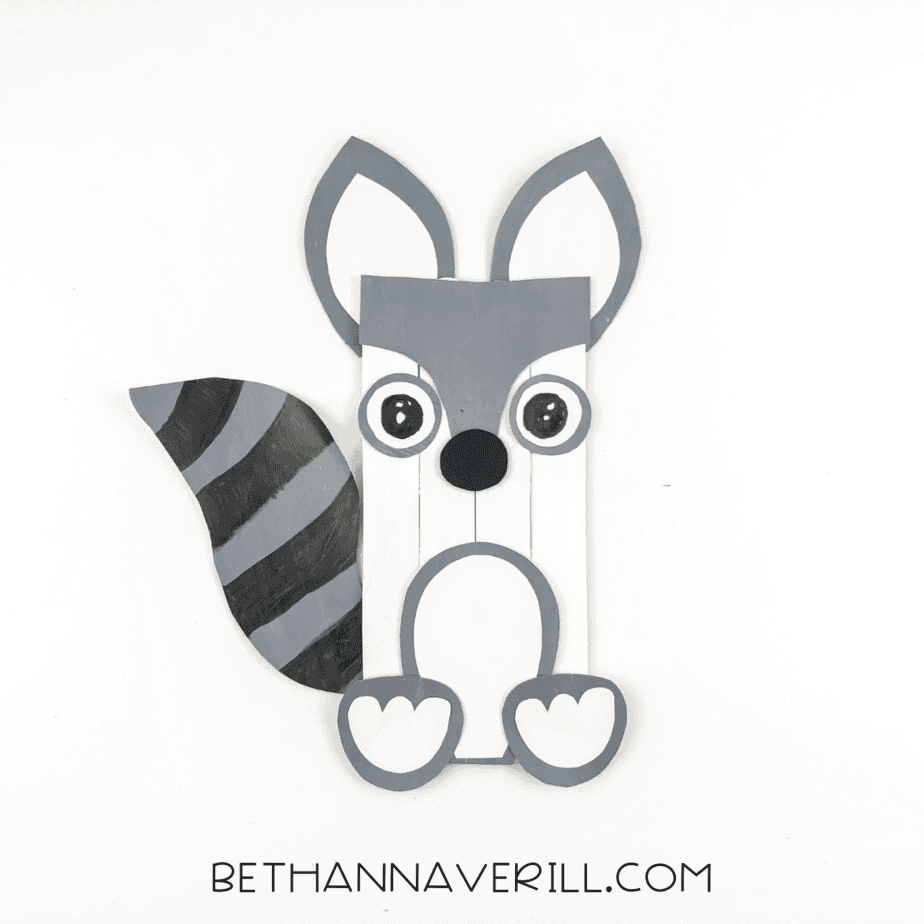
- Finish with any tiny details—light pencil whiskers or a faint center line—then let everything dry. Your popsicle-stick raccoon is ready to scamper onto the fridge.
Recommended Products
As an Amazon Associate and member of other affiliate programs, I earn from qualifying purchases.


Why This Craft Steals the Spotlight
If you want to go beyond just gluing sticks together, here are a few ways this raccoon can sneak into your learning and playtime:
- Pair with a nature lesson – Talk about raccoon habitats, nocturnal animals, and how their “masks” actually help them see better at night.
- Story time connection – Read a raccoon-themed picture book and have kids create a craft to match the main character.
- Imaginative play – Add your raccoon to a woodland animal collection for pretend play adventures.
- Bulletin board ready – Make a whole family of raccoons with different facial expressions for a fall classroom display.
And there you have it, a raccoon that’s far more charming than the dumpster-diving variety. It’s budget-friendly, classroom-friendly, and guaranteed to get a few “aww”s from anyone who sees it.
Please Share This Popsicle Stick Raccoon Craft
Your shares help this site grow, and I truly appreciate it! If you know someone who’d love this raccoon craft, send it their way, or pin it to your favorite kids’ activity board on Pinterest so you can find it later.


