
Glow in the Dark Slime Recipe
You know what makes regular slime even cooler? When it glows in the dark!
This ooey-gooey, stretchy craft is a hands-on activity that feels like a science experiment and sensory play all wrapped into one.
Whether you’re planning a Halloween activity, a rainy-day boredom buster, or just want to wow your kiddos with something squishy and magical, this glow in the dark slime is it.
Making glow in the dark slime feels like creating a little bit of magic right in your own kitchen. The kids will be talking about it all week!

Searching for more glow in the dark fun? Try out this fun glow in the dark play dough recipe.
Supplies Needed for Glow in the Dark Slime
Before you start mixing and stirring, it's essential to have everything you need in one place.
Trust me, nothing takes the fun out of DIY crafts faster than realizing you’re missing an ingredient halfway through. Here’s exactly what you'll need for this glow in the dark slime recipe:
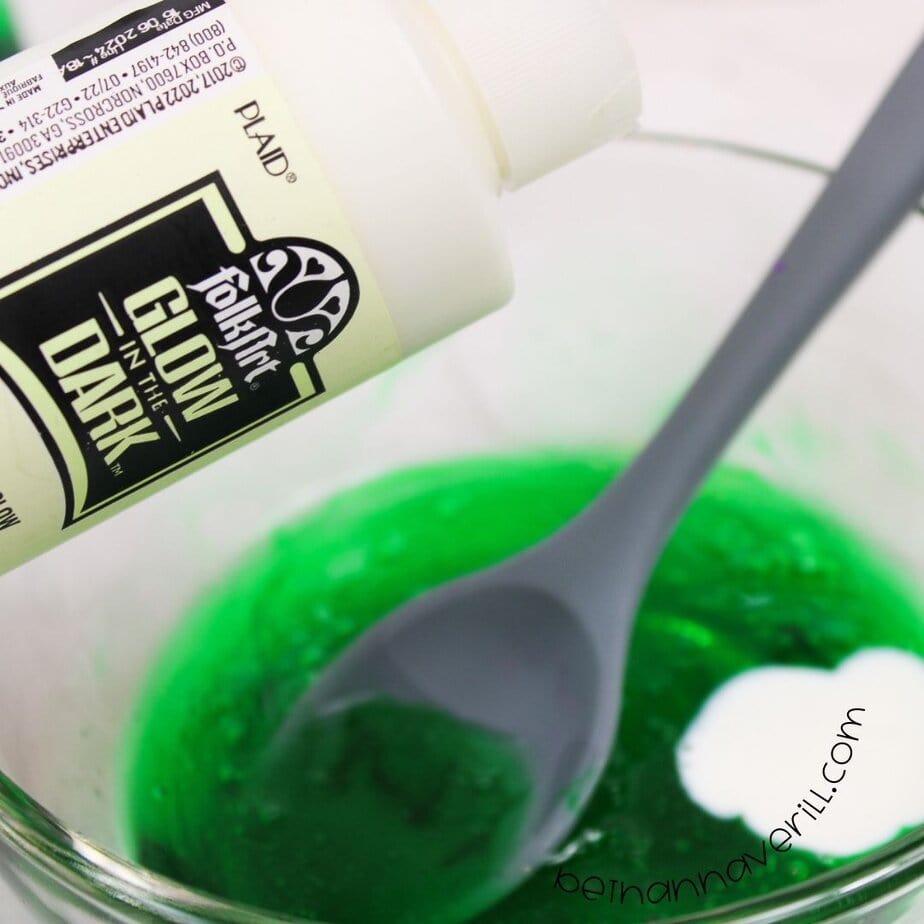
- Glow in the Dark Paint: The secret to the fun of this slime.
- Clear Glue – The base of your slime. Clear glue works best for that translucent glow effect. Skip the white glue unless you're going for a completely different vibe.
- Green Food Coloring – Want that classic, eerie glow look? Green food coloring is your ticket. It's the best look when your slime isn't in the dark
- Baking Soda – A little baking soda adds structure to the slime.
- Contact Solution (with Boric Acid) – The final piece of the puzzle. This helps transform the mixture into stretchy slime.
I added a link to grab that glow in the dark paint so you know you're getting the good stuff. I can't tell you how many junky glow in the dark paints I went through before I found this one, and there's no way I'm keeping that information to myself.
Tools You’ll Need
Having everything prepped ahead of time means you'll glide through the process like a supermom. Plus, if this is a family activity, you’ll look like the ultimate slime master. They'll write songs about you.
- Bowl and Spoon – Your tools for mixing the magic.
- Measuring Cups and Spoons – Accuracy counts when it comes to slime-making.
Step-by-Step Glow in the Dark Slime Recipe
Ready to get crafting? Find the instructions below!
Glow in the Dark Slime
Glowing, stretchy, and endlessly fun—glow in the dark slime is here to light up your craft night! Whether you're looking for a playful DIY activity with your kids or a cool way to impress at your next gathering, this slime recipe is a game-changer.
Materials
- ½ C Clear Glue
- 2-3 drops of green food coloring
- 2 tsp glow in the dark paint
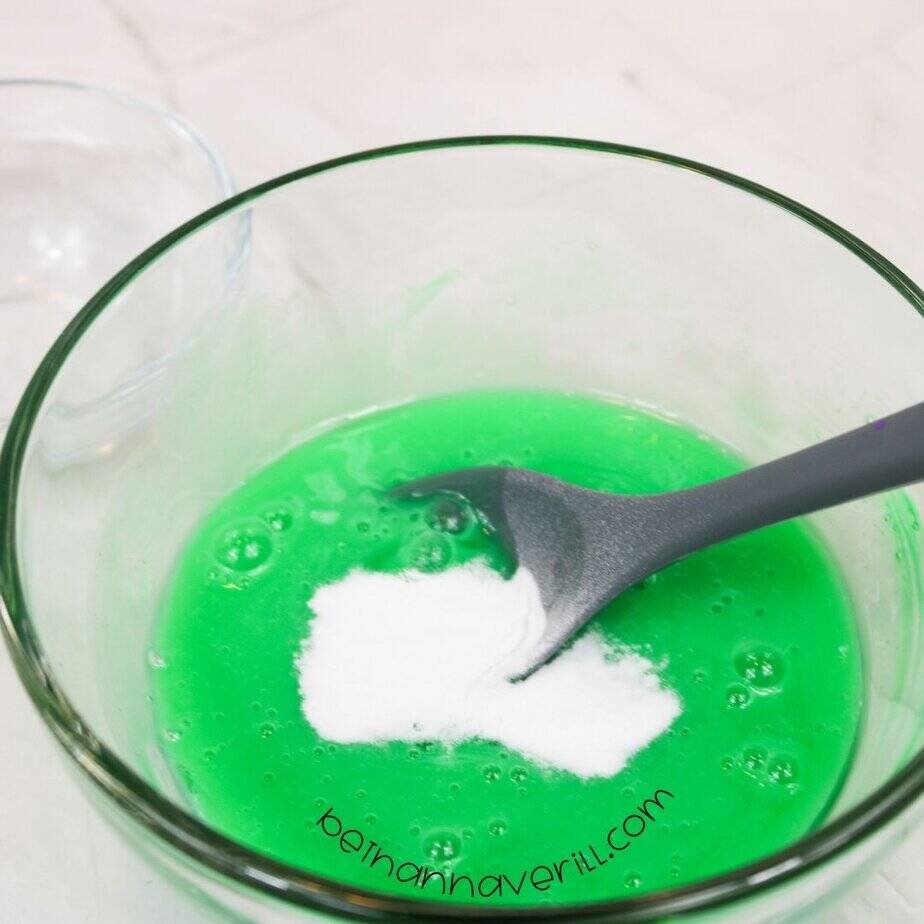
- ½ tsp baking soda
- 1 Tbsp Contact Solution (contact solution should contain Boric Acid)
Tools
- Bowl
- Spoon
- Measuring cup and spoons
Instructions
- Gather all the supplies needed.

- Add glue to a bowl.

- Add food coloring and stir to mix.

- Squeeze in the glow-in-the-dark paint. (about 2 tsp). Stir to combine.
- Add in the baking soda. Stir to mix.
- Add contact solution and stir until the slime is no longer sticky and pulls away from the
sides of the bowl.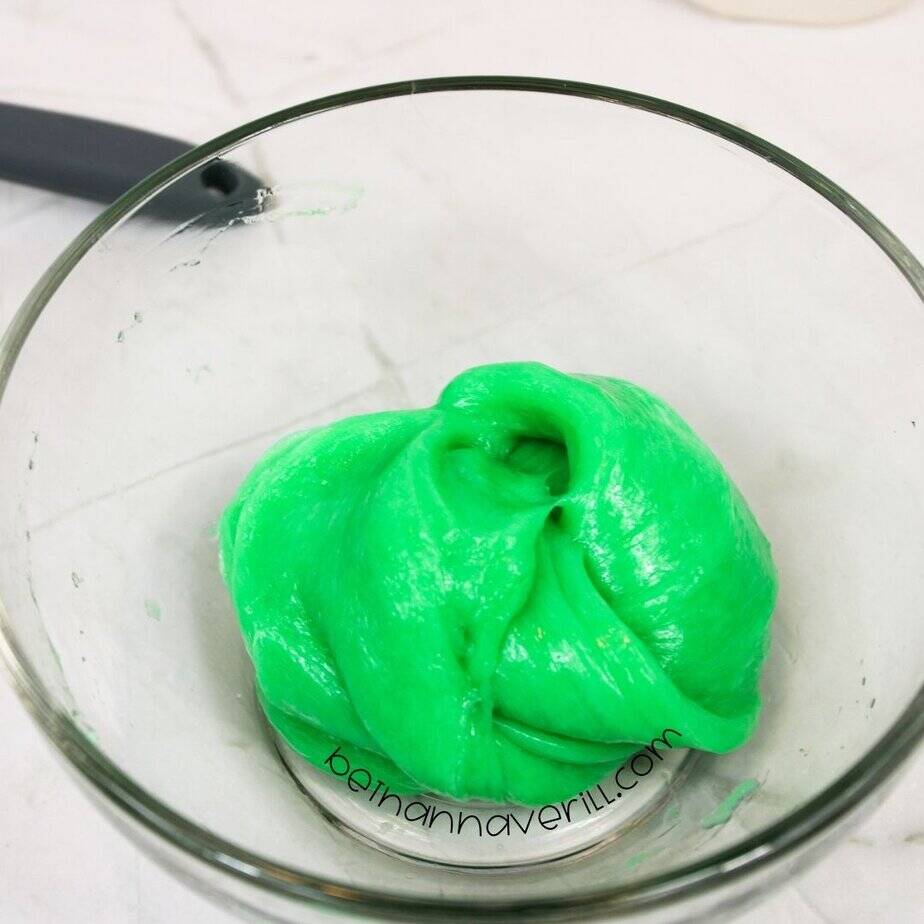
- You may need to knead to incorporate all the ingredients well.
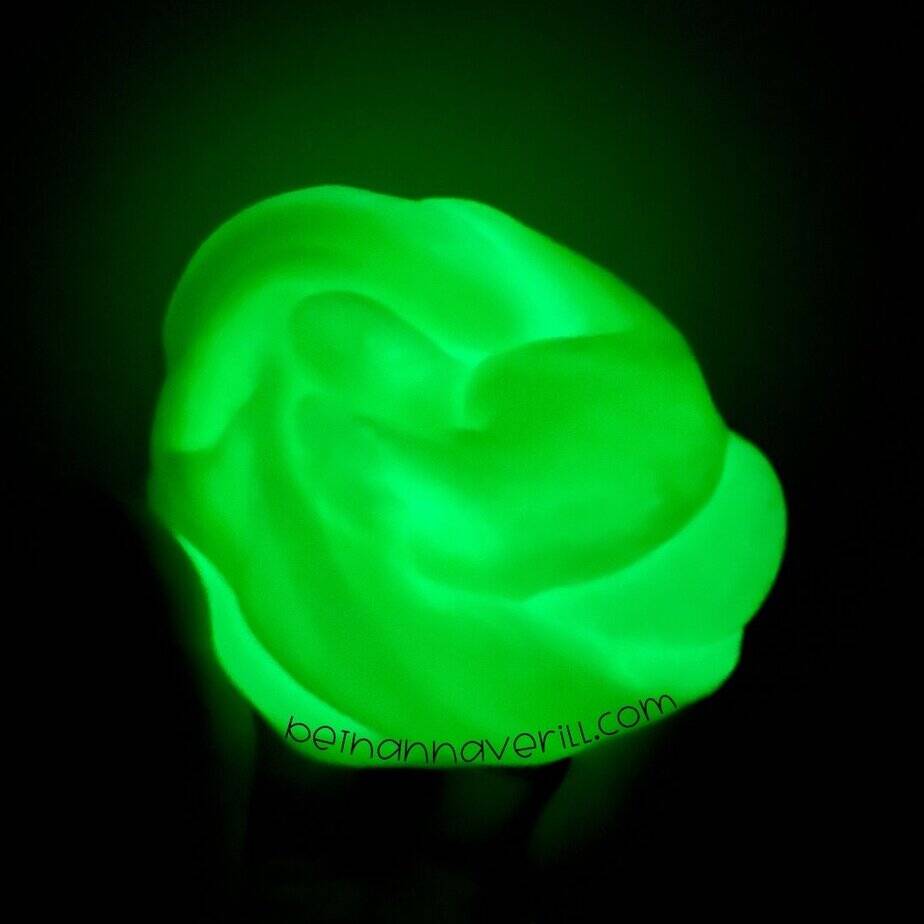
- Turn off the lights to see your slime glow in the dark
Notes
If the slime doesn't glow very bright, let it sit in the sun or under a light for 10-15 minutes.
How to Activate the Glowing Effect
Here’s the part your kids (and if we’re honest, you) will love most—making it GLOW! Follow these easy steps to achieve the brightest effect:
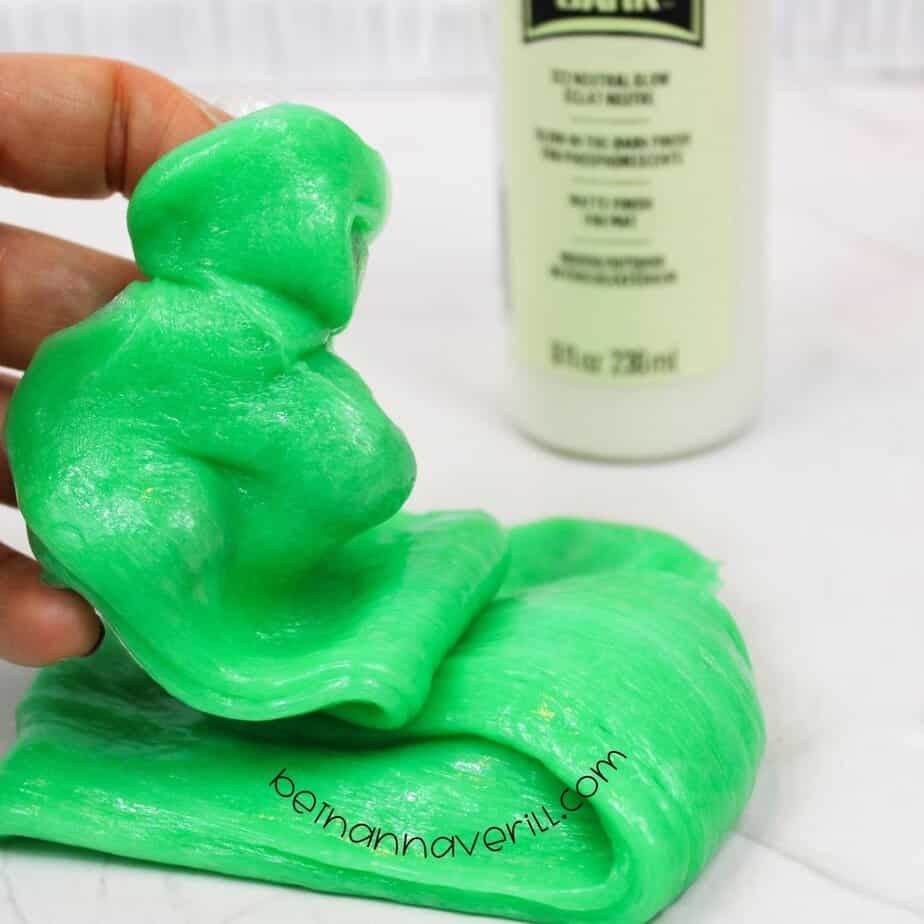
- Charge Under Light: When your slime is ready, place it under a strong light source. Natural sunlight or a bright lamp works wonders. A quick 10-15 minute “charging session” should do the trick. I like to do this while I am kneading the slime to make sure everything is mixed in well.
- Dim the Lights: Take your slime into a dark room and watch the magic unfold. It’s like holding a neon alien blob in your hands!
- Experiment with Glow Colors: Want to mix things up? Swap out green food coloring for blue, or use different glow-in-the-dark paint colors. This is an easy way to personalize your slime and make it feel truly one-of-a-kind.
For inspiration with other luminous crafts, check out this Glow in the Dark Sensory Bin, which is sure to keep the creativity flowing.
With these steps, there's no limit to how glowing and mesmerizing your slime can get.
The Science Behind Glow in the Dark Slime
Making glow in the dark slime isn’t just a fun DIY activity . . . it’s a hands-on science experiment that showcases some pretty cool chemistry.
If you’ve ever wondered why your slime glows or how the ingredients work together to create that satisfyingly stretchy texture, this is going to clear everything up.
Warning: After you read this, you may feel like a slime expert.
What Makes It Glow?
The glow in your slime comes down to one word: phosphorescence.
Sounds fancy, right?
Phosphorescent materials absorb light energy when exposed to a light source, then slowly release it over time. This is why your slime needs a little “charge” under a lamp or sunlight before showing off its glow in the dark magic.
It’s not a trick—it’s science in action.
The glow-in-the-dark paint you use in this recipe is filled with phosphorescent pigments, typically made from phosphors like zinc sulfide or strontium aluminate.
These are the same materials used in things like glow-in-the-dark toys or stickers.
Ever had those stars on your bedroom ceiling as a kid? Yep, same idea.
Here’s where it gets cool: When you mix that glow paint into your slime, those phosphors spread evenly throughout the gooey texture, giving it that consistent and mesmerizing neon glow.
Safety Tips and Cleanup Advice
Playing with glow in the dark slime is as exciting as it sounds, but it’s important to balance all that fun with safety and practicality.
You don’t want a craft night turned into a mess overload, right?
By taking a few precautions and setting up a good plan for cleanup, you can ensure everyone focuses on the glowing fun instead of accidental hiccups.
Ensuring Safe Play
Making and playing with glow in the dark slime can be super engaging, especially for kids. However, given some of the ingredients involved, a little caution goes a long way.
Here’s how you can keep things safe for everyone:
- Supervise Playtime: ALWAYS supervise children while they’re making or playing with slime. The glue, glow-in-the-dark paint, and even the baking soda can cause issues if handled improperly.
- Avoid Ingestion: While these ingredients are generally safe when used as directed, they’re not edible. Be sure to remind little ones that the slime is for squishing, not snacking.
- Protect Skin and Eyes: Some kids may have sensitive skin, so provide gloves if necessary, especially for younger children. If any ingredient gets in their eyes, rinse thoroughly and seek medical advice if irritation persists.
- Designate a Safe Area: Keep the activity in a space that’s easy to clean, like a kitchen table lined with a protective cover or a craft area. It minimizes stress for you and mess for your home.
- Know Ingredients: Review the ingredients list for potential allergens. If your child has sensitive skin or allergies, double-check to ensure nothing will trigger a reaction.
Cleaning and Storage
Once the fun winds down, it’s time to clean up and store the slime properly.
Don’t worry—this part doesn’t have to be a chore. A few simple steps can save you a headache later.
- Wipe Surfaces Immediately: If slime lands on your table, walls, or floors, wipe it up right away with a damp cloth. Tackle it quickly before it dries to avoid leaving stubborn residue.
- Use White Vinegar for Residues: For areas where the slime stubbornly sticks (like your favorite rug—yes, it happens), a little white vinegar can work magic. Apply a small amount with a clean rag and gently rub the residue away.
- Small Tools, Big Difference: Plastic scrapers work wonders for nudging stuck-on slime off non-porous surfaces. Just be gentle to avoid scratches.
- Store in Airtight Containers: Keep leftover slime fresh and stretchy by placing it in a sealed plastic container or ziplock bag. Bonus tip: Label the container with the date, so you know how long it’s been sitting around.
- Keep Away from Heat and Sunlight: Heat can dehydrate your slime, and while sunlight won’t hurt it directly, it can fade the vibrant glow. Store in a cool, shaded spot to maintain its quality.
- Trash Disposal: Never wash leftover slime or glue down the sink! It can clog your drains. Instead, toss excess into the trash.
The best advice? Don’t let the messiness overshadow the fun. By staying prepared, you can wrap up slimy playtime in the easiest way possible.
FAQ About Glow in the Dark Slime
Glow in the dark slime is a crowd favorite, but it doesn’t always go as planned, right?
Maybe yours isn’t glowing as much as you hoped, or you're wondering if that paint in your garage will work.
Let’s tackle the most common questions so you can enjoy this glowing craft without the guesswork.
Why Isn’t My Slime Glowing?
If your glow in the dark slime isn’t radiating that satisfying, ghostly glow, there are a few common reasons:
- It Needs a Charge – Glow-in-the-dark paint relies on light to “charge.” Place your slime under a bright light (like a lamp or direct sunlight) for 10–15 minutes, then take it into a dark room to check the glow.
- The Paint Wasn’t Mixed Well – Make sure you thoroughly stir the glow-in-the-dark paint into the slime. Uneven mixing can leave you with patchy spots that don’t glow.
- Wrong Type of Paint – Only use glow-in-the-dark paint specifically labeled for crafts. Regular neon or fluorescent paint might look bright but won’t glow in the dark. Make sure it's non-toxic if you're crafting with kids.
- Old Supplies – Over time, some glow-in-the-dark paints lose their brightness. If yours has been sitting in the back of a craft drawer for years, it might be time for a fresh bottle.
Think of the glow like charging a battery—without that light exposure, it just won’t perform.
How Long Does the Glow Last?
The glow effect in your slime depends on the type of glow-in-the-dark paint you use and how long the slime is charged. Typically:
- A full charge under direct light can last for about 30 minutes to an hour in the dark.
- For a longer-lasting glow, recharge it as needed—just pop it back under a lamp for a few minutes.
Pro tip: Slime won’t hold the glow forever. Over time (think weeks or months), you might notice it isn’t as bright. That doesn’t mean your slime isn’t fun anymore—it just might need a little makeover or a new batch.
Can I Use Regular Paint Instead?
You might think, “Hey, I’ve got some leftover craft paint. Can I make it work?” Unfortunately, regular paint won’t glow in the dark.
It’s not about the color intensity—it’s about special glow pigments like zinc sulfide or strontium aluminate in the paint you’re using.
These materials absorb light and emit it as that amazing neon glow.
Here’s the thing with regular craft paints:
- Neon or fluorescent paints may look electrifying in daylight but won’t glow in total darkness. They're perfect for slime, but not for glowing in the dark.
- Even if mixed in, they won’t create the charged glow effect we’re going for in this slime recipe.
If your goal is glowing slime, stick with glow-in-the-dark paint designed for crafts. It’s worth the small investment to get the magical effect everyone will love.
Please Share This Glow in the Dark Slime How to
Your shares are how this site grows and I am sincerely grateful. Know a friend who’d like this? Please share it on Facebook or save it to your favorite kids’ activity board on Pinterest.


