
Polar Bear Paper Plate Craft
Winter crafts have a way of taking over our whole house this time of year…and honestly, this polar bear paper plate craft ended up being one of our favorites. It’s simple, it’s cute, and it hits that perfect balance of “quick to set up” and “wow, they’re actually focused.”
We made ours on a snowy afternoon when everyone was a little stir-crazy, and it turned into this fun little moment of talking about Arctic animals, big bear paws, and why polar bears basically wear built-in snow camo. Plus, my kid took full creative control of the cheeks, which was…an adventure.
If you’re looking for an easy winter craft that feels cozy, kid-led, and doesn’t require digging through twelve bins of supplies this polar bear is ready for crafting. Let’s make one!

Materials for Your Polar Bear Paper Plate Craft
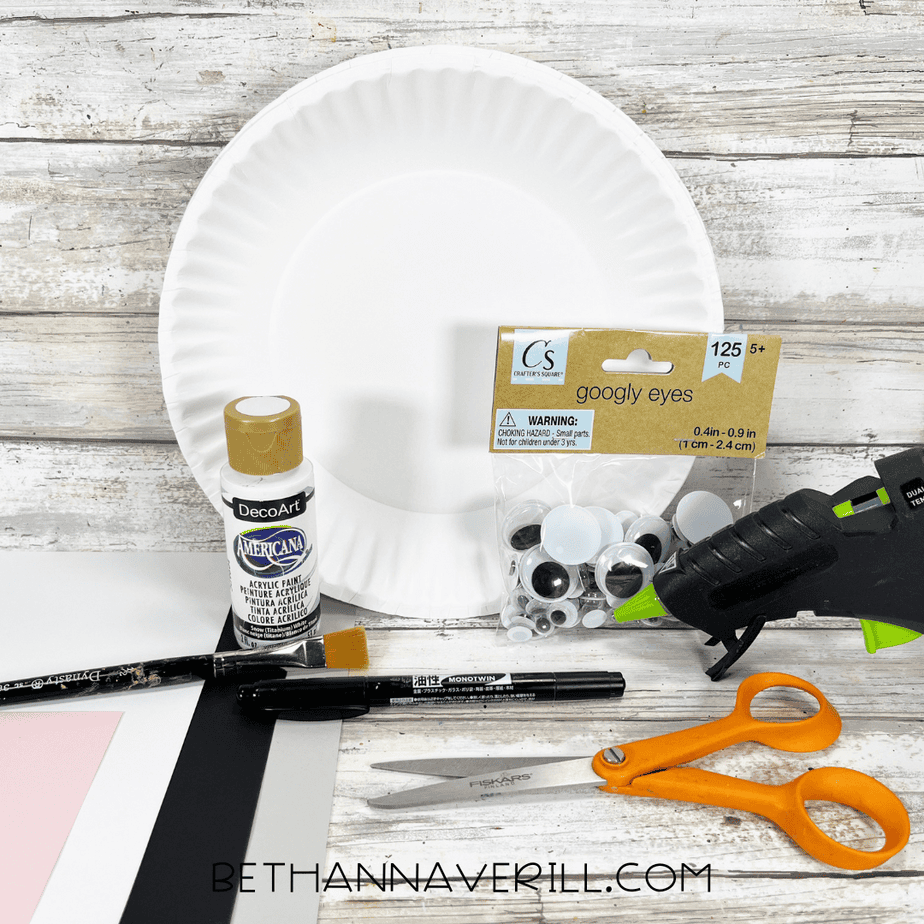
Before we jump into the fun, here’s everything you’ll want to grab so you’re not mid-craft digging through drawers.
- Paper Plate
- Wiggle Eyes
- Cardstock, Black, White, Pink
- Craft Paint – Pink
- Glue Gun and Glue Sticks
- Paintbrush
- Scissors
- Pencil
- Permanent Marker, Black
- Sponge Dabber
- Polar Bear Pattern

How to Make This Paper Plate Polar Bear Craft
Ready to get crafting? Find the instructions below!
Polar Bear Paper Plate Craft

Make this adorable polar bear paper plate craft using cardstock, paint, and a simple pattern. A quick and easy winter activity that’s perfect for preschoolers and turns out cute every time.
Materials
- Paper Plate
- Wiggle Eyes
- Cardstock, Black, White, Pink
- Craft Paint – Pink
- Glue Gun and Glue Sticks
- Pencil
- Permanent Marker, Black
- Sponge Dabber, Round
- Polar Bear Pattern
Tools
- Paintbrush
- Scissors
Instructions
- Gather all supplies.
- Download and print the polar bear patterns, then cut out with scissors. Trace the nose once onto black cardstock. Trace the muzzle once and the outer ears twice once onto white cardstock. Trace the inner ears twice onto pink cardstock with a pencil. You could also use colored craft foam, construction paper, or craft felt for this project.

- Cut out the polar bear patterns with scissors making sure to cut inside the traced lines for a clean, finished project.
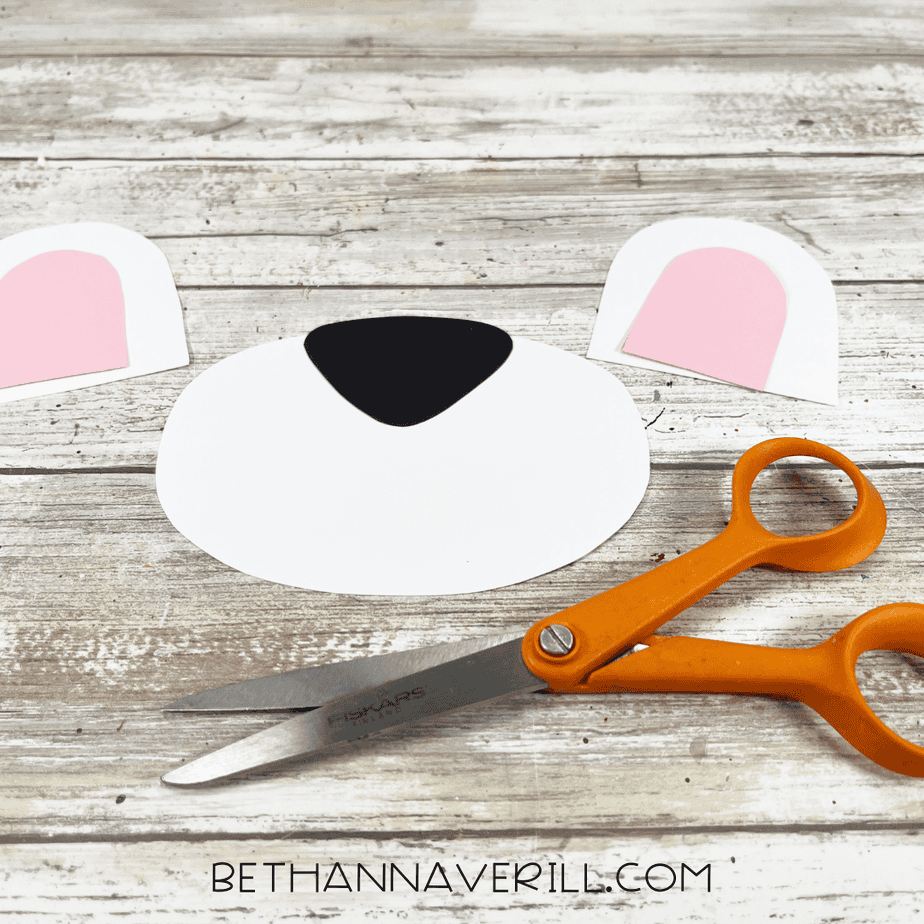
- Using a black marker, outline the muzzle and outer ears with a jagged line to represent the polar bear’s fur.

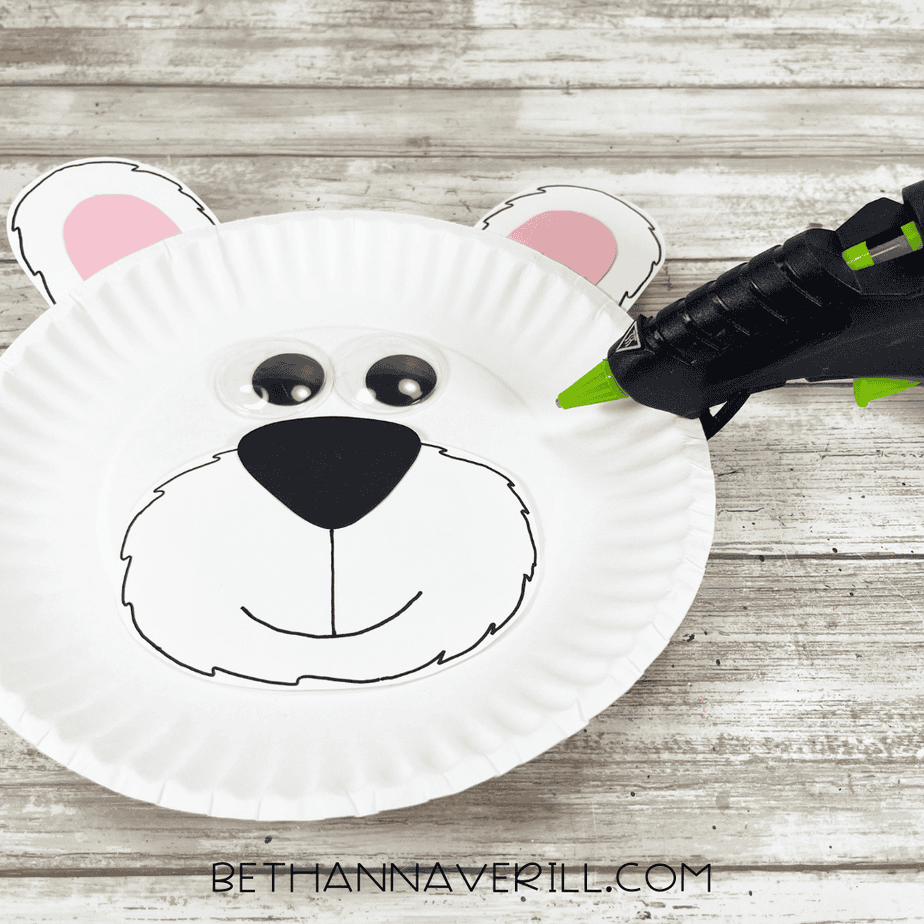
- Attach the inner ears to the outer ears and the nose to the muzzle with a glue gun and glue sticks. Glue the muzzle to the inside of the paper plate, and the ears to the top right and top left sides. TIP: You can use liquid craft glue for this project, but you will have to wait for it to dry.

- Attach two wiggle eyes to the polar bear’s face with a glue gun and glue sticks.
- To finish, create cheeks by dipping a round sponge dabber in pink acrylic craft paint and stamping on either side of the polar bear’s nose. Let paint dry.

- Hang your finished polar bear on display!

Recommended Products
As an Amazon Associate and member of other affiliate programs, I earn from qualifying purchases.


What We Loved About This Polar Bear Paper Plate Craft
This polar bear turned out to be such a fun mix of easy steps and kid-friendly details. The sponge-painted cheeks, simple ear shapes, and big googly eyes give kids plenty to do without overwhelming them…and all those little snips, dabs, and glue spots sneak in great fine motor practice along the way.
We also loved how naturally it fit into winter themes. While we crafted, we ended up chatting about where polar bears live, why they’re white, and how they stay warm in the cold. Nothing formal, just the kind of curious questions that pop up while kids’ hands are busy.
And honestly, the finished bear is just plain cute. It’s simple enough for younger kids but still fun for big kids who like adding their own details. Definitely a quick win for winter crafting.
Grab This Paper Plate Polar Bear Craftivity Now!
Use code POLAR at checkout to snag this printable packet for free.
Please Share This Polar Bear Paper Plate Craft
If you enjoyed making this little polar bear, I’d love for you to share it! Pin it to your favorite craft board or pass it along to a parent or teacher who could use a simple winter activity. Every share helps more families find easy, creative projects their kids will actually enjoy.


