
Peacock Paper Plate Craft
If your kid is all about bold colors, silly birds, and messy art time, this peacock paper plate craft is gonna be a hit. It’s easy to prep, super fun to make, and somehow – magically – turns a regular old paper plate into a rainbow-feathered masterpiece.
There’s painting. There’s gluing. There’s a little bit of chaos. But at the end of it, you’ve got a pretty fantastic peacock and a proud preschooler beaming from ear to ear.

Materials Needed for This Paper Plate Peacock
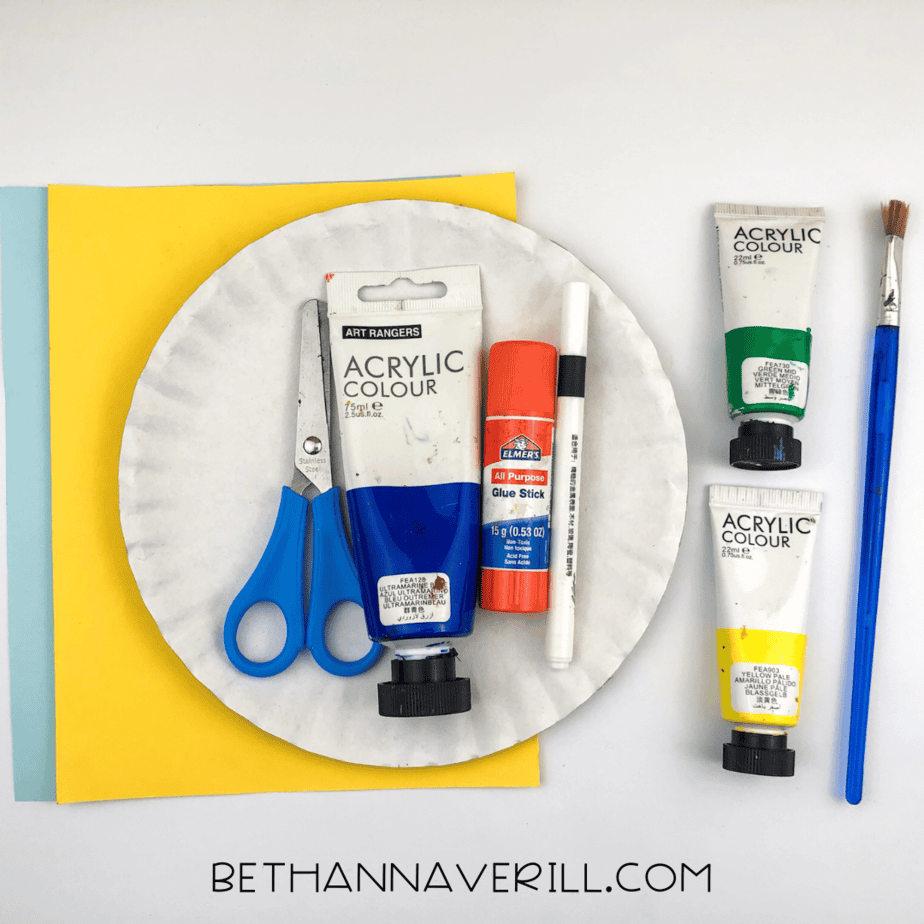
Okay, grab your stuff. This one doesn’t take much, and you probably already have most of it floating around in your craft drawer (or junk drawer, we don’t judge).
- 1 paper plate
- Blue, green, and yellow paint
- Paint brushes
- Blue construction paper
- Yellow construction paper
- White construction paper – if you're making your own eyes
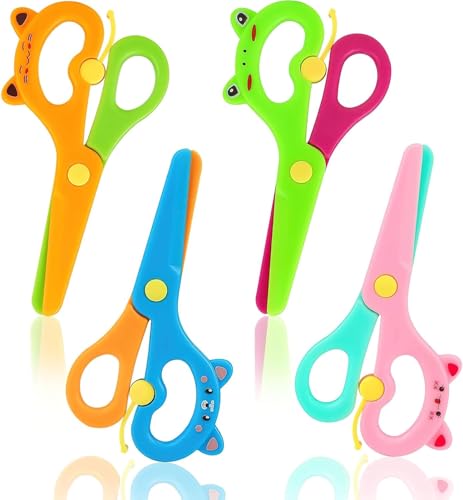
- Scissors – kid-safe if little hands are helping
- Glue stick or school glue
- Black marker – for the finishing touches (eyes, eyebrows, tiny bird sass)
- Googly eyes – totally optional but always a hit
- Template
- Old newspaper or something to protect the table – this is not a tidy activity
Don’t have everything? No stress. Cut up a cereal box for the body. Mix your own paint colors. Draw the eyes with a marker. It’s a peacock, it’s supposed to be a little wild.
How to Make a Peacock Paper Plate Craft
Ready to get crafting? Find the instructions below!
Peacock Paper Plate Craft

This vibrant peacock paper plate craft is perfect for bird units, rainforest themes, or adding a pop of color to your classroom decor. Kids will love combining painting, cutting, and gluing while practicing their fine motor skills and creative expression.
Materials
- Paper plate
- Blue paint
- Green paint
- Yellow paint
- Blue, white, and yellow construction paper
- Glue stick
- Black marker
Tools
- Scissors
- Paintbrush
Instructions
- Gather your supplies.
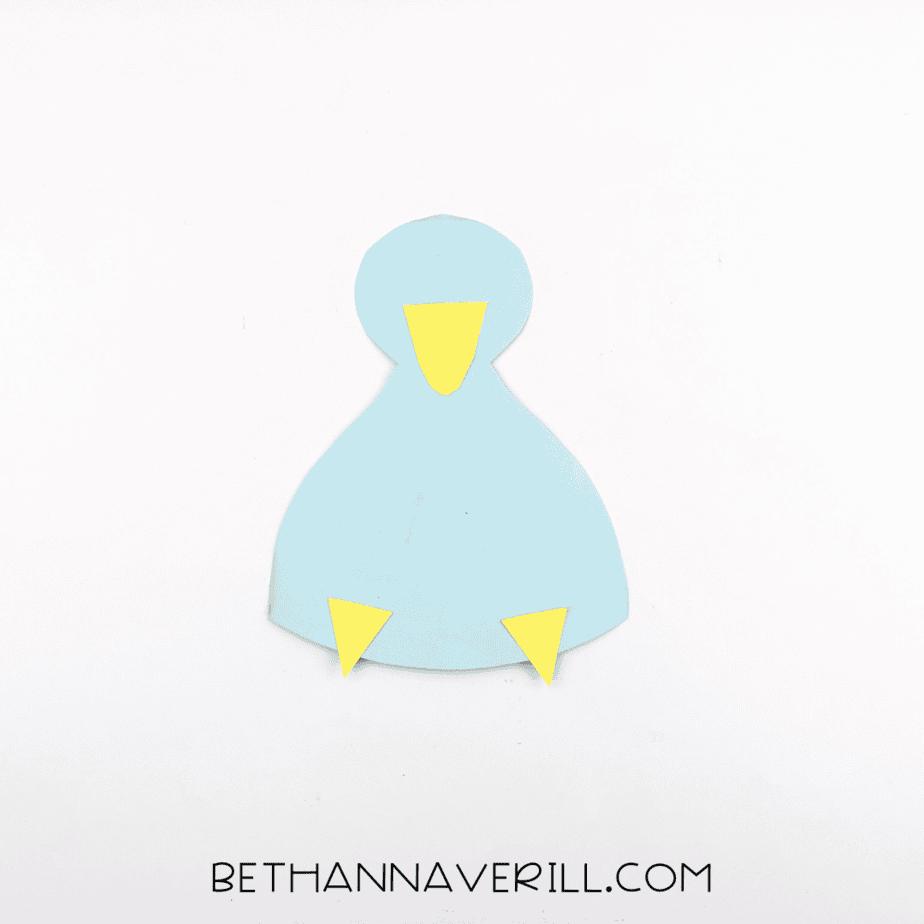
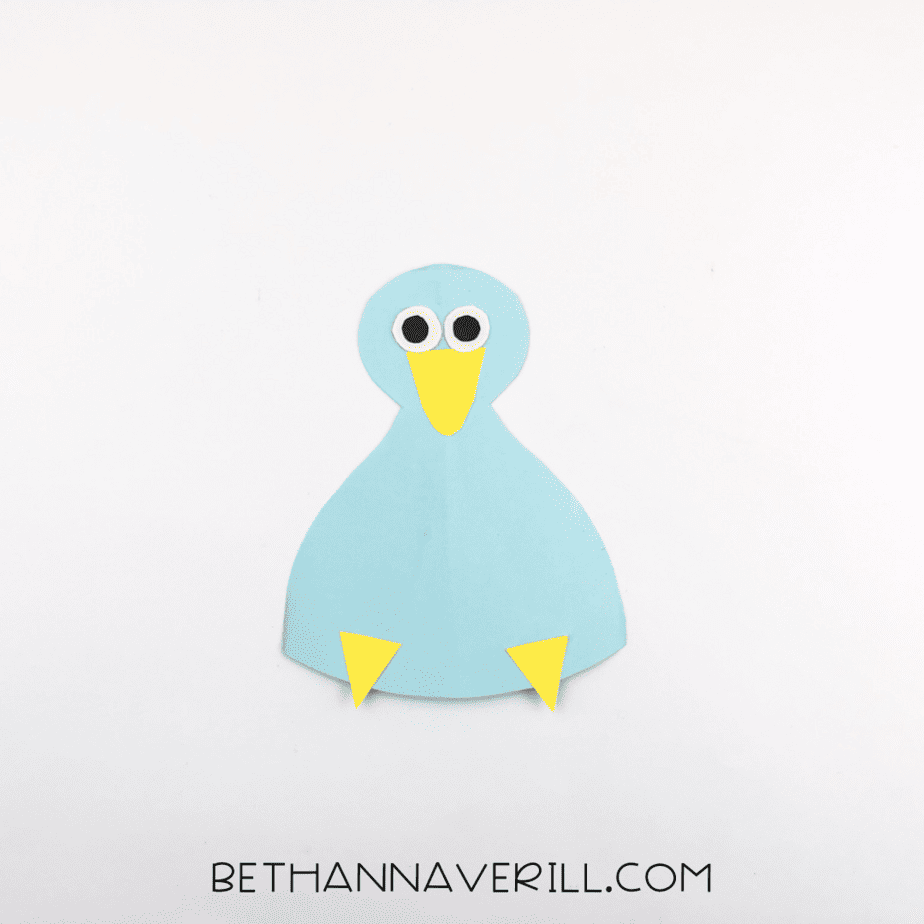
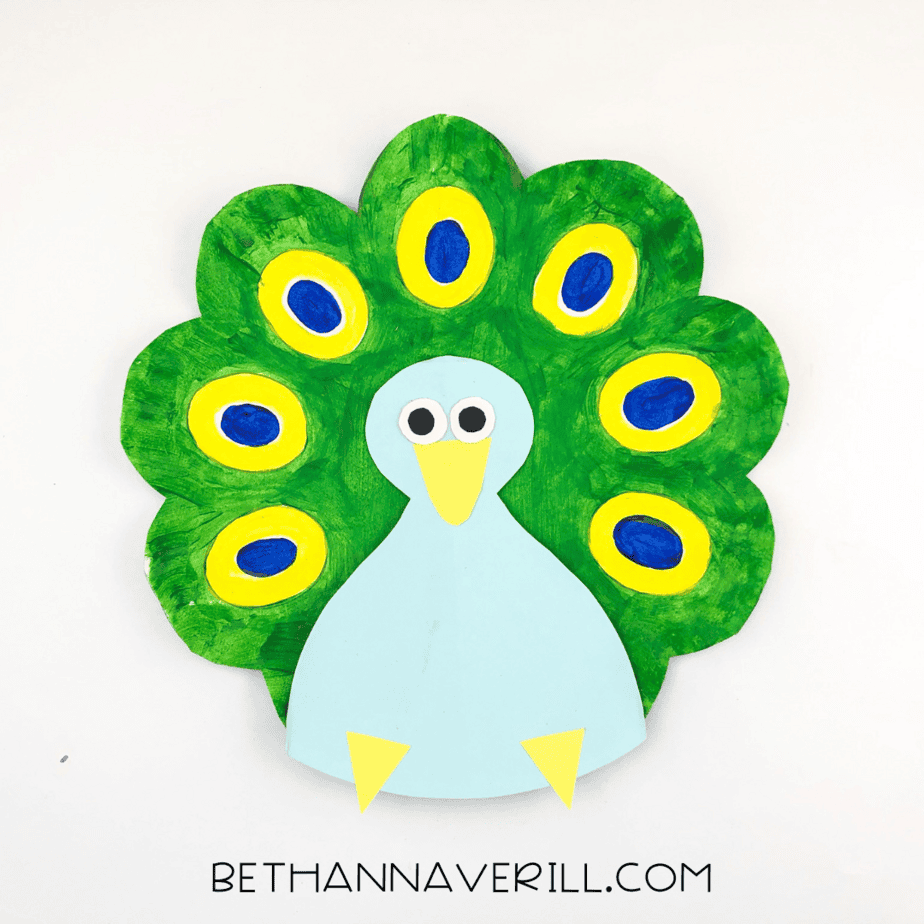
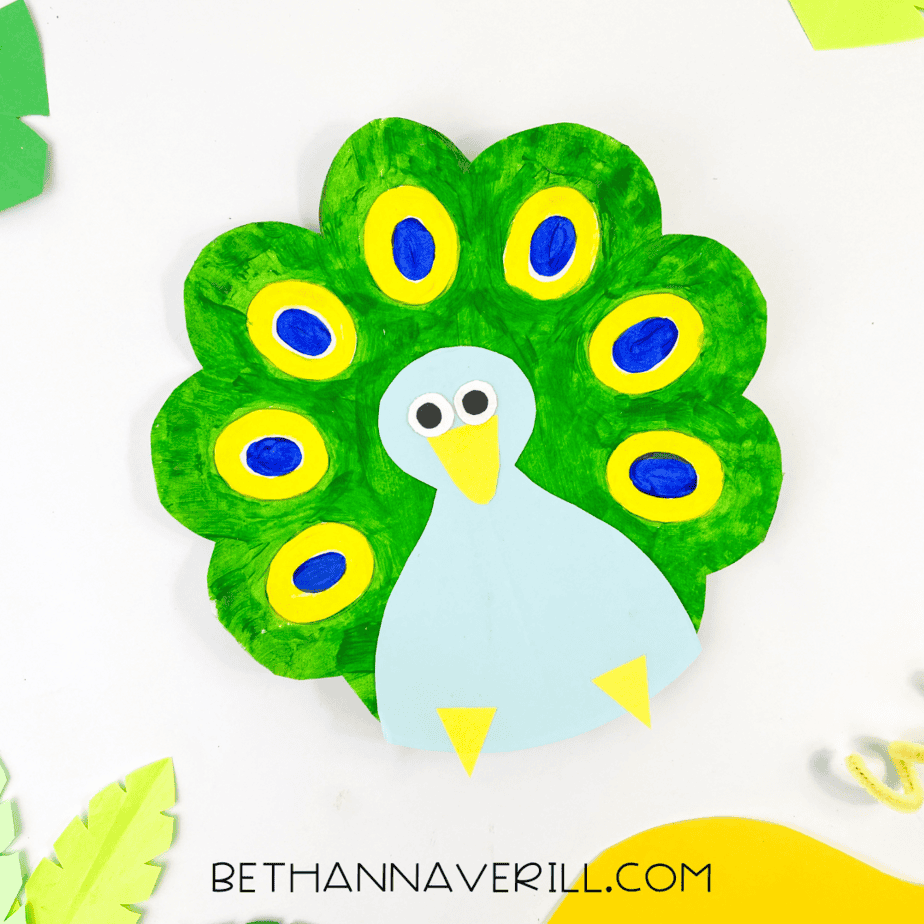
- Use the template to cut a simple peacock body from blue paper, a wide shape with a round head on top. Cut a yellow triangle for the beak and two feet. Cut small white circles for the eyes (if you’re not using googly ones) and tiny black dots for pupils.

- Glue the beak and feet onto the blue body. Add the eyes above the beak. If you're using paper eyes, glue the black dots onto the white circles first.
- Cut the paper plate in half, and trim the edges into a rounded fan shape, this will be the peacock’s tail.
- Paint the tail green and let it dry. Once dry, paint several large yellow ovals spaced out around the fan.
- Add blue ovals inside the yellow ones to finish the “eye” feathers. Let your child dab with fingers, cotton swabs, or brushes.
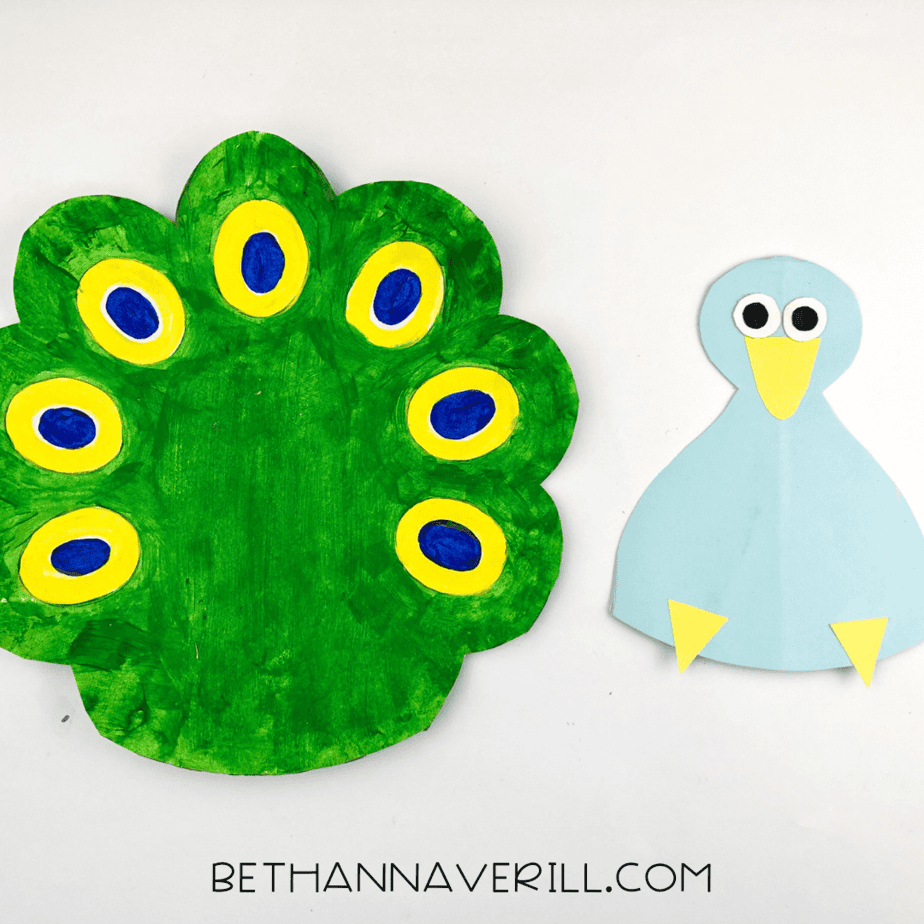
- Once everything is dry, glue the peacock body onto the center-bottom of the tail fan so the feathers frame it from behind.
- Let it all dry, then hang up your fabulous peacock or let it join your paper plate zoo!
Recommended Products
As an Amazon Associate and member of other affiliate programs, I earn from qualifying purchases.


Make It a Whole Thing
This isn’t just a craft, it’s a whole vibe. Let your kid name their peacock. Give it a backstory. Does it live in the jungle? Is it besties with a flamingo? Can it talk? What’s its favorite snack?
Want to sneak in a little learning? Count the feathers together. Point to all the blue parts. Talk about how real peacocks fan their tails to impress each other (or just to show off, because same).
And if your kid’s still feeling crafty, check out this adorable paper plate duck craft too. You might end up with a whole bird family on the fridge by the end of the week!
Final Thoughts (from someone who’s probably still cleaning up glitter)
This paper plate peacock is everything you want in a kids’ craft: fun, colorful, no weird materials required. Your preschooler gets to flex their creative muscles, work on those scissor and glue skills, and you get a break that almost feels like enrichment time.
Hang it up, play pretend, or just admire the chaos of it all. However it turns out, it’s going to be awesome, because they made it.
Please Share This Peacock Paper Plate Craft
Your shares are how this site grows and I am sincerely grateful. Know a friend who’d like this? Please share it on Facebook or save it to your favorite kids’ activity board on Pinterest.


