Paper Plate Owl Craft for Preschoolers
This seriously adorable paper plate owl craft is so easy you can have your preschooler create their very own. I love this craft for a cute any time of year craft, I love it for October, but also for talking about nocturnal animals which we talk about in January and February.
My daughter's room is decorated in owls, so this was her FAVORITE craft we have done in awhile.
You'll love this craft because it's easy to set up, low-cost, and you can use it to learn multiple learning objectives. It's a fun and interactive activity that can be used to break up the classroom routine and engage students in a different way.
Use this adorable owl craft to promote creativity and self-expression, fine motor skills development, and following directions.
If you’re juggling classroom chaos, my Halloween Paper Plate Bundle will help. It’s 15 no-fuss projects your students will actually enjoy.
You can easily add this into a unit study of owls, with lots of books available, as well as videos and you can even add some research projects.
Let's get started.

Paper plate crafts are one of my favorites because they are easy to find and inexpensive — the best plates for crafts are the extra cheap, flimsy ones. They are also versatile and forgiving. You can make a mistake and simply start over, or you can make an entire family of owls at home without breaking the bank.
Arts and crafts are important to child development. They help with cognitive, motor, and social-emotional development. Learn more about the importance of art in child development.
This fun paper plate owl craft is easy to make and ends up looking adorable, it’s a great way to work on those tiny hand muscles to prepare for writing someday, and work on their creative muscles so they can flourish as they grow.
My kids are always putting their unique spin on these, and I loved seeing what they could create.
These are perfect preschool classroom crafts, or if you stay home with your little, this one is a great craft to add to your decorations.
I love to put crafts on their windowsills or along their bookshelves in their rooms. This way kids can decorate their rooms with their creativity. They love being surrounded by things they've created with their hands, and I love how proud they are of their work.
We talk about our favorite parts of the day every night before bed, and they often bring up their owls, even though we did them a few weeks ago. They just love them so much.
If you're ready to learn more about owls, try this owls nature study and printables.
How to make an owl with paper plates
There are a few things you'll need, like a paper plate. But read through these instructions and let your (or your child's) creative heart tell you how to build this adorable little owl.
You can make your own true to real life, and use the colors of one of your favorite owl breeds, or you can go with a cartoony owl like the one I'm showing you today. A snowy owl would look AWESOME with this craft! Just use white paper, and add a few brown “feathers” onto it's belly to make a fun snowy owl.
Get the full list of supplies and directions in a handy printable version at the end of this post.

- Paper Plate
- Paper (orange, black, and white)
- Googly eyes
- Glue
- Scissors
You can make this owl craft your own by using different colors, adding other objects for texture such as aluminum foil, pom poms, or crumpled up tissue paper. Let this tutorials help you decide how you want to create your owl.
PIN for later:
Pin this Cute Paper Plate Owl Craft to Come Back to Later

This easy paper plate owl craft for toddlers is a great activity to do when you introduce nocturnal animals in your homeschool or preschool. It's also great every day — who doesn't love owls?
My favorite part about this paper plate owl craft is you can make it as unique to your child as you want. This is all just a way to spark that creativity. Your owl can be blue winged, with a green belly, or make a snowy owl!
Some ideas for changing things up is finding different breeds of owls and trying to make a similar owl, or picking their favorite colors!
Give them free rein to be creative! Once everything is glued down, they can proudly display their masterpiece on the mantle, or make them a fun tabletop decoration for a themed party.
My favorite decorations are the ones my kids made. The cool thing about these little crafts is you can make them every year if you want, or you can remake them like 30 times in a day, like my youngest always asks.
And I LOVE how they can decorate their rooms every season with the crafts they created.
How to make a paper plate owl
If you'd like a printable version of these instructions, scroll to the bottom!
First things first, you need to make your paper plate into a fish shape. You can look at this image to help you shape your first.

You can allow kids to do this if you think they can! Draw where you want them to fold, and give them the plate. It doesn't have to be perfect!
Fold two sides of the paper plate into the center, you want them to overlap, but you don't want the top to come to a sharp point, you want a little room between where the top folds lay.
These folds will be diagonal, see the image above to help you decide where to fold.

Fold the top of your plate, the thin part, down. Bring it to about the center of the plate, and then glue the whole top down. You don't need to glue the sides down, because the feathers will need to go underneath to look great.
Looking for more owl crafts? Try this lowercase o is for owl craft.
This is the base of your owl. From here, you can go crazy with different colors or textures.
Next we need to create a TON of feathers.

Cut your paper into one inch wide strips.
Then we are going to fold. Fold every half inch until the whole strip is folded. This is what it will look like as you're working on it. But remember, you want to do the whole strip!

After you've completed the whole strip, repeat on ALL of your strips. But don't use all your paper, just make 5-7 strips at first, and then add more if you need them.

Once you've folded them all up you need to add a curve to the top most flap.
Cut out the paper on that curve. You want each strip to have about the same size curve on it.
This isn't something a small child's hands are easily capable of doing, so I recommend you do the cutting, or cut them apart ahead of time.
You'll be left with some “feathers”, like you can see below.

Time for gluing!
After cutting out your feathers, use glue to attach them to the bottom edge of your owl. You can see below what I did. On my paper plate, the top of the plate was shiny, this makes it easier for you to see what I folded and where I glued it.
Try this heart shaped owl craft for some fun this Valentine's Day!
It's okay to let the feathers go underneath the “wings”, this gives it a more realistic look, so I highly recommend it!

Once you've completed your gluing, set it aside to dry, and pull out your leftover orange paper, and let's cut out the larger feathers, for the wings.
Start with the strips again, but this time fold them every inch (instead of half inch), and cut them out. Now you'll paste these along the wings.
You want to begin gluing them down on the bottom of the wings, so each layer can overlap the layer below. This gives your owl a full feathery body.
Make sure you have put the small feathers on the face portion as well! The larger feathers are just for the wings.

Cut small circles from the black paper, and slightly larger circles from the white paper, then attach them together to make eyes. You can also use googly eyes, but I couldn't find any big enough for the look I was going for.
Using the yellow paper, cut out a triangle shape for the beak.
Then glue all the pieces onto your owl, you can see where to put things below:

He is lookin' so adorable now!
You did it! You created a really adorable paper plate owl!

I'm all for letting kids go crazy with these crafts. So if it makes your life easier and your kids are old enough to be trusted with scissors (or you're understanding that you'll have a lot to clean up later!) let them take the reins, and decide how they want theirs to look.
Every owl can be different, and they can still be perfect!
How do you make an owl out of paper plates?
Here is a great printable version if you'd like it!
Paper Plate Owl Craft for Preschoolers

This DIY owl craft is so fun to do with the kids. A few of my favorite things is how it takes up a bunch of time because of all the tiny feathers, but also how easy it is.
Not only is this craft simple and affordable-- all you need is a paper plate for each kid and a few basic craft materials--it's also a great way to promote creativity and fine motor skills. They can pick the colors they want for their owl and decorate it as they see fit.
Plus, whoooo doesn't love owls?
Materials
- Paper Plate
- Orange, Black, and white construction paper
- Googly eyes (instead of black paper)
- Glue
Tools
- Glue (stick or white glue) and Glue Gun
- Scissors
Instructions
- Fold two sides of a paper plate. You want then two sides to overlap across the center, and the fold should be diagonal across your plate.

- Fold the top of the folded paper plate, then glue that down.

- Cut the orange paper in one inch strips. I kept the length of the strips to six inches to make it easier to cut when they're all folded up.

- Fold every half inch until the whole orange strip is folded. Fold it like an accordion.

- Draw a small curve to the top, and cut, these will serve as the feathers. You're going to need a LOT, so you might want to cut these ahead of time!

- Use a glue gun or school glue to paste your feathers to the bottom edge of your owl's body. When you complete a row, start a new row, making sure the feathers overlap the row below. You will use these feathers for the shiny part of the paper plate (it's shiny so you can see it on mine, but you can use whatever plate you want) as well as the head.

- Once you have completed the bottom part of the owl, you can use larger "feathers" on the wings. Fold these orange strips every inch instead of half inch, and cut them out, then paste along the folded over part of your owl. The face portion should have the smaller feathers, like the bottom.
- Cut small circles from the black paper, and slightly larger from the white paper for eyes, or you can just use googly eyes!

- Cut out a rounded triangle for the beak

- Paste them face features out, and you have a paper plate owl!

Notes
Tips:
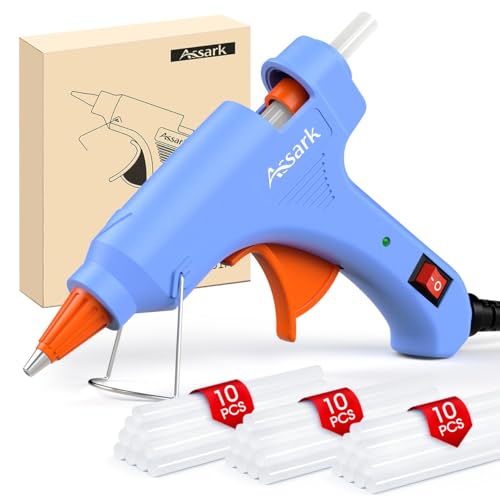
Be extra careful with scissors and hot glue around little hands. If it makes you more comfortable, feel free to use regular white glue. I also love using double sided tape, it makes the whole process much quicker and easier because you don't have to wait for glue to dry, or get your fingers sticky.
Let your creativity flow here! You are free to change colors. The choice is yours! I love seeing what my little's create after I show them the instructions, it's always fun and unique!
Recommended Products
As an Amazon Associate and member of other affiliate programs, I earn from qualifying purchases.