
Paper Plate Jack-o-Lantern Craft
Halloween just isn’t complete without a glowing jack-o’-lantern or two, but who says pumpkins have to be messy and full of seeds? This paper plate jack-o-lantern craft gives kids all the fun of designing silly (or spooky!) pumpkin faces without the carving tools. With a little paint, paper, and some pipe cleaner curls, you’ll have a whole patch of paper pumpkins ready to decorate the classroom, playroom, or front porch.

What You’ll Need for This Jack-o’-Lantern Craft
Time to round up your supplies before the fun begins:
- Paper plates (large and small)
- Orange acrylic paint (use a mix of shades if you’d like)
- Paintbrush
- Black construction paper
- Green construction paper (two shades for extra depth)
- Brown construction paper or cardstock
- Green pipe cleaners
- Pencil
- Scissors
- Glue gun or school glue
- Black marker

How to Make a Paper Plate Jack-o’-Lantern
Ready to get crafting? Find the instructions below!
Paper Plate Jack-o’-Lantern Craft

Make a fun and easy paper plate jack-o’-lantern craft with your kids. This simple Halloween craft uses paper plates, paint, and paper to create adorable pumpkin faces.
Materials
- Paper plates (large and small)
- Orange acrylic paint (variety of shades optional)
- Black construction paper
- Green construction paper (two shades)
- Brown construction paper or cardstock
- Green pipe cleaners
- Pencil
- Glue gun or school glue
- Black marker
Tools
- Paintbrush
- Scissors
Instructions
- Gather your supplies including paper plates, orange paint, black and green construction paper, brown paper, pipe cleaners, scissors, glue, and a marker.

- Paint the front of a paper plate completely orange and set it aside to dry. You can use multiple shades of orange for variation if desired.

- Paint a smaller plate another shade of orange. Allow it to dry fully.

- Trace jack-o’-lantern face shapes such as eyes, noses, and mouths onto white paper and cut them out to use as templates.

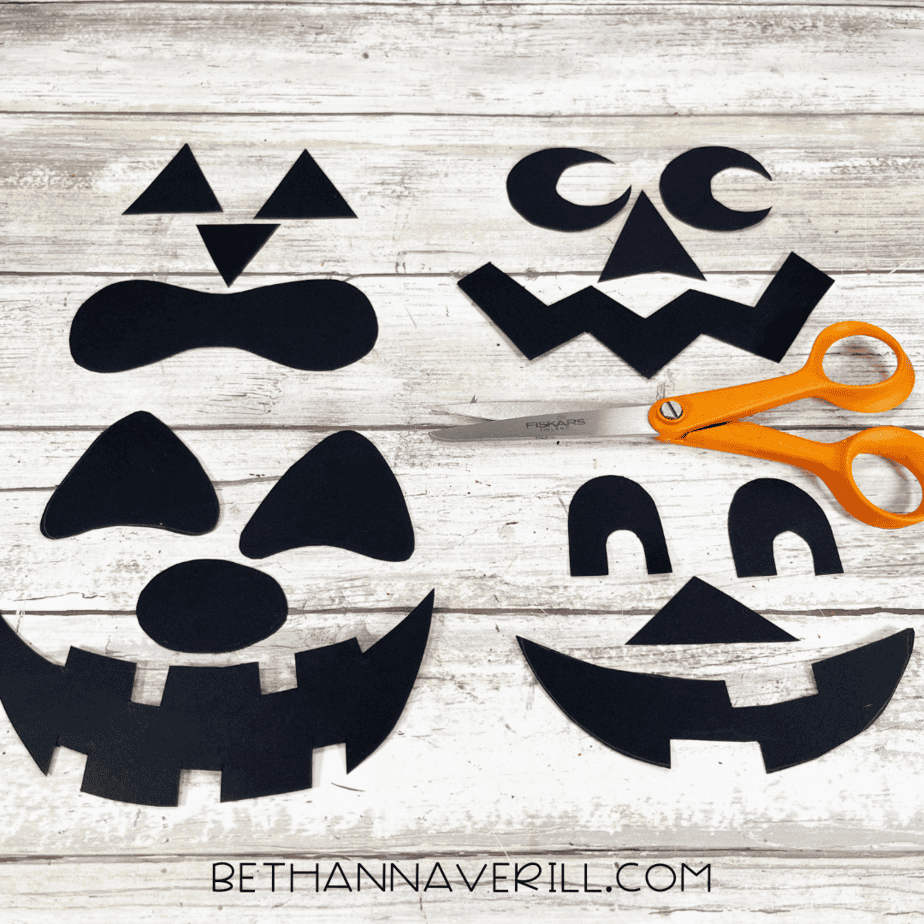
- Arrange the cut-out shapes on the orange plate to design your pumpkin’s face. Try different combinations before gluing them down.

- Glue the black paper pieces to the center of the plate to create the jack-o’-lantern face.
- Draw and cut out large leaves from green construction paper.

- Cut a pumpkin stem shape from brown paper and glue it to the top of the plate.

- Glue the leaves near the stem to give your pumpkin a finished look.

- Wrap a green pipe cleaner around a pencil to make a curly vine. Slide it off and glue it beside the stem.


- Repeat the steps with different face designs to create a whole set of paper plate jack-o’-lanterns.

Recommended Products
As an Amazon Associate and member of other affiliate programs, I earn from qualifying purchases.


Why Kids Will Love This Craft
This jack-o’-lantern isn’t just a decoration, it’s a mini design project that kids can really own:
- No-carve fun – Perfect for little ones who aren’t ready for pumpkin carving but still want to join in the tradition.
- Creative freedom – Kids can design endless expressions—happy, scary, silly, surprised—every jack-o’-lantern is different.
- Seasonal spirit – These paper pumpkins bring Halloween cheer to classrooms, front windows, or bulletin boards.
- Fine motor practice – Tracing, cutting, and gluing help build hand strength and coordination.
Before you know it, you’ll have a whole wall (or door) filled with pumpkin personalities!
If you liked this project, you’ll love the other 14 in my Halloween Paper Plate Bundle — bats, ghosts, pumpkins, and more.
Get This Paper Plate Jack-o-Lantern Craftivity Now!
Please Share This Jack-o’-Lantern Craft
If this paper plate pumpkin put a smile on your face, I’d love if you’d share it! Pin it to your Halloween crafts board on Pinterest or pass it along to a friend looking for kid-friendly seasonal fun. Your shares keep this site growing, and I’m so grateful.


