
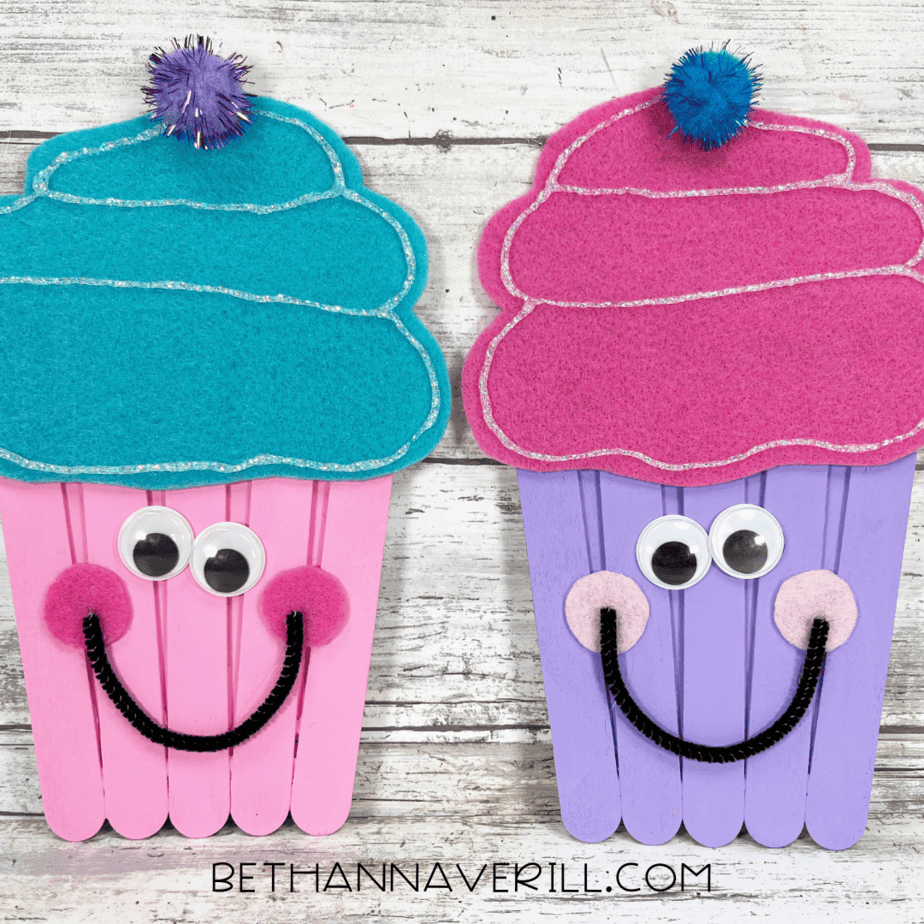
Cupcake Craft Stick Project
There are crafts. And then there are cupcake crafts with googly eyes, glitter glue, and pom-pom cherries that practically scream, “I am adorable and you cannot resist me.”
This cupcake craft stick project is equal parts cute, colorful, and chaotic in the best way. It’s great for party decor, pretend play, or just a rainy day where everyone’s a little too wired for their own good. No baking required – just glue, paint, and the commitment to making your cupcake smile.

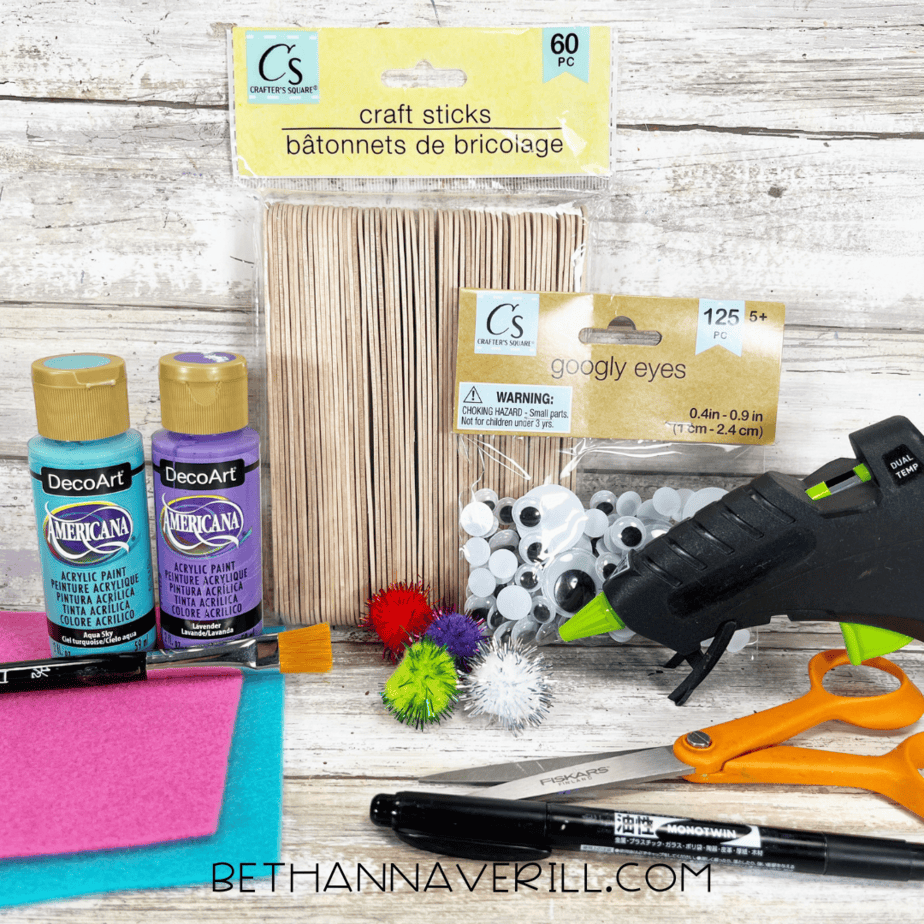
What You'll Need for This Cupcake Popsicle Stick Craft
- Jumbo craft sticks
- Wiggle eyes
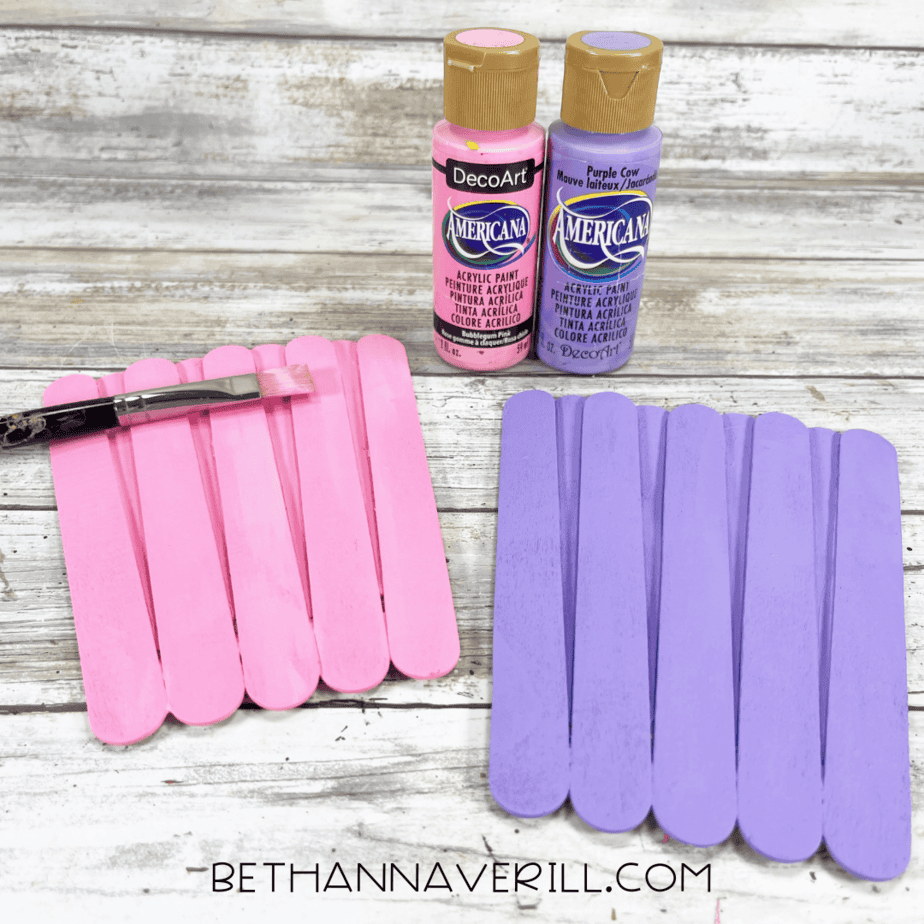
- Acrylic craft paint – bright pink, lavender
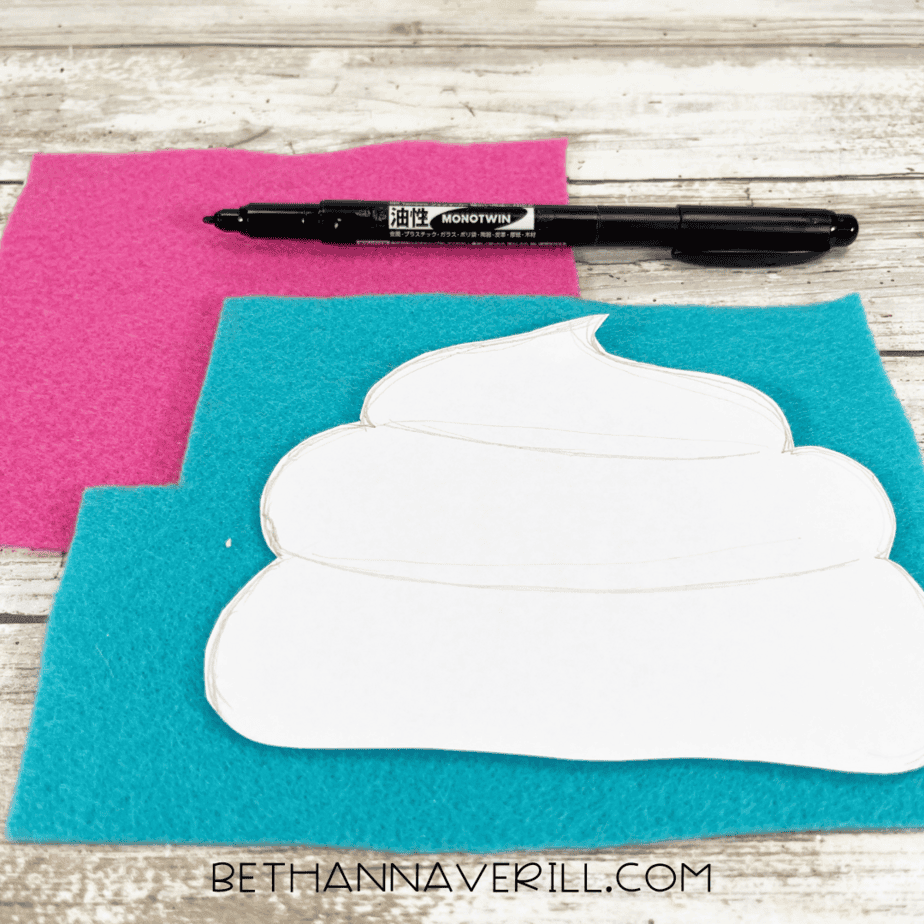
- Craft felt – bright blue, light pink, bright pink
- Pom poms
- Black chenille stem
- Iridescent glitter glue
- Scissors
- Paintbrush
- Black marker
Gather your supplies, say a quick goodbye to any surface you thought was clean, and let’s get crafting.
How to Make a Craft Stick Cupcake
Ready to get crafting? Find the instructions below!
Cupcake Craft Stick Project

Craft this adorable cupcake out of jumbo craft sticks, felt, and glitter glue! A fun and easy project for kids that’s perfect for pretend play or party decor.
Materials
- Jumbo craft sticks
- Wiggle eyes
- Bright pink acrylic craft paint
- Lavender acrylic craft paint
- Bright blue felt
- Light pink felt
- Bright pink felt
- Pom poms
- Black chenille stem
- Iridescent glitter glue
- Black marker
Tools
- Scissors
- Paintbrush
Instructions
- Gather your supplies.
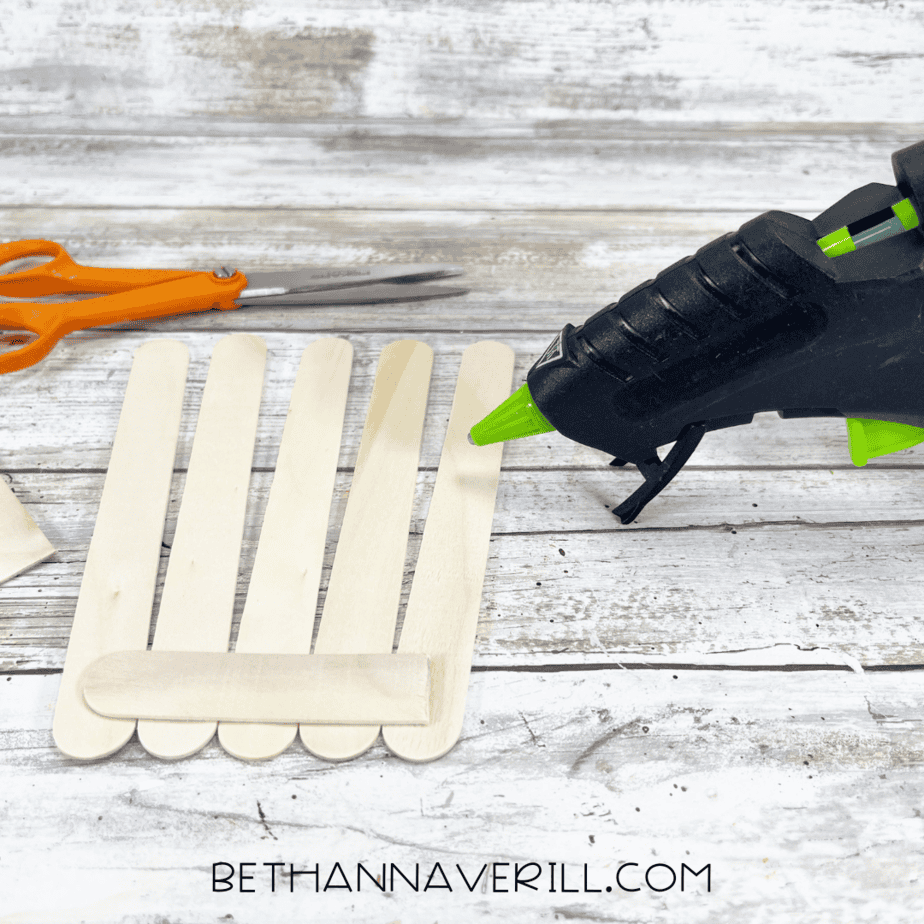
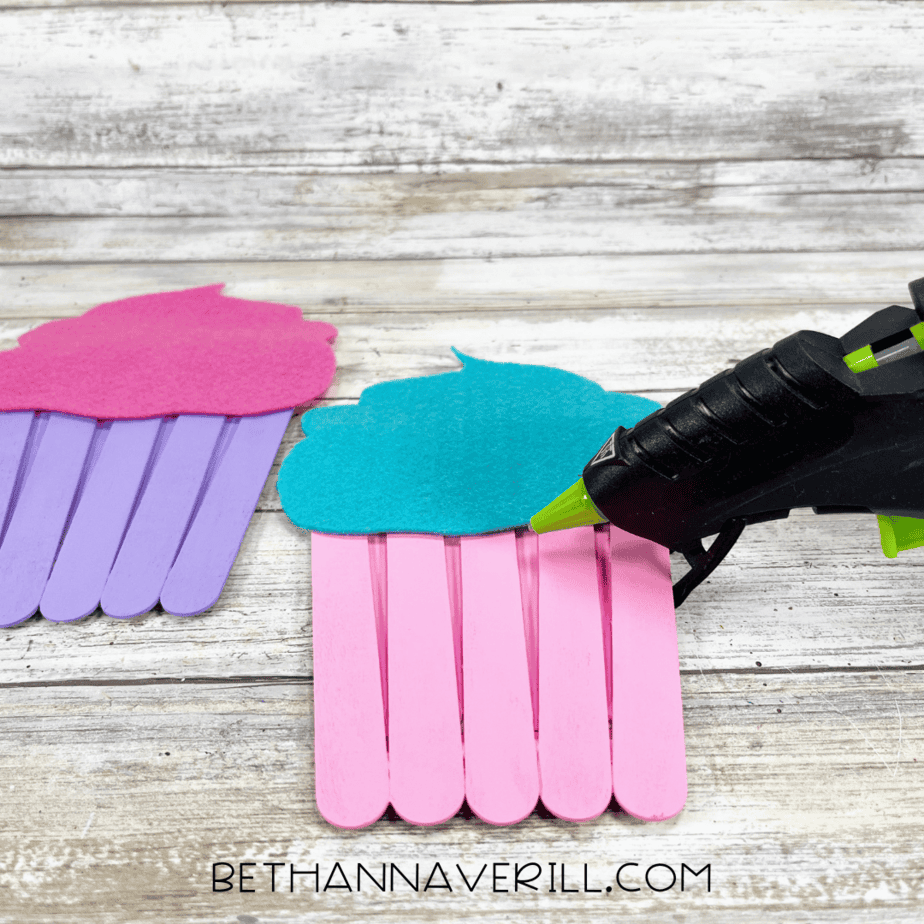
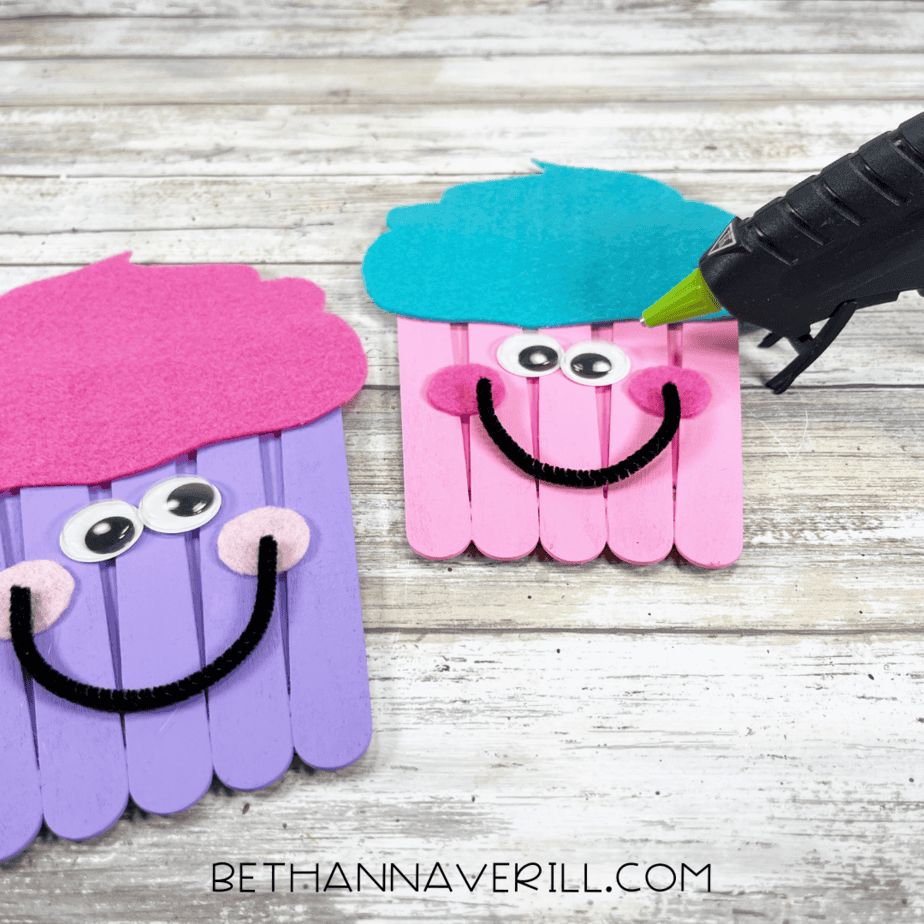
- Fan out five jumbo craft sticks with space in between. Trim one more stick to size and glue it across the bottom to hold them all together. (Yes, it looks like a fence. No, it won’t stay that way.)
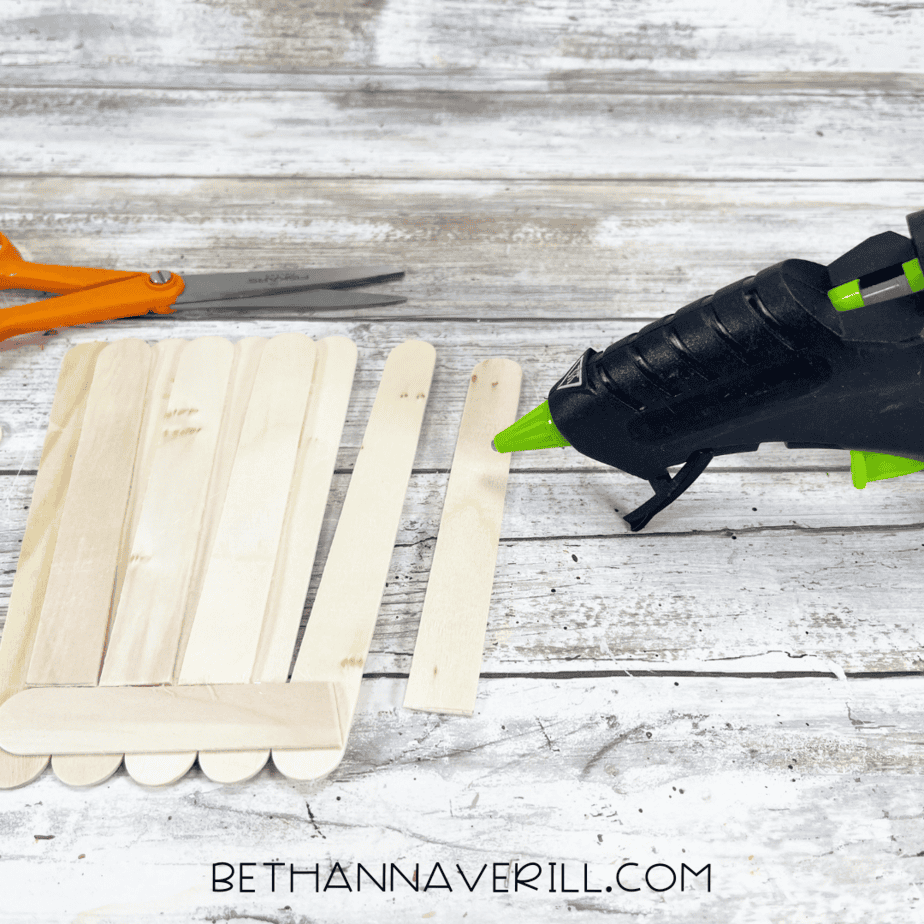
- Cut four more sticks to fit in the gaps and glue them in place. Then glue one more trimmed stick across the top to finish the cupcake base.
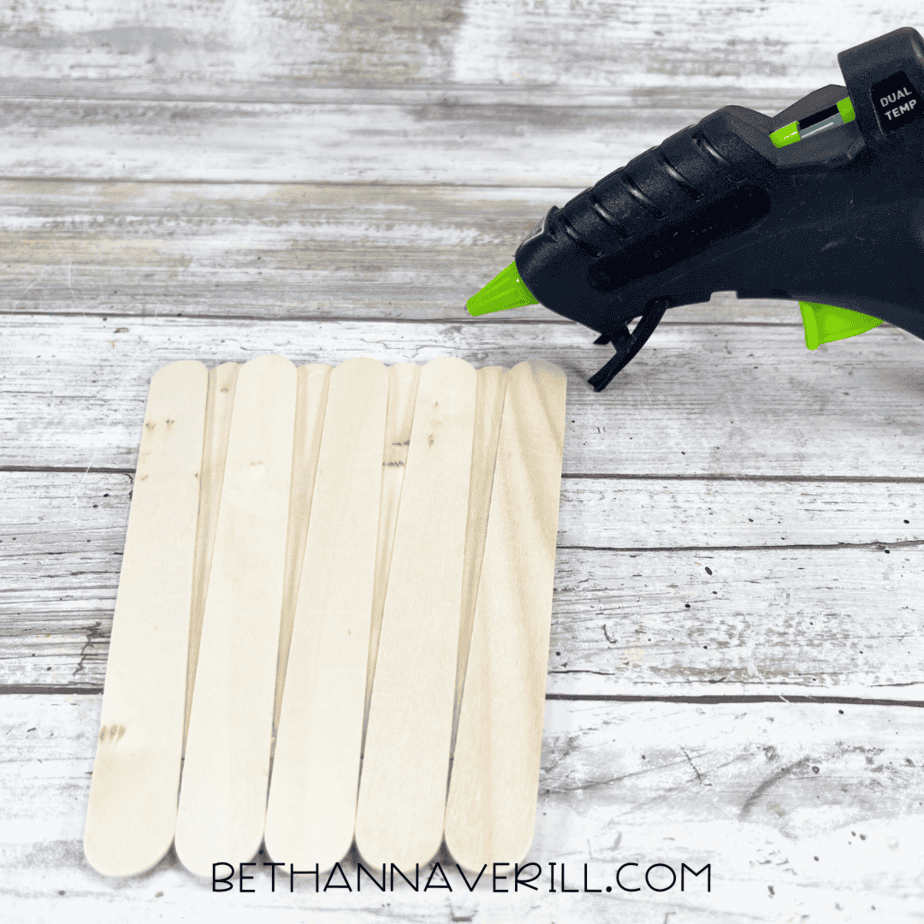
- Paint the base in your color of choice—bright pink or lavender both work beautifully. Let it dry, or at least pretend to let it dry before the kids start adding things anyway.
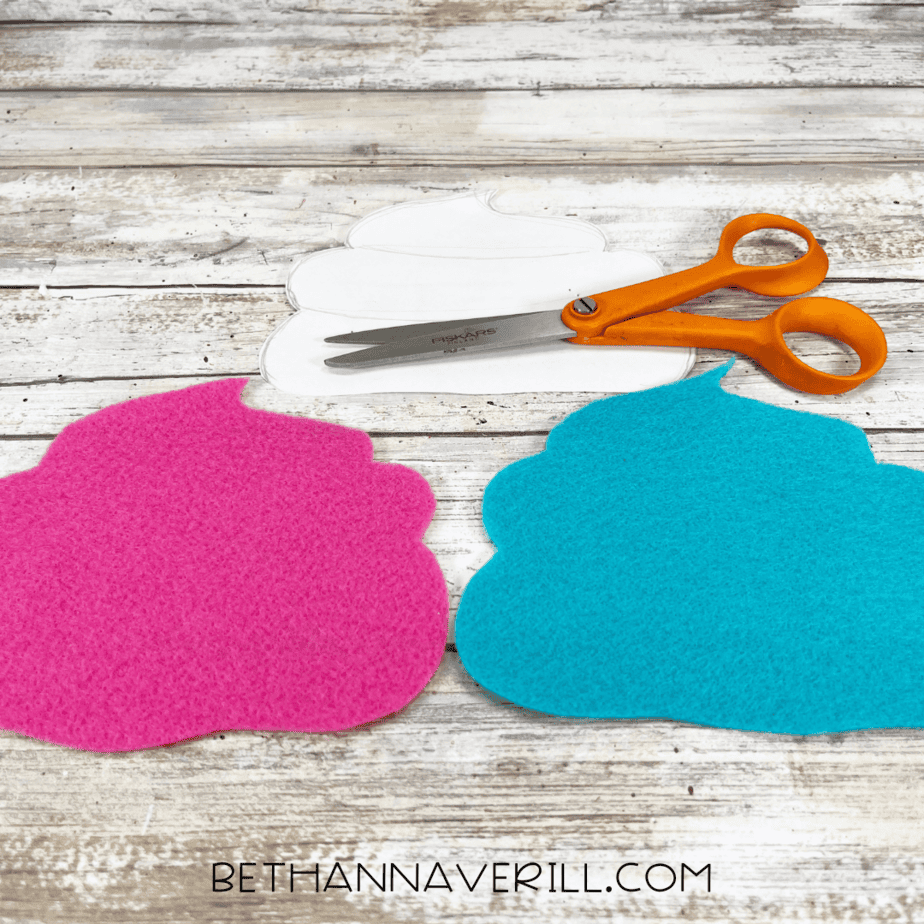
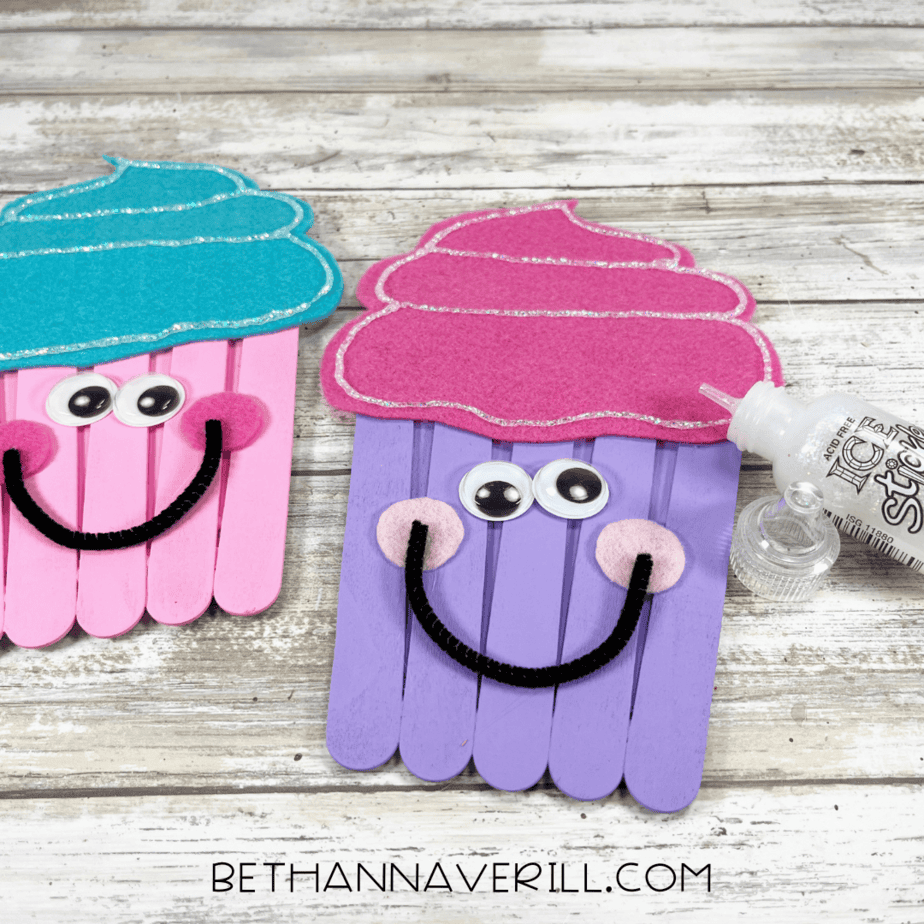
- Trace and cut your frosting from bright blue or pink felt. The more dramatic the frosting, the better. You’re making fashion frosting here.
- Glue the frosting to the cupcake top like it’s decorated in the cutest way possible.
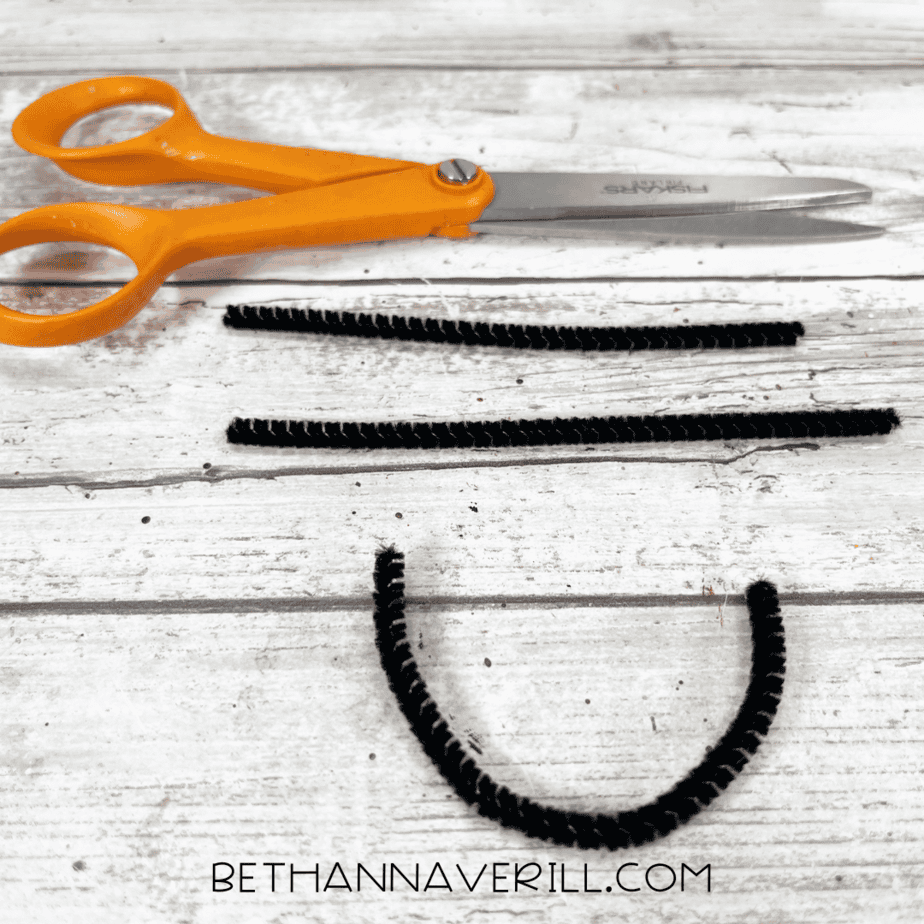
- Glue it all down, then cut a chenille stem into a U-shape and glue on a little smile. You now have an emotionally stable cupcake.
- Cut out two felt cheeks (light or bright pink) and dry fit them with the wiggle eyes to make sure your cupcake looks friendly, not slightly haunted.
- Outline the frosting in glitter glue, because sometimes you just need a little sparkle to feel something. Let it dry completely (a cruel but necessary wait).
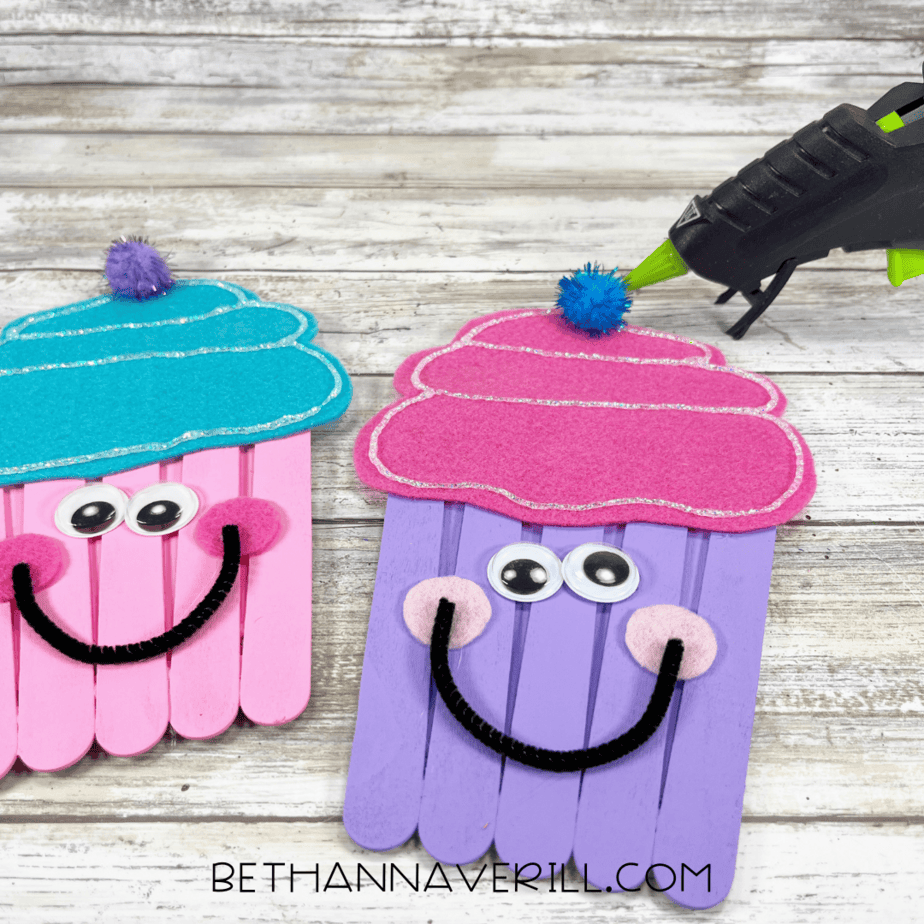
- Finish it off with a big fluffy pom-pom “cherry” on top. Optional: give it a name. Ours is Cupcake Carla.
- Hang your finished massterpiece on display!
Recommended Products
As an Amazon Associate and member of other affiliate programs, I earn from qualifying purchases.


How to Use Your Cupcake (Other Than Staring at It in Awe)
This is more than a craft, it’s a versatile little cupcake with big main character energy. Here’s how to let it shine:
1. Make party place cards – Add a name to the cupcake base and plop it at each seat. Instant cuteness. No fondant required.
2. Use them in pretend play – Kids can run their own bakery, complete with felt donuts and painted macarons if you’re feeling wild.
3. Tie it into a baking theme – Craft cupcakes, then bake real ones. Pair it with a picture book like “If You Give a Cat a Cupcake” and you’ve got a full activity plan that feels suspiciously educational.
4. Display it proudly – These look amazing hanging on a classroom bulletin board, strung as a garland, or stuck to the fridge as a gentle reminder that crafts > chores.
If this made you smile, you’ll love our full collection of popsicle stick crafts for kids or dive into more creative sweetness with our pretend food crafts.
Please Share This Cupcake Craft Stick Project
Your shares are how this site grows and I am sincerely grateful. Know a friend who’d like this? Please share it on Facebook or save it to your favorite kids’ activity board on Pinterest.


