
Yeti Paper Plate Craft
If your kids are deep in their “everything needs to be fluffy and mildly ridiculous” era, this yeti paper plate craft is exactly the kind of winter fun they’ll fall in love with. Big googly eyes? Check. Cotton-ball fur they can’t resist squishing? Double check. Horns that make him look like he’s late for a snowball party? Absolutely.
It’s simple, it’s adorable, and it turns into one of those crafts kids proudly parade around the house like they just adopted a baby yeti. Let’s grab a few supplies and make some snowy magic!

Materials You’ll Need for This Yeti Paper Plate Craft
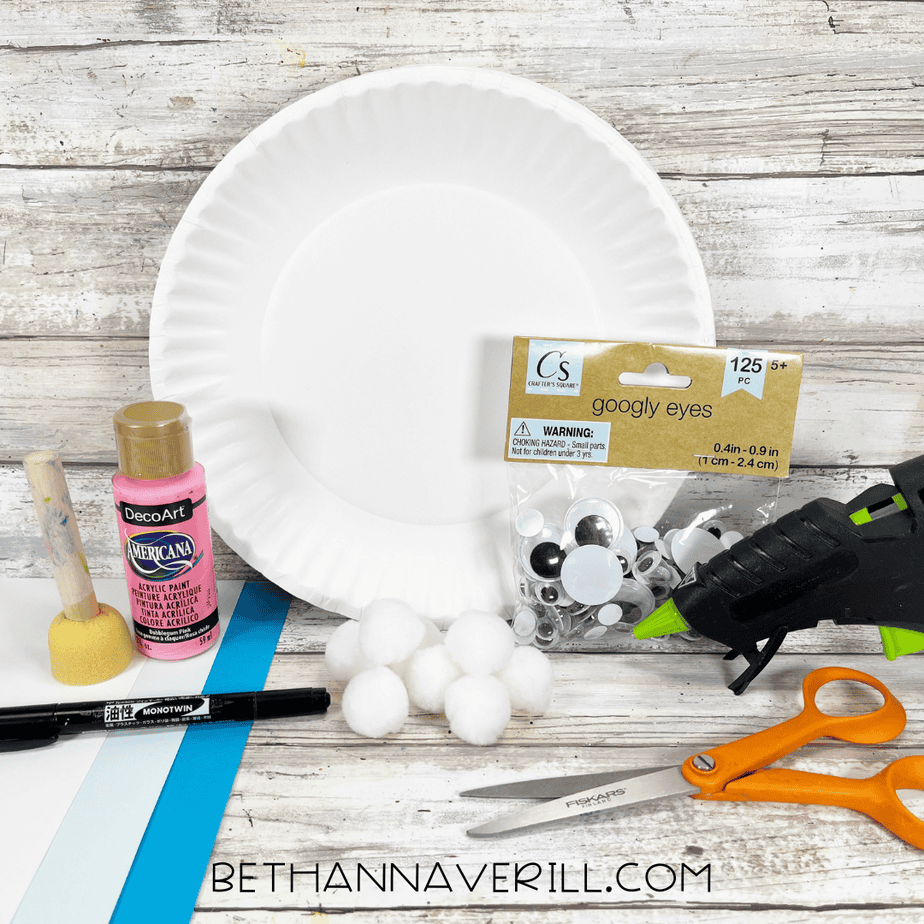
Gather your supplies before you start building this fluffy little snow monster:
- Paper plate
- Wiggle eyes
- Cotton balls
- Bright blue, light blue, and white cardstock
- Light blue craft paint
- Glue gun and glue sticks
- Paintbrush
- Scissors
- Pencil
- Black permanent marker
- White paint marker
- Yeti template patterns

How to Make This Yeti Paper Plate Craft
Ready to get crafting? Find the instructions below!
Yeti Paper Plate Craft

Make this adorable yeti paper plate craft using cotton balls, cardstock, and a simple printable template. A fun winter craft for kids that’s easy to set up and perfect for classroom or at-home activities. Kids will love building their own fluffy snow monster!
Materials
- Paper Plate
- Wiggle Eyes
- Cotton Balls
- Cardstock – Bright Blue, Light Blue, White
- Craft Paint, Light Blue
- Glue Gun and Glue Sticks
- Pencil
- Permanent Marker, Black
- Paint Marker, White
Tools
- Paintbrush
- Scissors
Instructions
- Gather all supplies.
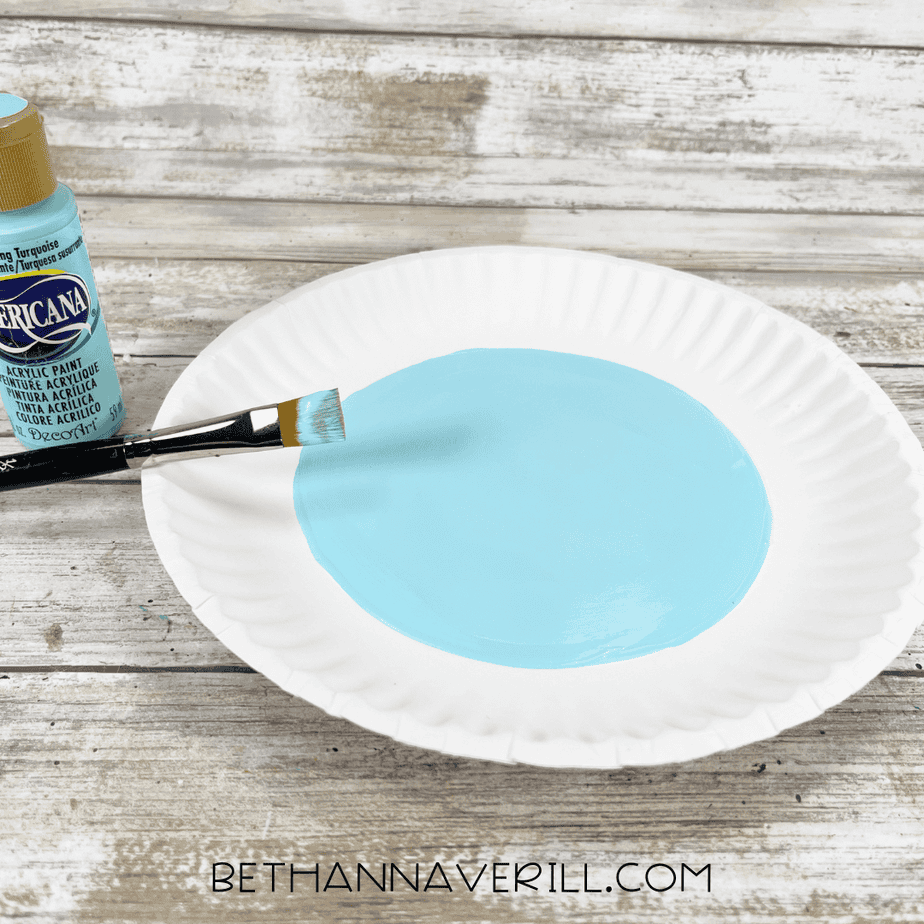
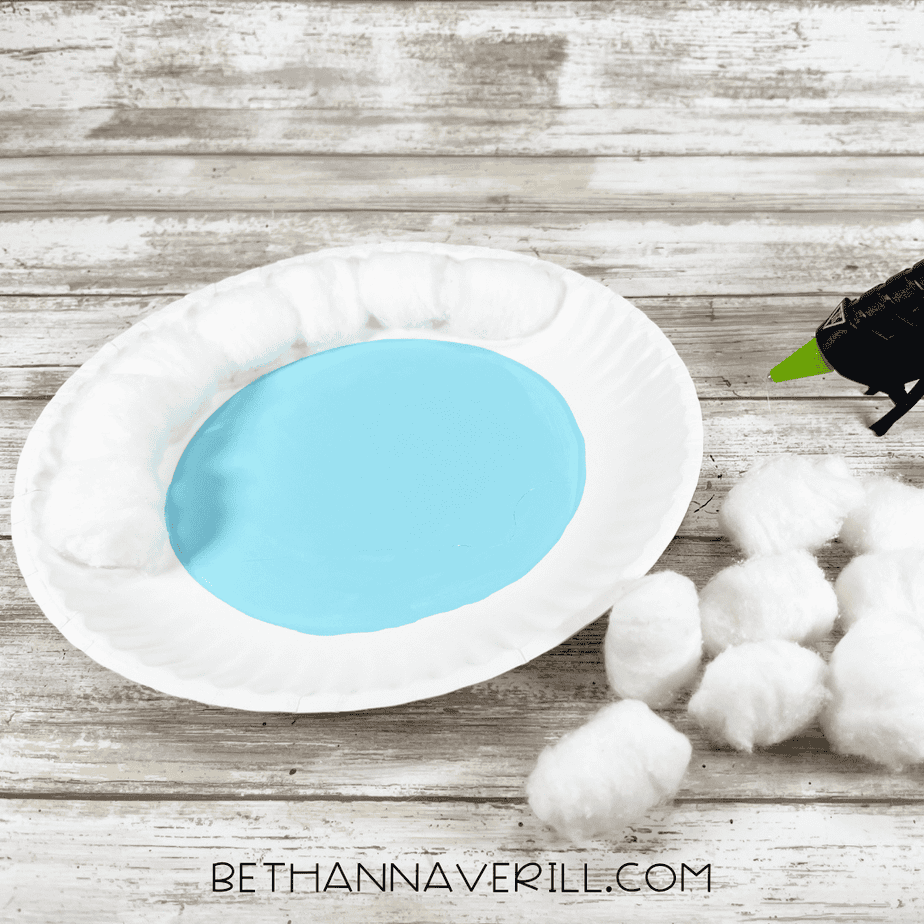
- Paint the inside circle of the paper plate with light blue acrylic craft paint. Set aside to dry and apply a second coat, if necessary.
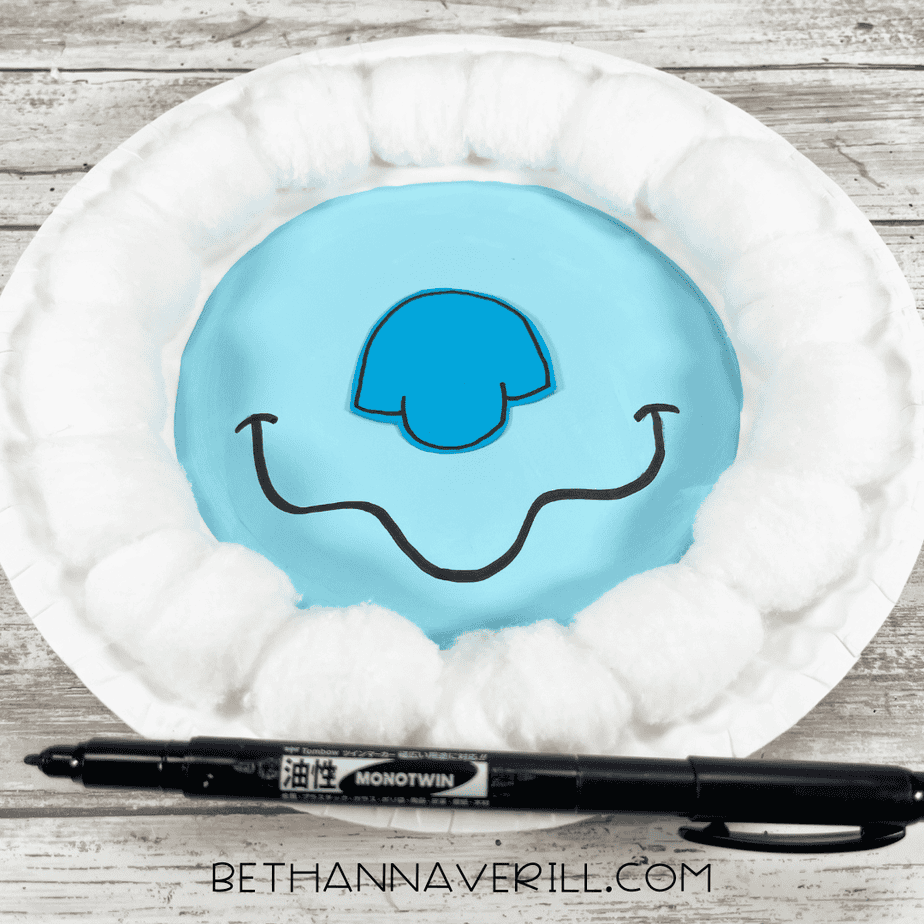
- Download and print the yeti patterns, then cut out with scissors. Trace the nose once and the horns twice onto bright blue cardstock. Cut small triangles from white cardstock for teeth.
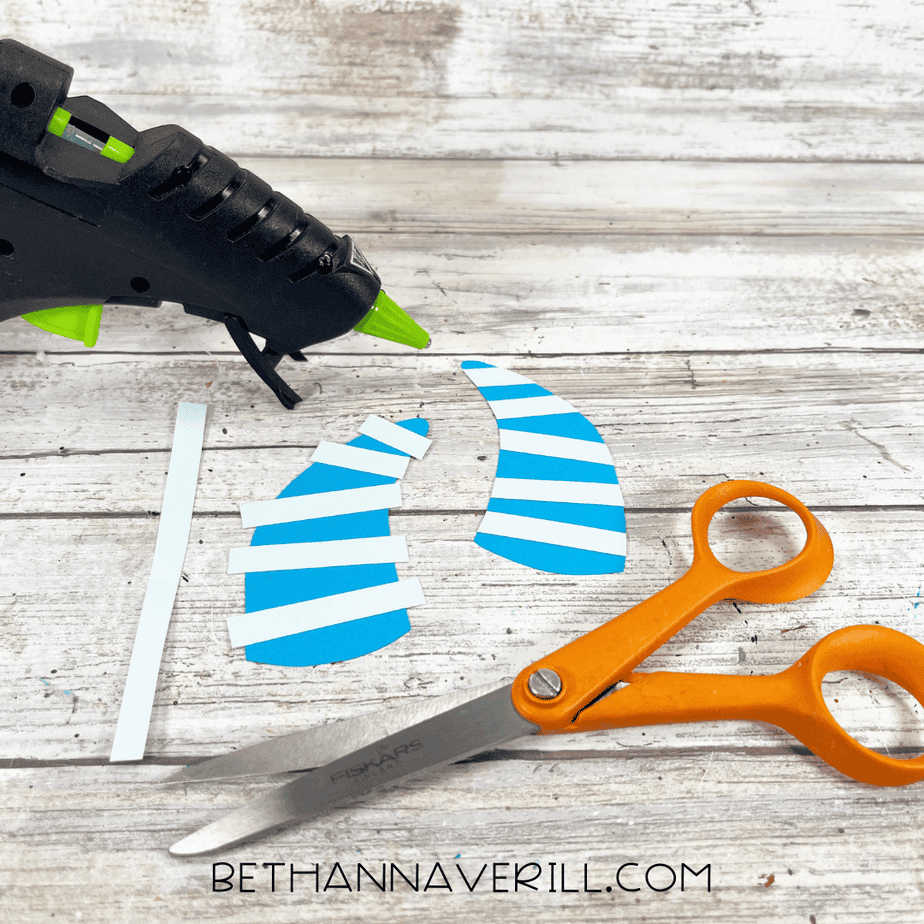
Cut six strips of light blue cardstock as an accent for the horns. You could also use colored craft foam, construction paper, or craft felt for this project.
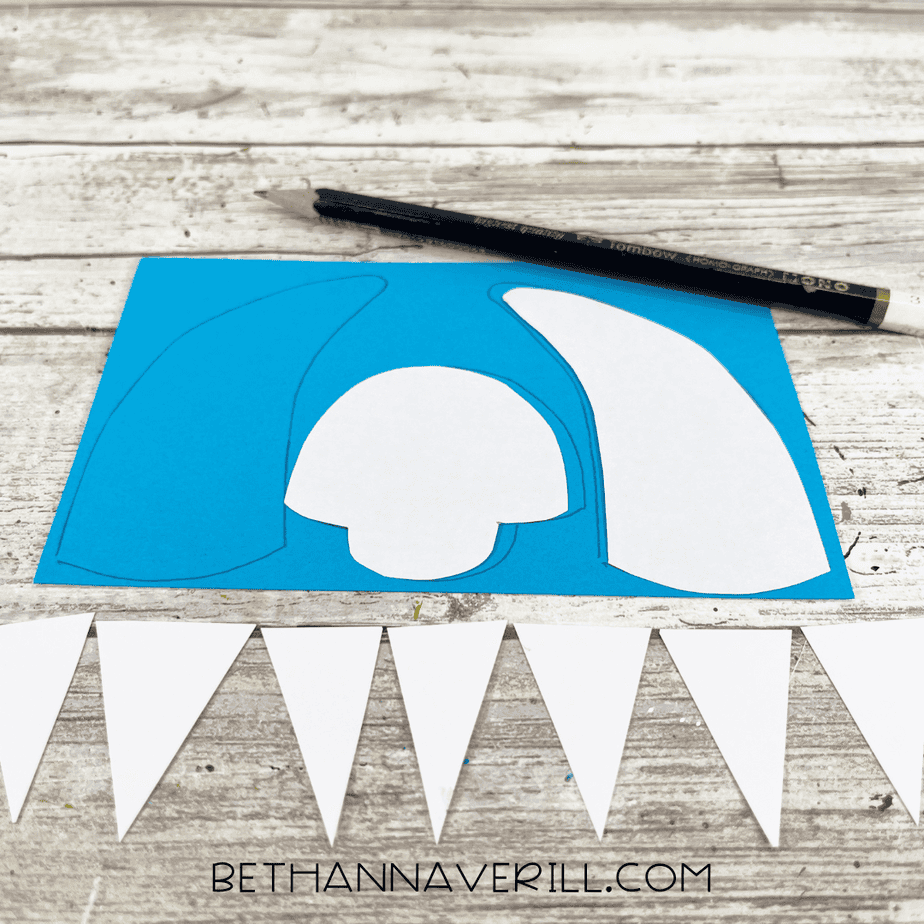
- Cut out the yeti patterns with scissors making sure to cut inside the traced lines for a clean, finished project.
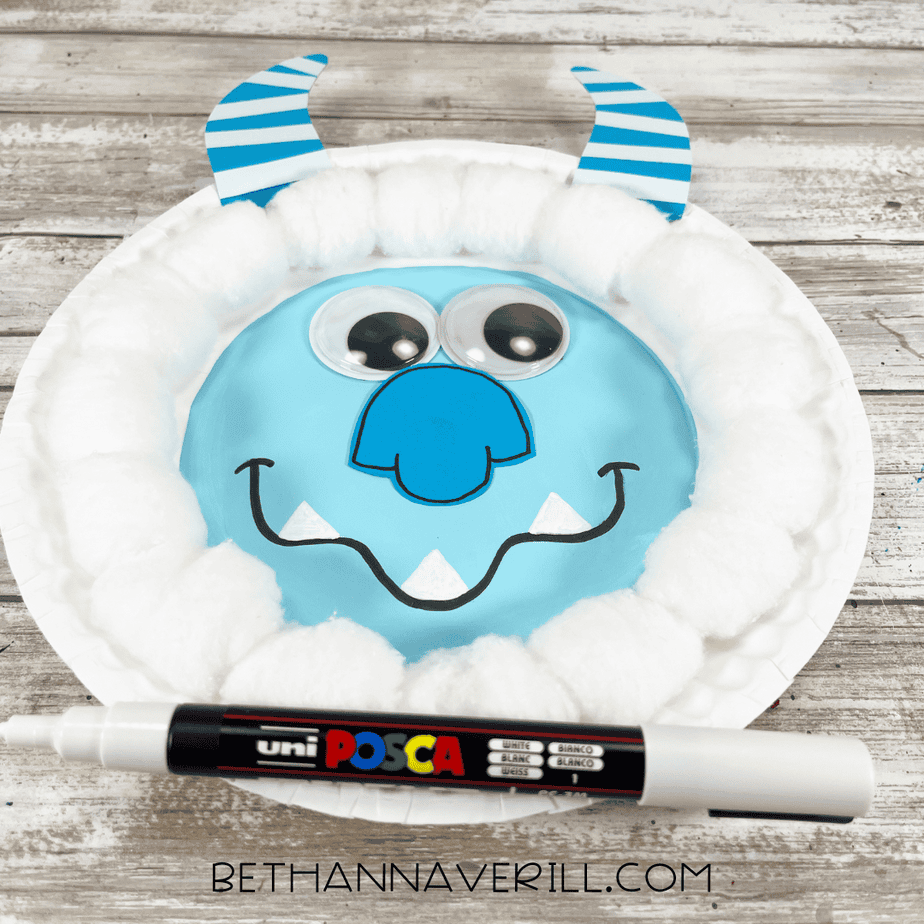
- Attach the strips of light blue cardstock to the horns with a glue gun and glue sticks. Trim any excess cardstock with scissors.
- Attach a row of cotton balls to the edge of the paper plate with a glue gun and glue sticks.
- Using a black marker, draw a crooked smile, and outline the yeti’s nose. Glue the nose to the center of the yeti’s face. TIP: You can use liquid craft glue for this project, but you will have to wait for it to dry.
- Attach the horns to the top right and left with a glue gun and glue sticks. Then glue two wiggle eyes above the nose.

- To finish, draw teeth on the yeti’s mouth with a white paint pen. You can also glue white cardstock teeth to the mouth.
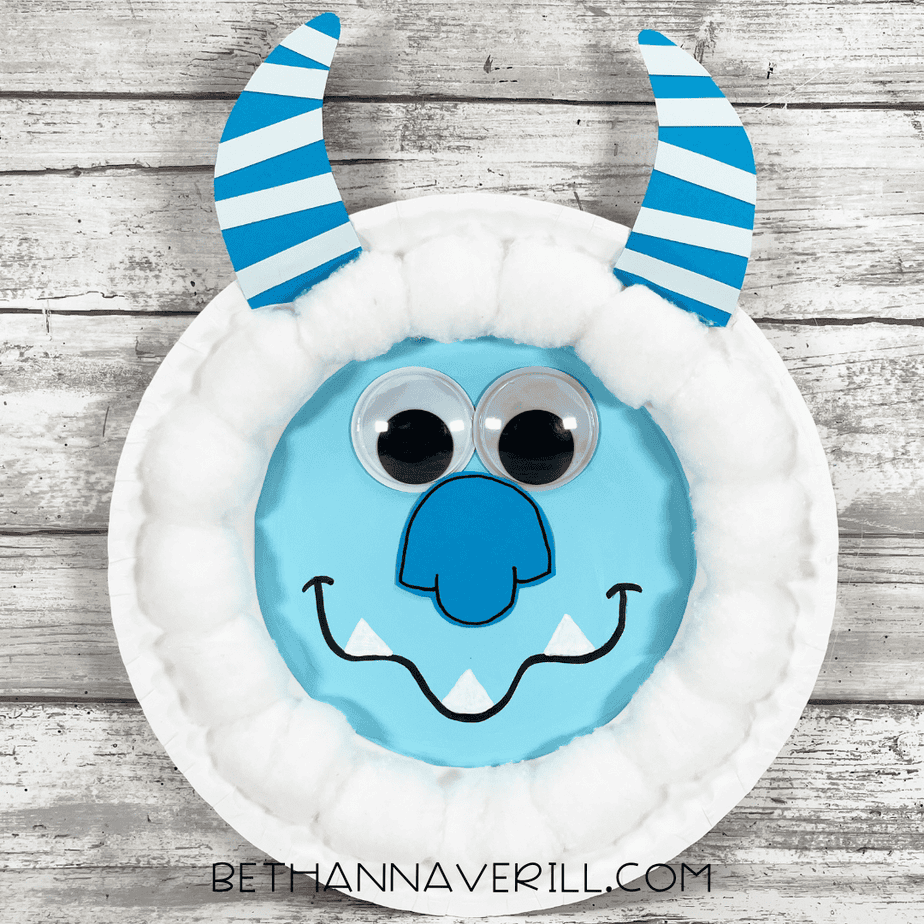
- Hang your finished yeti on display!
Recommended Products
As an Amazon Associate and member of other affiliate programs, I earn from qualifying purchases.


Why Kids Will Love This Yeti Paper Plate Craft
This yeti paper plate craft brings a burst of winter fun right to the craft table. It’s fluffy, friendly, and just open-ended enough for kids to give their yeti its own personality.
Here’s why it’s always a hit:
- It’s creative and hands-on. Painting, gluing, and building that fluffy fur keeps little hands busy.
- It’s full of character. Big googly eyes and soft cotton-ball fuzz make every yeti look a little different.
- It’s display-ready. Perfect for winter bulletin boards, bedroom doors, or anywhere a cute snow monster belongs.
No complicated steps, no mess storms…just a simple winter craft that turns out adorable every single time.
Get This Paper Plate Yeti Craftivity Now!
Use code YETI at checkout to get 25% off.
Please Share This Yeti Paper Plate Craft
If your kiddo had a blast creating this fluffy little snow monster, please share it! Add it to your favorite winter craft board on Pinterest or pass it along to a friend or teacher planning seasonal activities. Every share helps more families discover simple, creative fun all winter long.


