
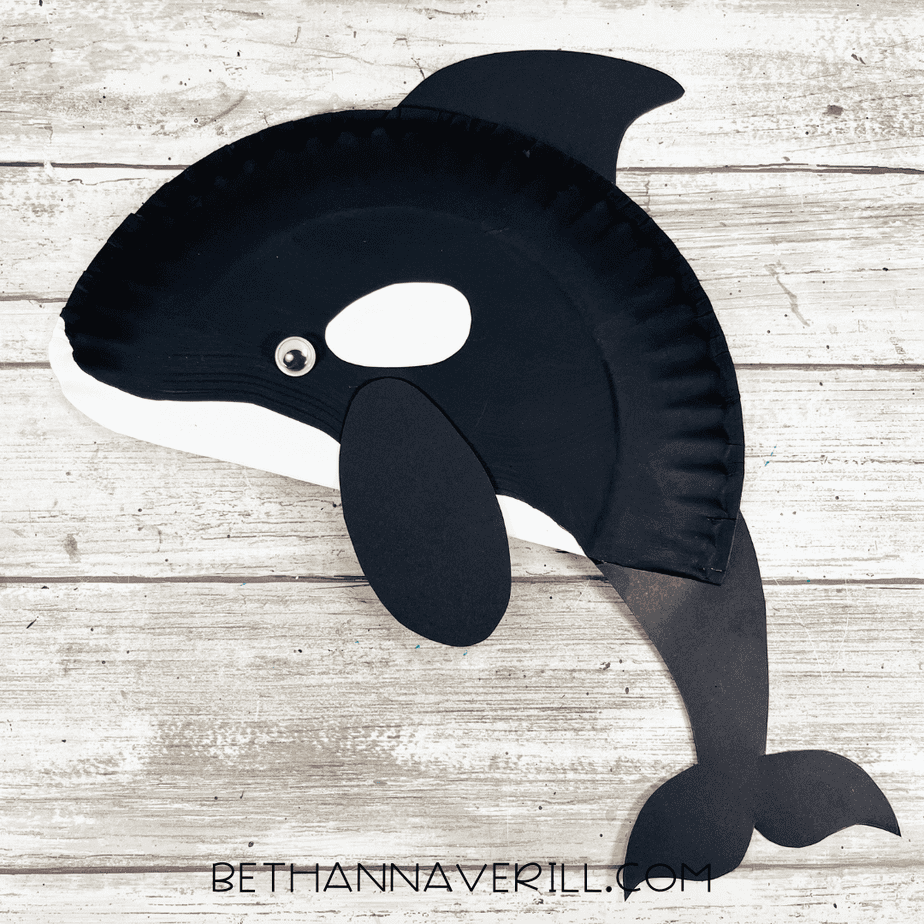
Orca Paper Plate Craft
There’s something about turning a plain paper plate into a bold, black-and-white orca paper plate craft that instantly pulls kids in. Maybe it’s the giant fin, maybe it’s the googly eye, or maybe it’s just the magic of watching a circle become a whole whale…but my kids were so into this one.
This craft hits that perfect sweet spot: simple shapes, big motions, lots of paint, and just enough “ooh!” moments to keep even the wiggle-worms glued to the table. And once the orca is finished? Cue the ocean sound effects and the dramatic swooshing around the room.
If you need a winter-themed craft that’s easy, adorable, and guaranteed to spark pretend play, this little whale is ready to make a splash.

Materials for Your Orca Paper Plate Craft
Grab everything you need before you start so your orca comes together smoothly without any mid-craft scrambling.
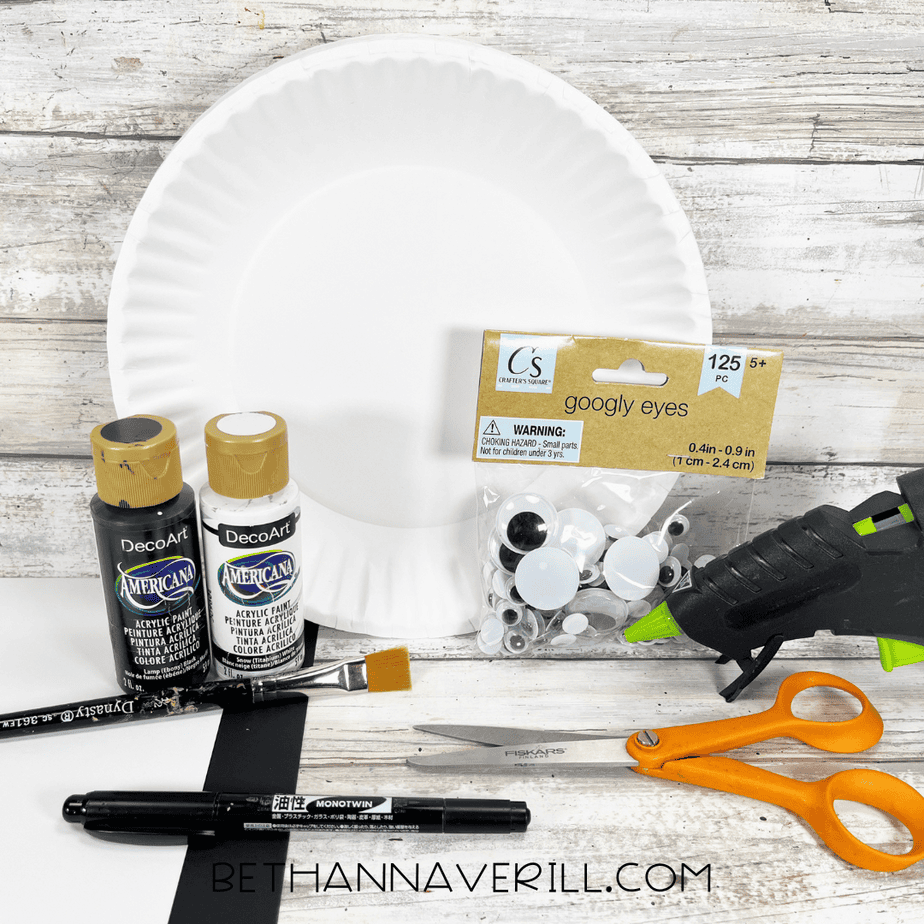
- Paper Plate
- Wiggle Eye
- Cardstock – Black and White
- Craft Paint – Black
- Glue Gun and Glue Sticks
- Paintbrush
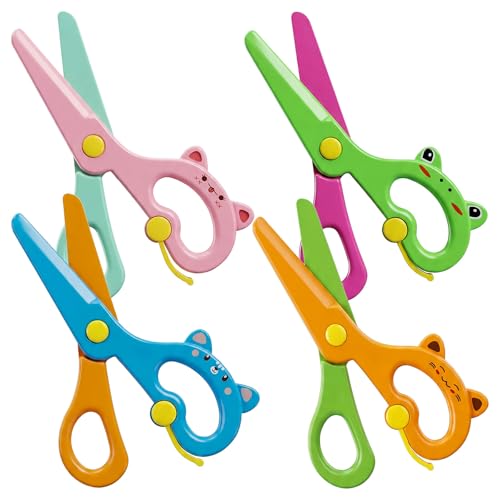
- Scissors
- Pencil
- Orca Pattern

How to Make This Paper Plate Orca Craft
Ready to get crafting? Find the instructions below!
Orca Paper Plate Craft

Make this bold black-and-white orca paper plate craft using easy cardstock pieces and a simple pattern. A fun winter or ocean-themed activity that builds fine motor skills and comes together quickly.
Materials
- Paper Plate
- Wiggle Eye
- Cardstock – Black and White
- Craft Paint – Black
- Glue Gun and Glue Sticks
- Pencil
- Orca Pattern
Tools
- Paintbrush
- Scissors
Instructions
- Gather all supplies.
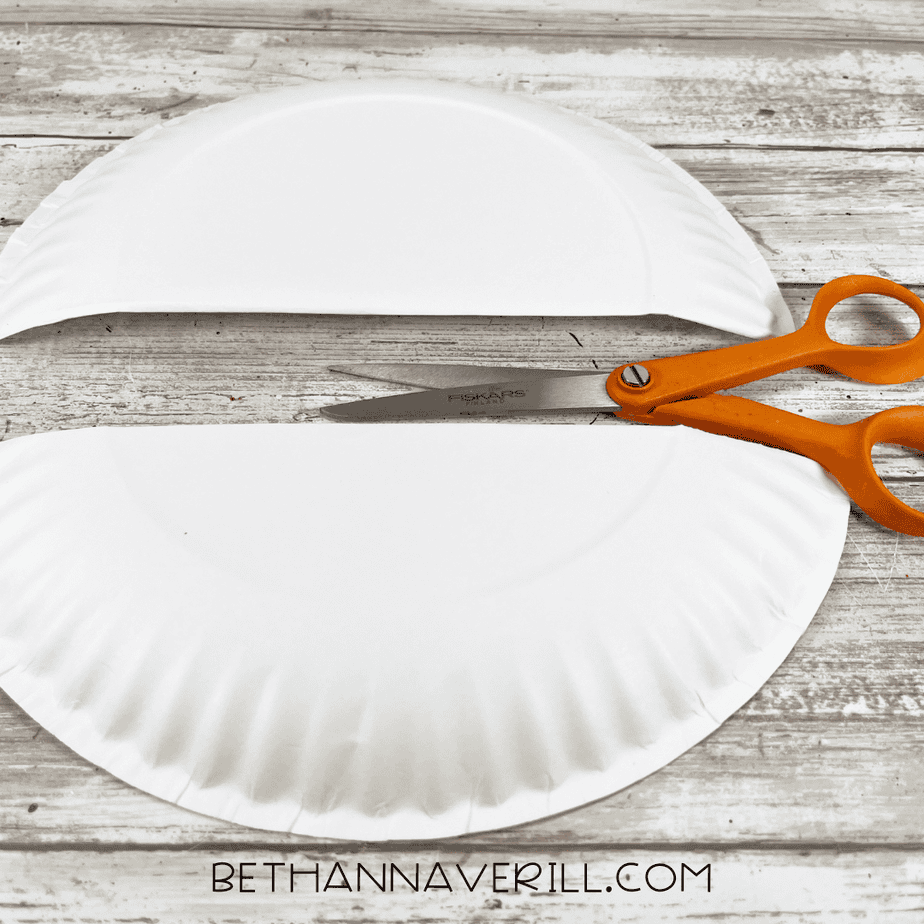
- Fold the paper plate sothe bottom edge meets the top edge of the circular indent and score firmly. Cut the paper plate with scissors along the folded line.
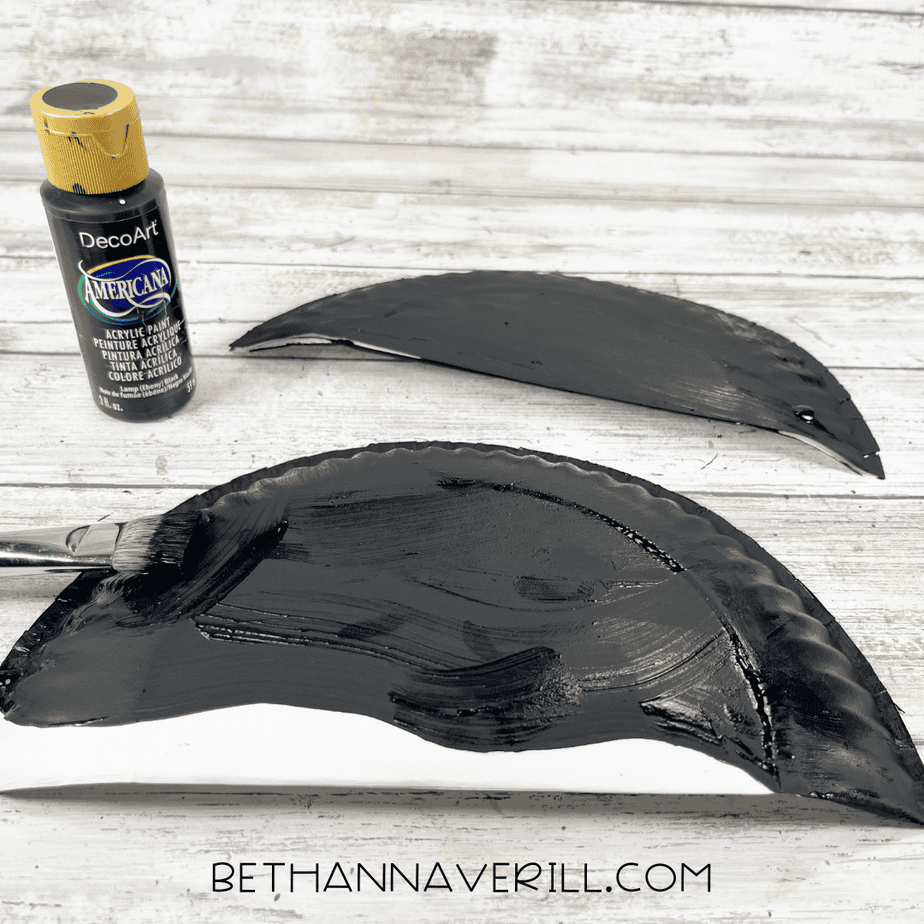
- Download and print the orca pattern, then cut out with scissors. Trace the orca body detail onto the outside of the larger section of the paper plate with a pencil.
- Paint the outside of the paper plate with black acrylic craft paint following the orca pattern. Set aside to dry and apply a second coat, if necessary.
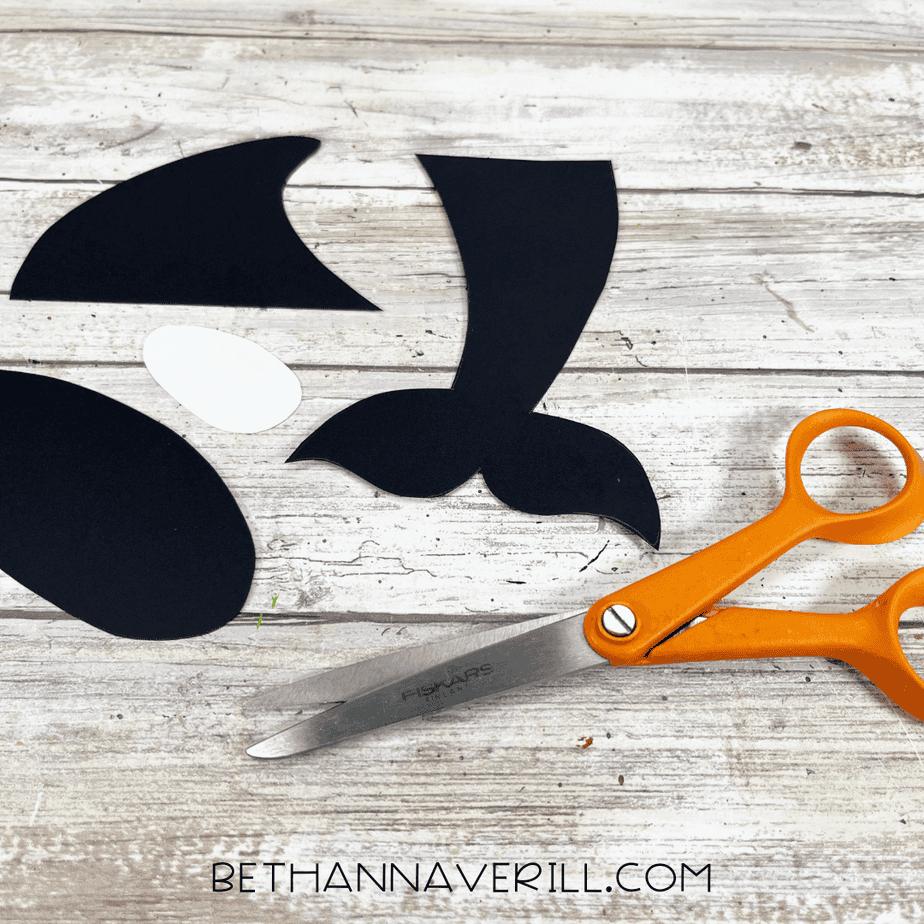
- Trace the tail fluke, dorsal fin, and pectoral fin once onto black cardstock. Trace the eye patch pattern once onto white cardstock with a pencil. You could also use colored craft foam, construction paper, or craft felt for this project.
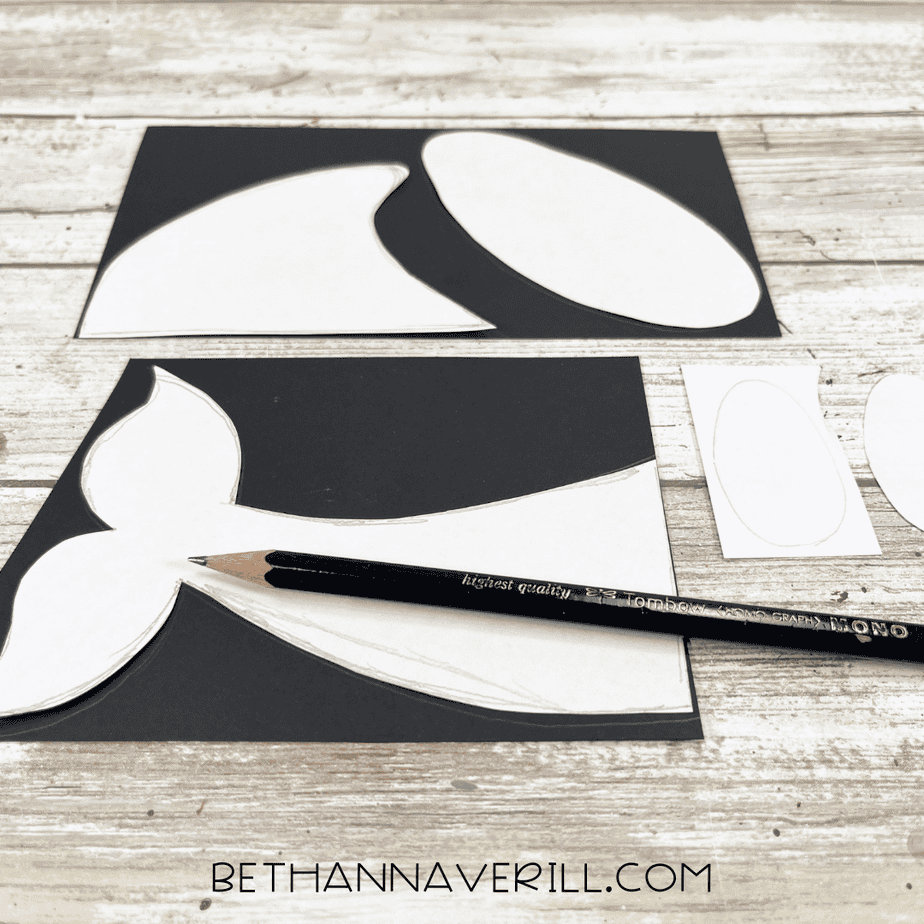
- Cut out the patterns with scissors making sure to cut inside the traced lines for a clean, finished project.
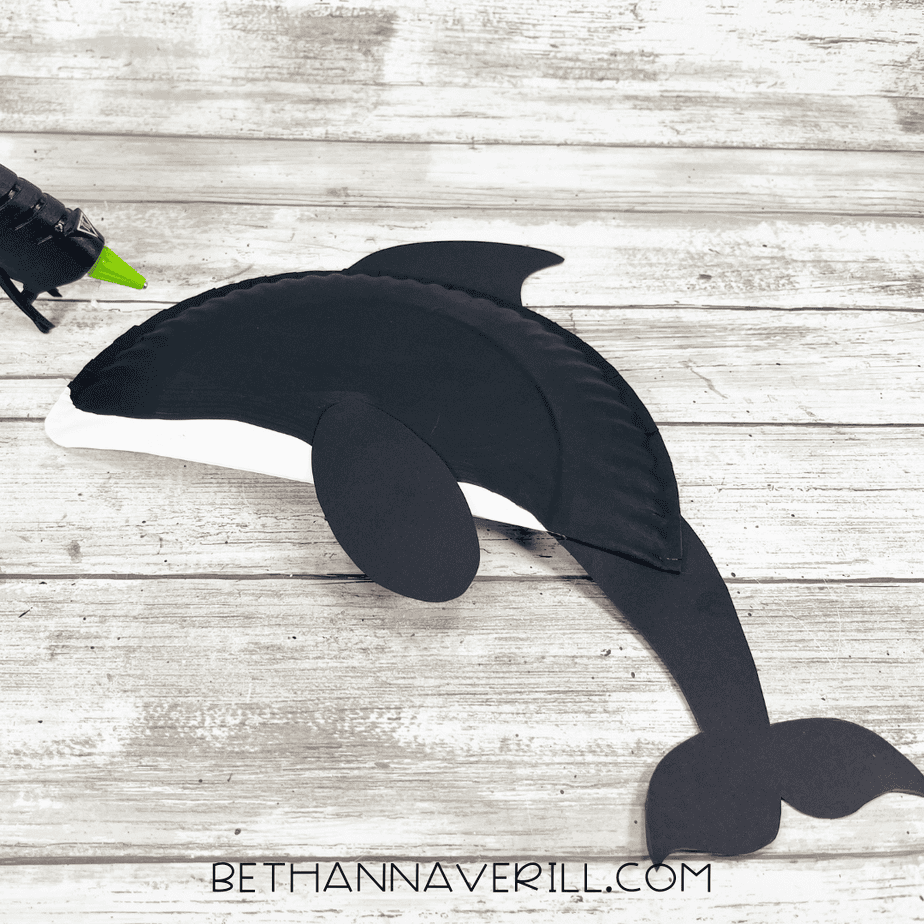
- Attach the tail fluke, dorsal fin, and pectoral fin with a glue gun and glue sticks. TIP: You can use liquid craft glue for this project, but you will have to wait for it to dry.
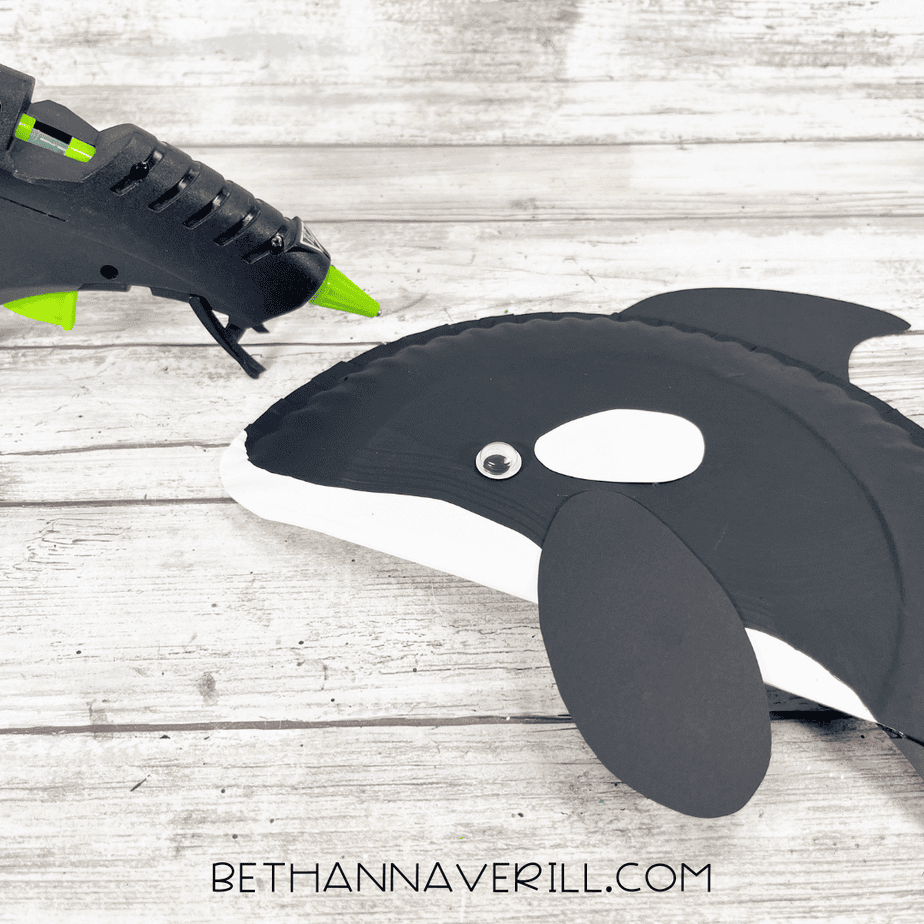
- Attach a wiggle eye and the white eyepatch to the orca’s face with a glue gun and glue sticks.
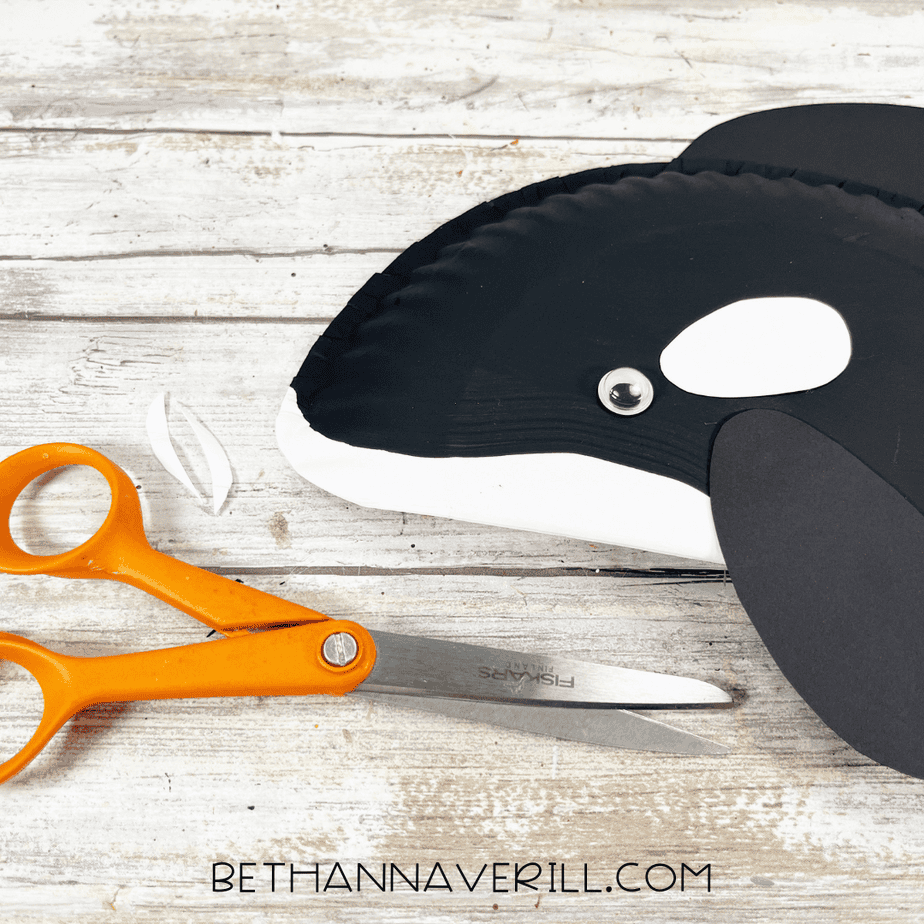
- To finish, trim the right angle of the paper plate into a rounded corner for the orca’s nose/snout.
- Hang your finished orca on display!
Recommended Products
As an Amazon Associate and member of other affiliate programs, I earn from qualifying purchases.


What We Loved About This Orca Paper Plate Craft
This craft ended up being such a fun blend of simple steps and hands-on learning. Painting the plate, trimming the fins, and lining up the black and white shapes gave us plenty of fine motor practice without it ever feeling like “sit down and focus” time. The high-contrast orca design also made it easy for kids to spot where each piece belonged, which turned into great little moments of shape and spatial awareness.
We also loved how naturally it sparked questions! Why are orcas black and white? How do they swim so fast? Do they really live in cold water? Nothing formal or scripted, just the kind of curious chatter that happens when kids are creating and their brains start connecting ideas.
And honestly, watching the orca take shape was the best part. It’s quick, it’s satisfying, and the finished whale has that bold, graphic look that makes it a total standout on the craft shelf.
Snag This Paper Plate Orca Craftivity Now!
Use code ORCA at check out to get 75% off the printable packet.
Please Share This Orca Paper Plate Craft
If you enjoyed making this orca, feel free to share it! Pin it to your favorite craft board or pass it along to another parent or teacher who might need an easy winter or ocean-themed activity. Every share helps more families find simple, creative projects their kids will actually enjoy.


Excellent blog here Also your website loads up very fast