
Walrus Paper Plate Craft
This walrus paper plate craft is such a fun little project, especially if your kids love animals with big personalities. There’s paint, giant tusks, and those dramatic whiskers that somehow end up pointing in every possible direction…which honestly makes the finished walrus even cuter.
It’s simple, it’s quick, and it’s one of those crafts that kids instantly claim as their new favorite because “look at his face!” Grab a paper plate and let’s make a walrus.

Materials You’ll Need for This Walrus Paper Plate Craft
Grab your supplies before you start so you’re not stopping mid-tusk to hunt down a marker:
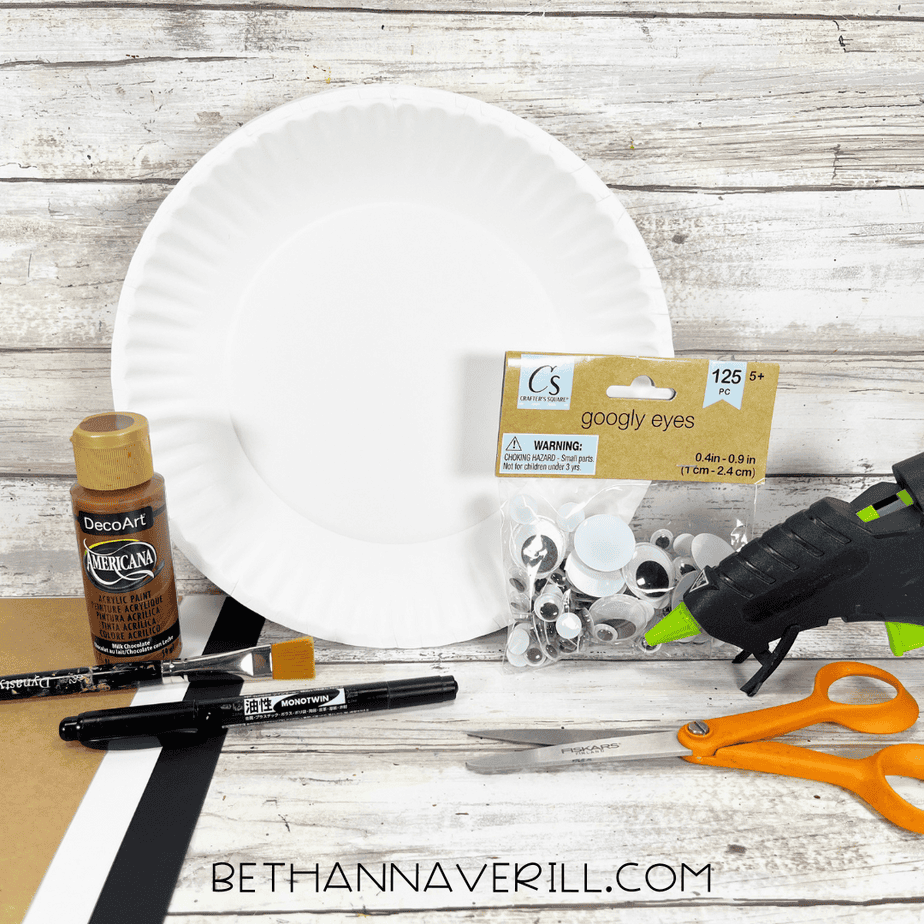
- Paper plate
- Wiggle eyes
- Black chenille stems
- Black, tan, and white cardstock
- Brown craft paint
- Glue gun and glue sticks
- Paintbrush
- Scissors
- Pencil
- Ruler
- Black permanent marker
- Walrus pattern templates

How to Make This Paper Plate Walrus Craft
Ready to get crafting? Find the instructions below!
Walrus Paper Plate Craft

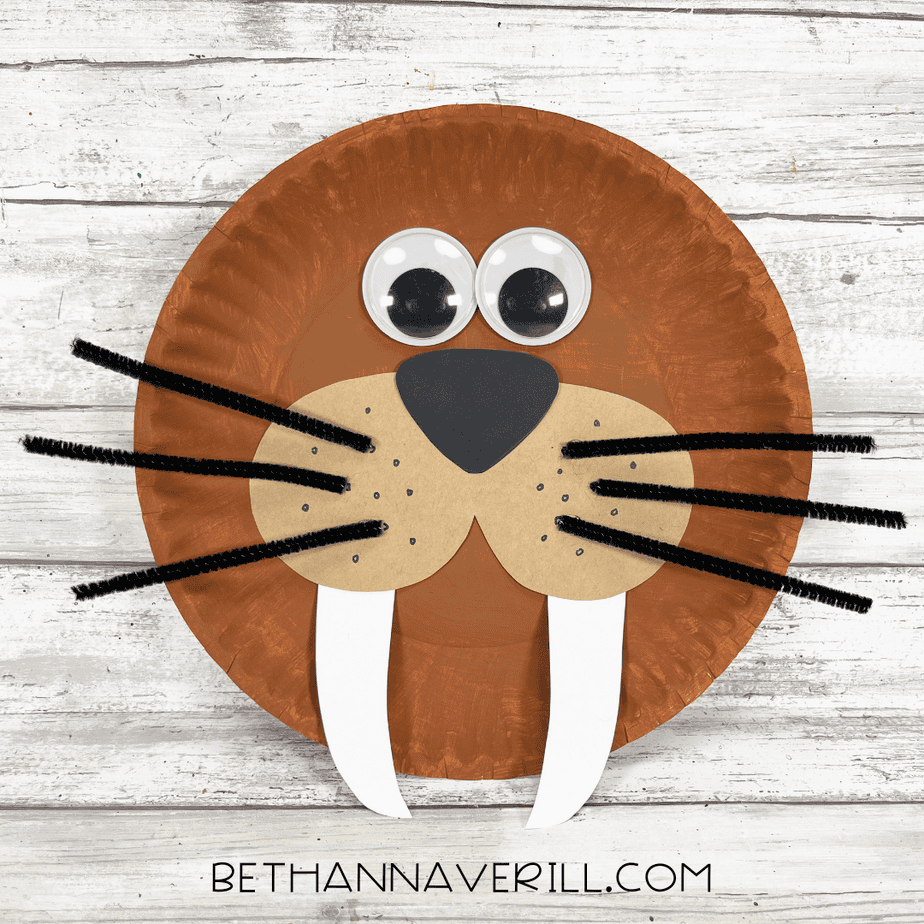
Make this cute walrus paper plate craft using brown paint, cardstock, googly eyes, and fuzzy whiskers. A fun arctic animal project kids can finish quickly and customize with big tusks and silly expressions.
Materials
- Paper Plate
- Wiggle Eyes
- Chenille Stems, Black
- Cardstock, Black, Tan White
- Craft Paint – Brown
- Glue Gun and Glue Sticks
- Pencil
- Ruler
- Permanent Marker, Black
Tools
- Paintbrush
- Scissors
Instructions
- Gather all supplies.
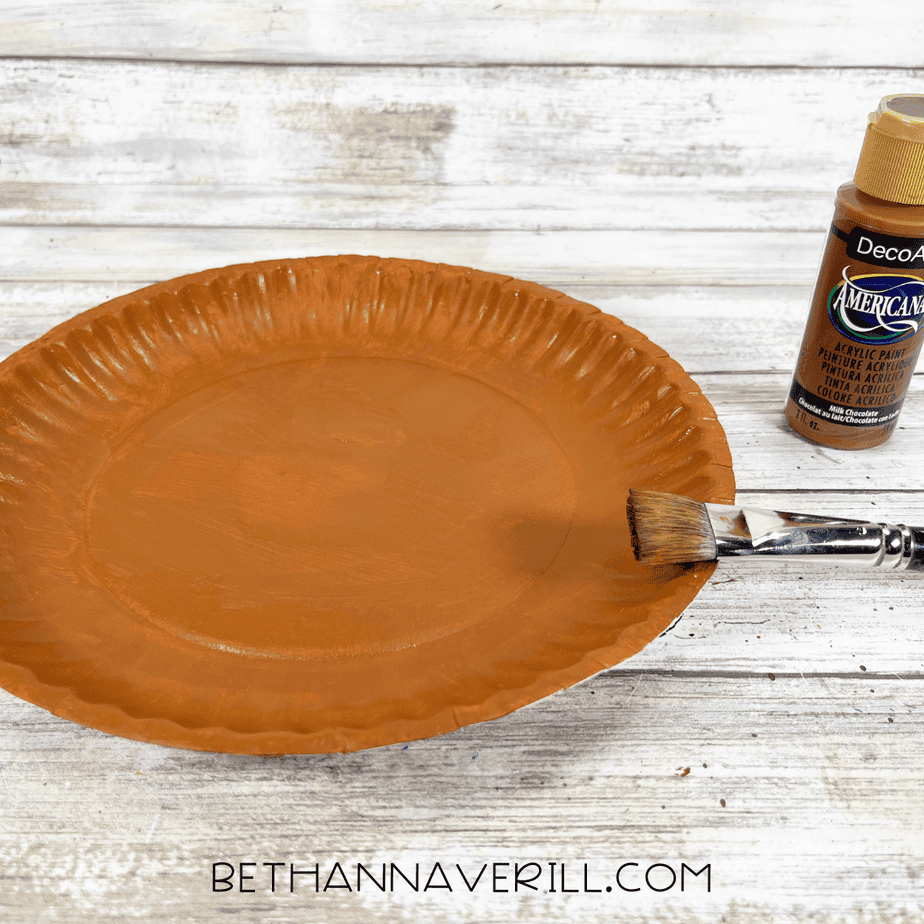
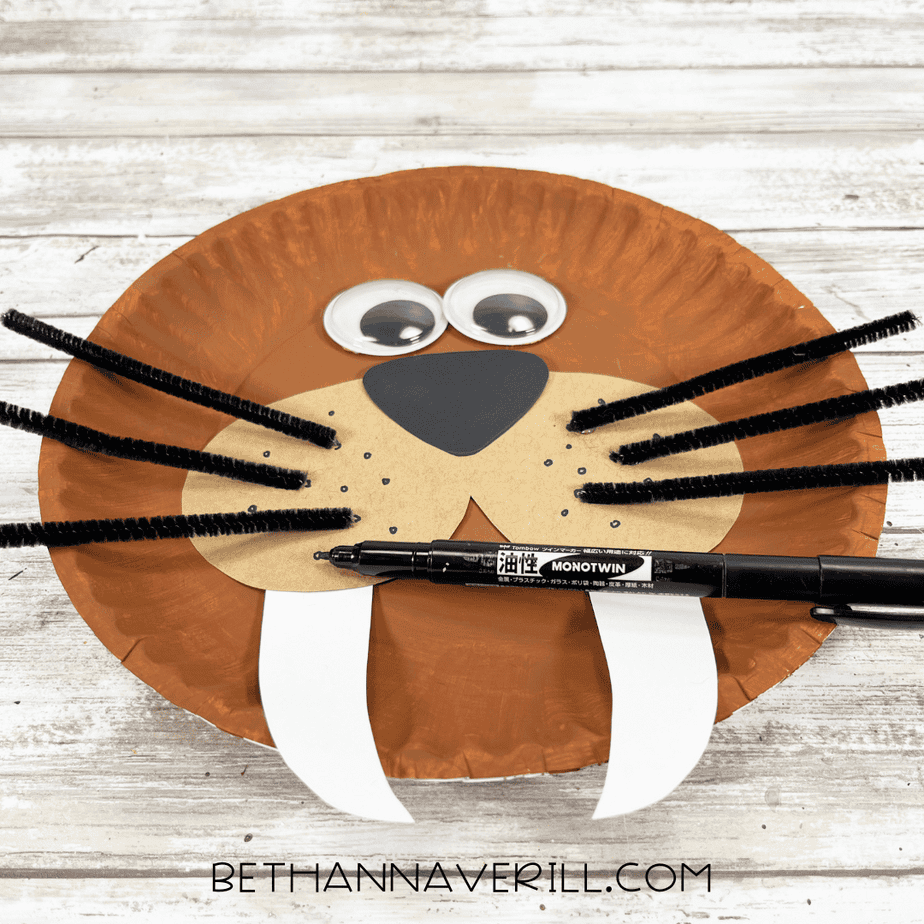
- Paint the inside of the paper plate with brown acrylic craft paint. Set aside to dry and apply a second coat, if necessary.
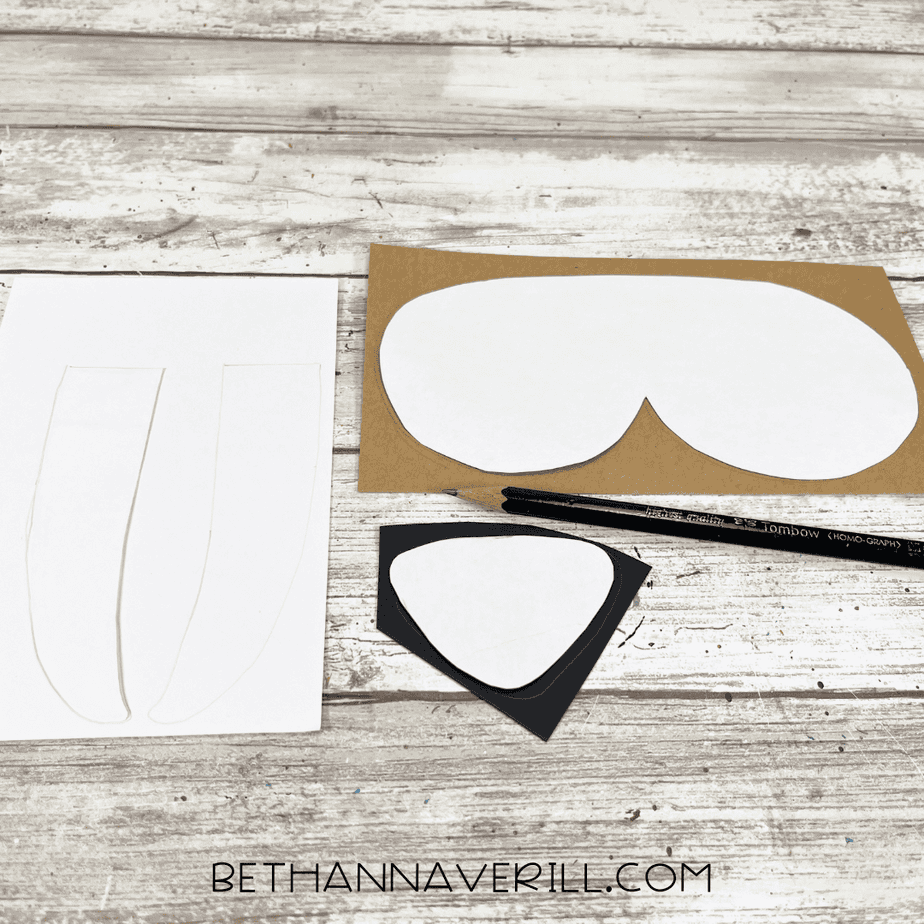
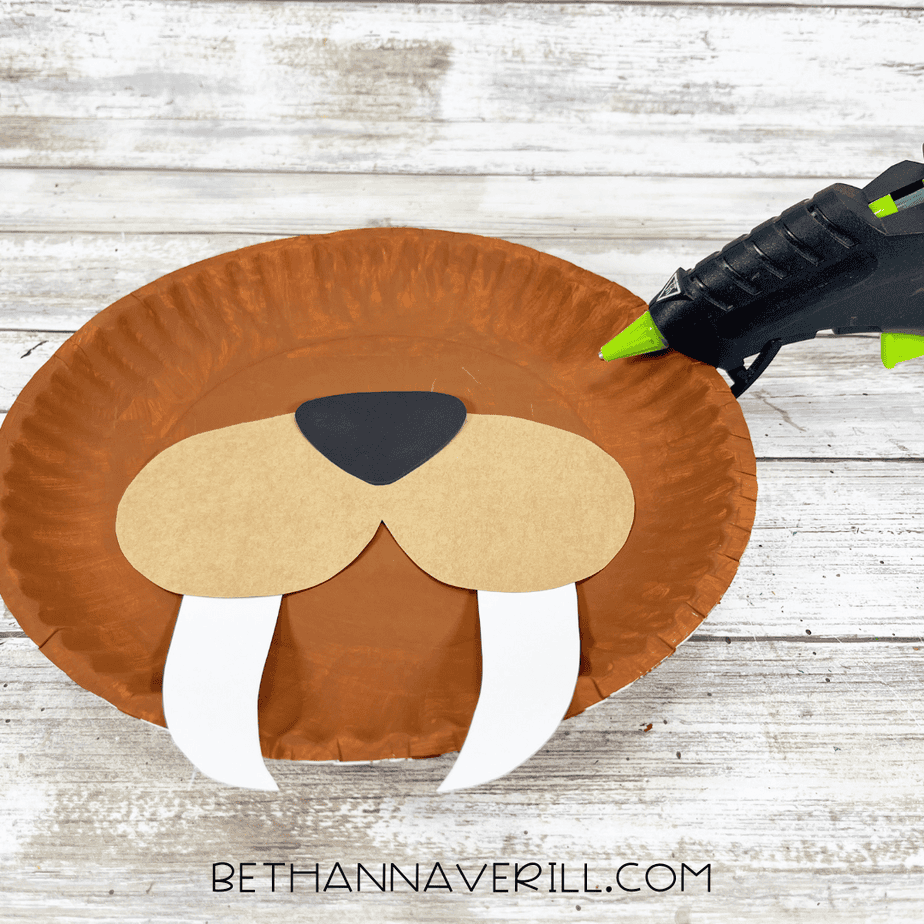
- Download and print the walrus patterns, then cut out with scissors. Trace the nose once onto black cardstock.Trace the muzzle once onto tan cardstock. Trace the tusks twice onto white cardstock with a pencil. You could also use colored craft foam, construction paper, or craft felt for this project.
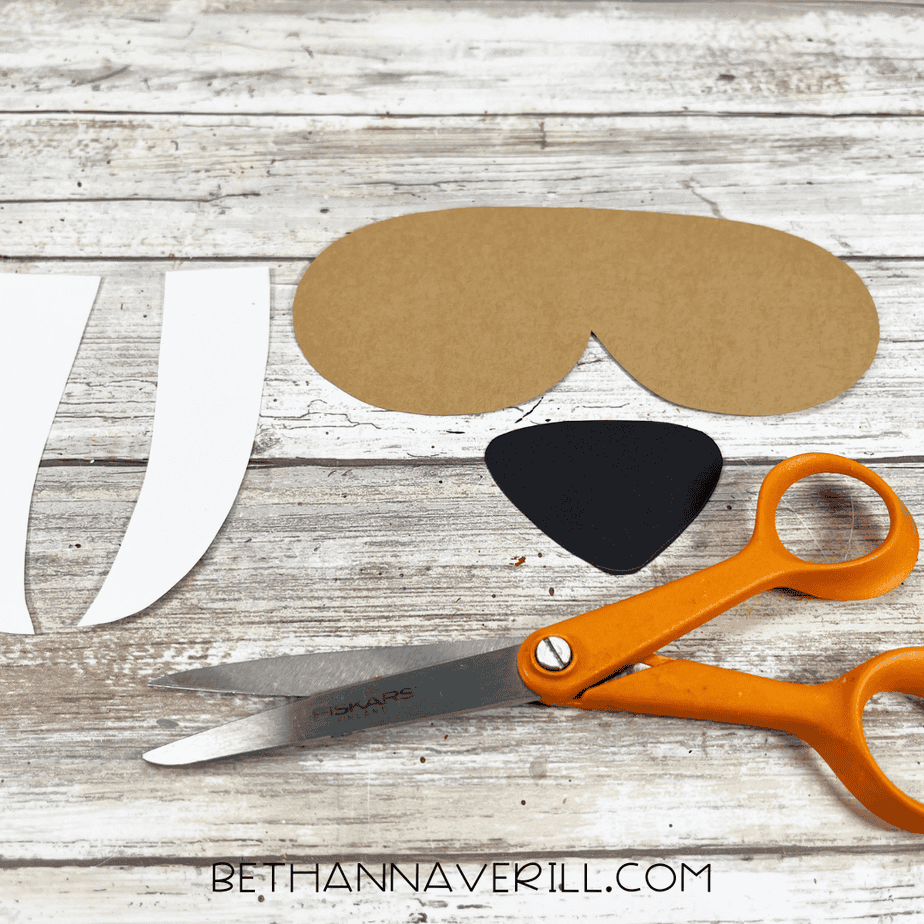
- Cut out the walrus patterns with scissors making sure to cut inside the traced lines for a clean, finished project.
- Attach the nose and tusks to the muzzle with a glue gun and glue sticks. Glue the muzzle to the walrus’ face. TIP: You can use liquid craft glue for this project, but you will have to wait for it to dry.
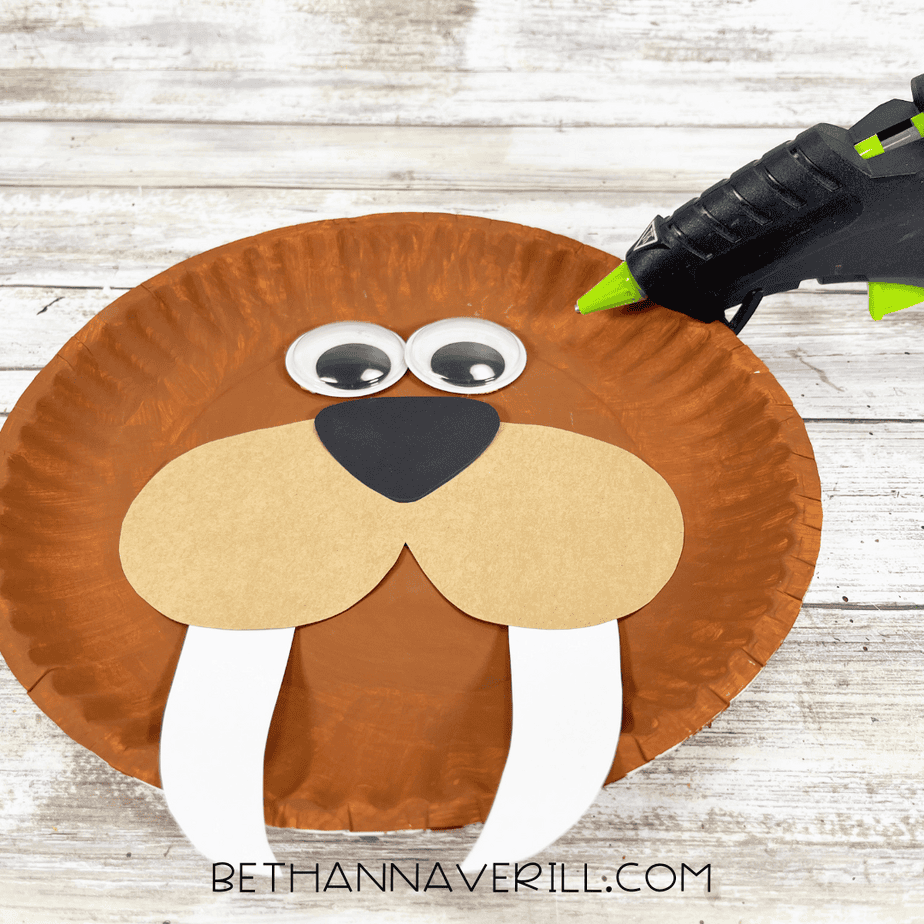
- Attach two wiggle eyes to the walrus’ face with a glue gun and glue sticks.
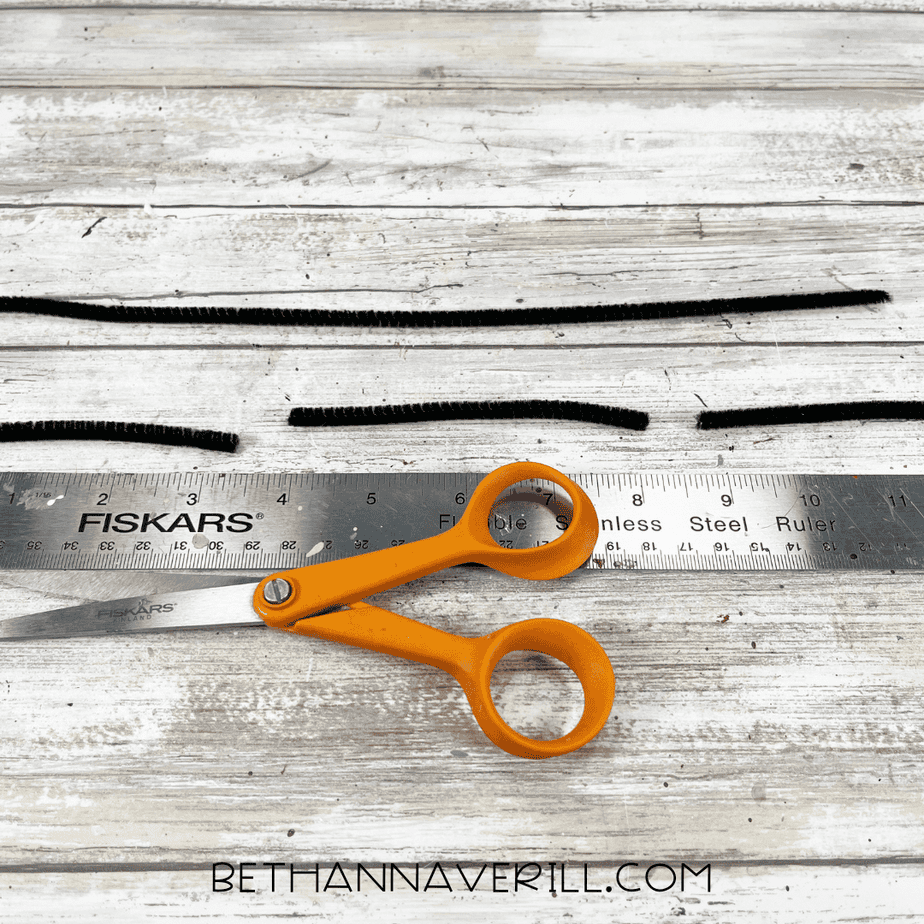
- Measure and cut two black chenille stems into six pieces, that are 4” long each.
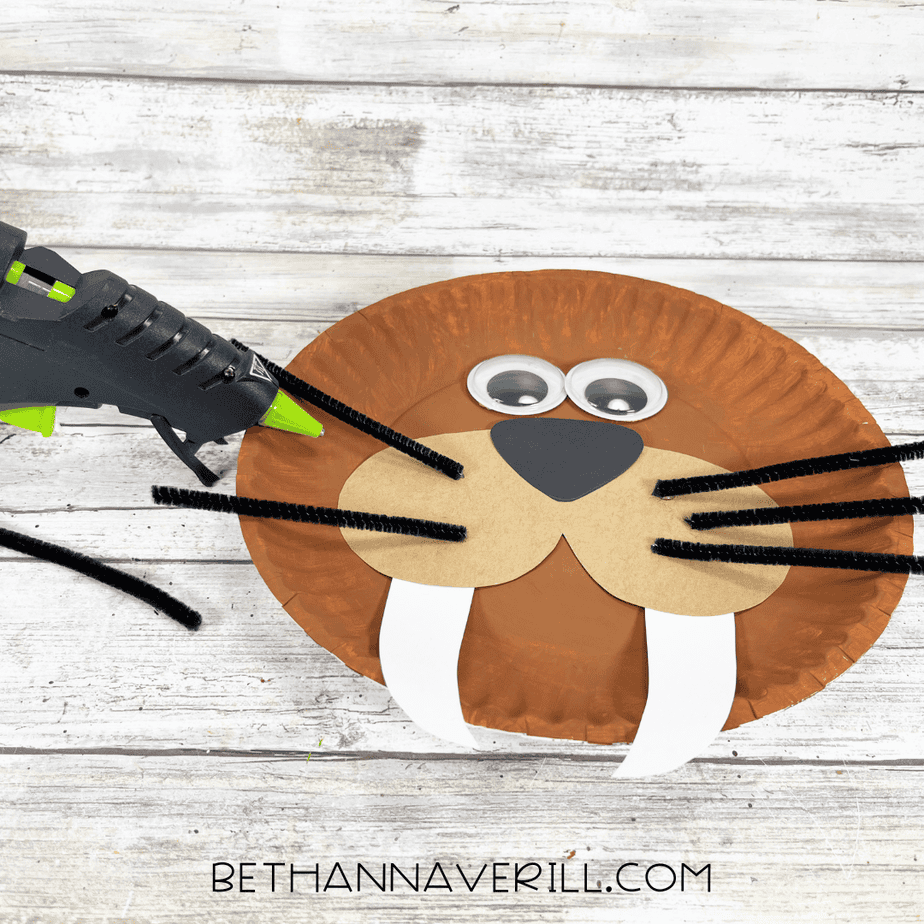
- Attach three pieces of chenille stem to the right and left side of the muzzle with a glue gun and glue sticks. They will be the walrus’ whiskers.
- To finish, draw small circles at the base of the whiskers and over the muzzle with a black marker.
- Hang your finished walrus on display!
Recommended Products
As an Amazon Associate and member of other affiliate programs, I earn from qualifying purchases.


Why Kids Will Love This Walrus Paper Plate Craft
This walrus paper plate craft brings a fun mix of painting, snipping, and building that kids really get into. The oversized tusks and fuzzy whiskers give it so much character, and kids love seeing their walrus come to life piece by piece.
Here’s why it always grabs their attention:
- The steps feel hands-on. Painting the plate and adding all the facial pieces keeps little hands busy in the best way.
- The whiskers are a win. Kids love arranging (and rearranging) those chenille stem whiskers until their walrus looks “just right.”
- It turns out adorable. With big eyes, long tusks, and a friendly little face, it’s the kind of craft kids immediately show off.
No complicated cutting, no tiny pieces to stress over…just a fun, approachable animal craft with lots of personality.
Get This Paper Plate Walrus Craftivity Now!
Use code WALRUS at checkout to get 75% off.
Please Share This Walrus Paper Plate Craft
If your kids had fun making this adorable walrus, please share it! Pin it to your favorite craft board or pass it along to another parent or teacher who could use a quick, easy project. Every share helps more families find simple, creative activities they can enjoy together.


