
Witch Hat Paper Plate Craft
If your little ghouls and goblins are ready for some spooky fun, this witch hat paper plate craft is the perfect Halloween activity. It’s colorful, simple, and just the right mix of silly and spooky — great for classrooms, family craft nights, or decorating your house for trick-or-treat season.
Kids can personalize their witch hats with stars, moons, and bright Halloween colors — and you’ll love how low-mess and low-stress it is.

Materials You’ll Need for This Witch Hat Paper Plate Craft
Gather your crafting supplies before you cast your first spell (or start painting). You probably have most of these on hand already!
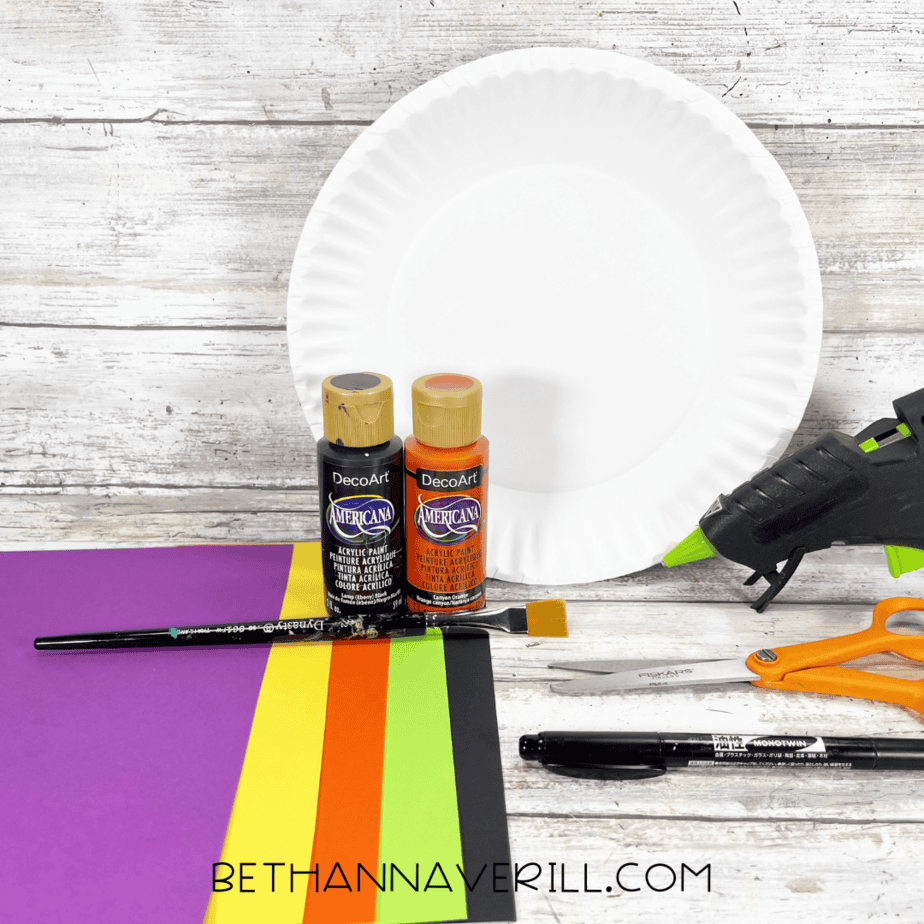
- Paper plate
- Orange acrylic paint
- Black acrylic paint
- Construction paper (purple, green, orange, yellow, black)
- Paintbrush
- Scissors
- Glue or hot glue gun
- Black marker
- Pencil

How to Make a Witch Hat Paper Plate Craft
Ready to get crafting? Find the instructions below!
Witch Hat Paper Plate Craft

Make a colorful witch hat paper plate craft using paint and construction paper! This easy Halloween craft for kids is spooky, silly, and so much fun for classrooms or family crafting nights.
Materials
- Paper plate
- Orange acrylic paint
- Black acrylic paint
- Construction paper (purple, green, orange, yellow, black)
- Glue or hot glue gun
- Black marker
- Pencil
Tools
- Paintbrush
- Scissors
Instructions
- Gather your materials, including a paper plate, paint, scissors, glue, and colorful construction paper.
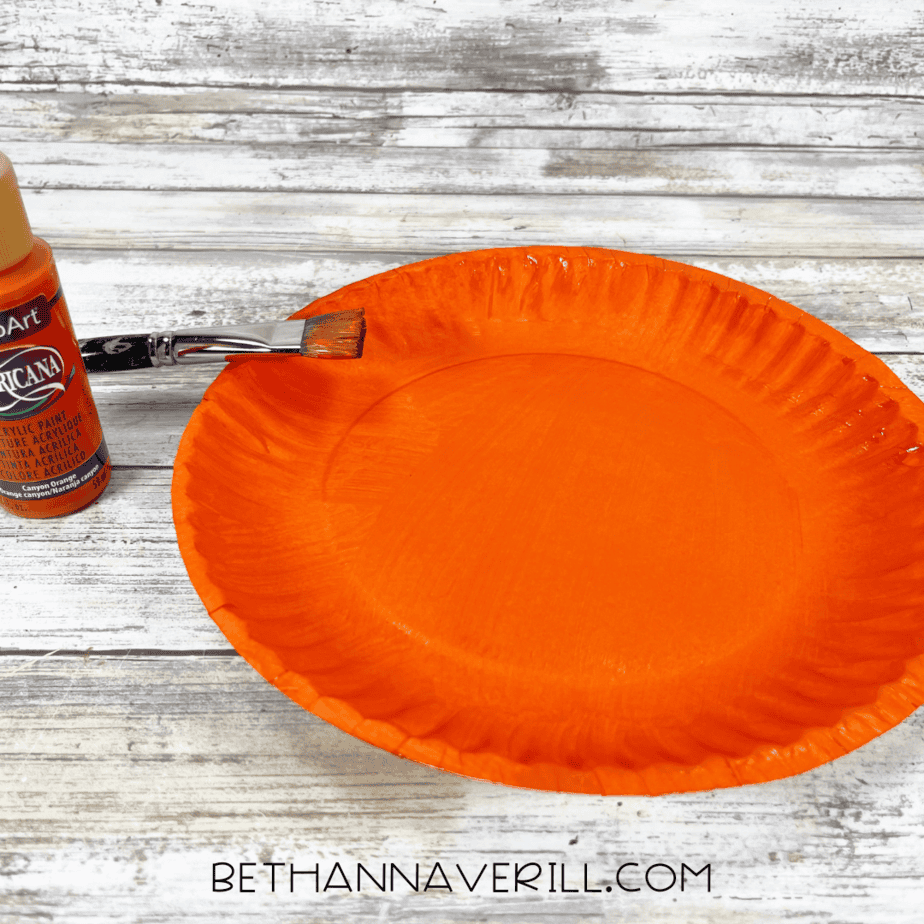
- Paint one paper plate orange and let it dry completely.
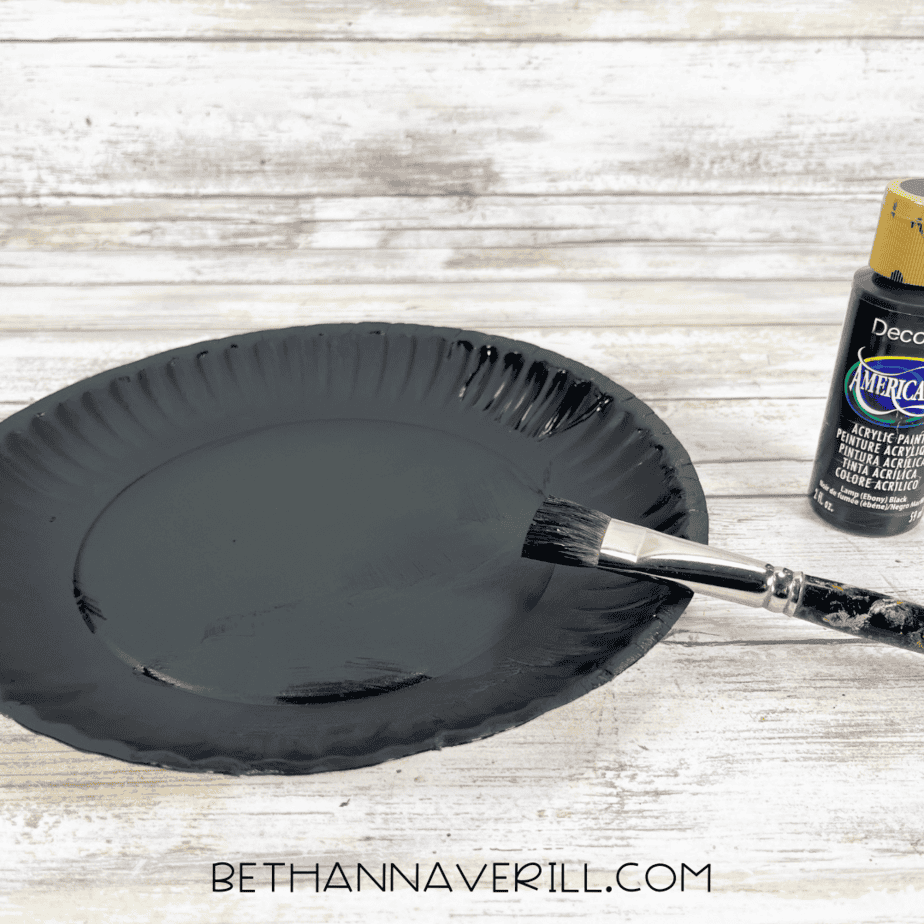
- Paint another paper plate black and set it aside to dry.
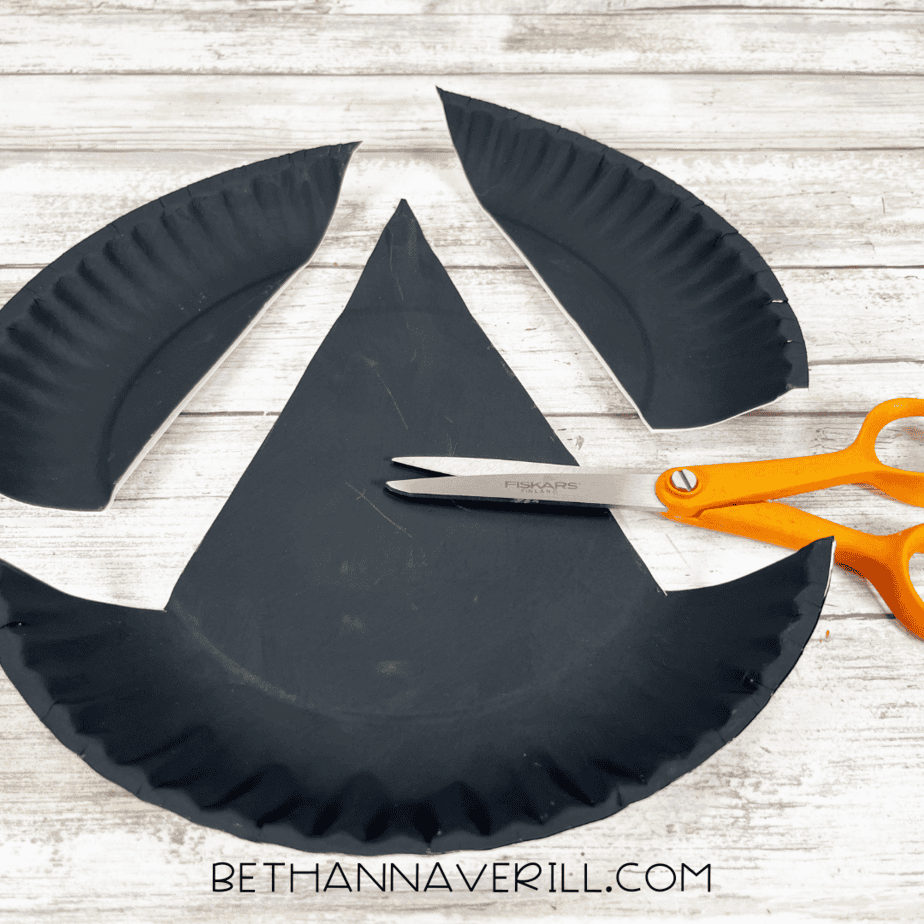
- Use a pencil and template to draw a witch hat shape on the back of a clean paper plate.
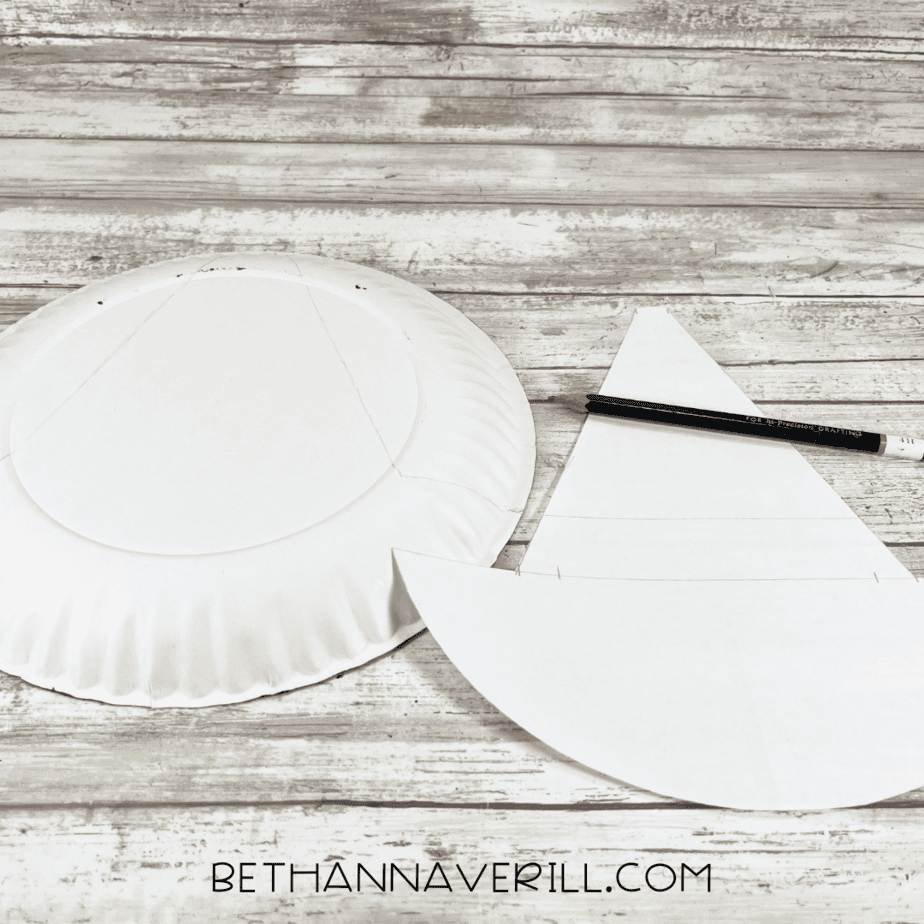
- Cut along the lines to create a large triangle hat shape and a curved brim.
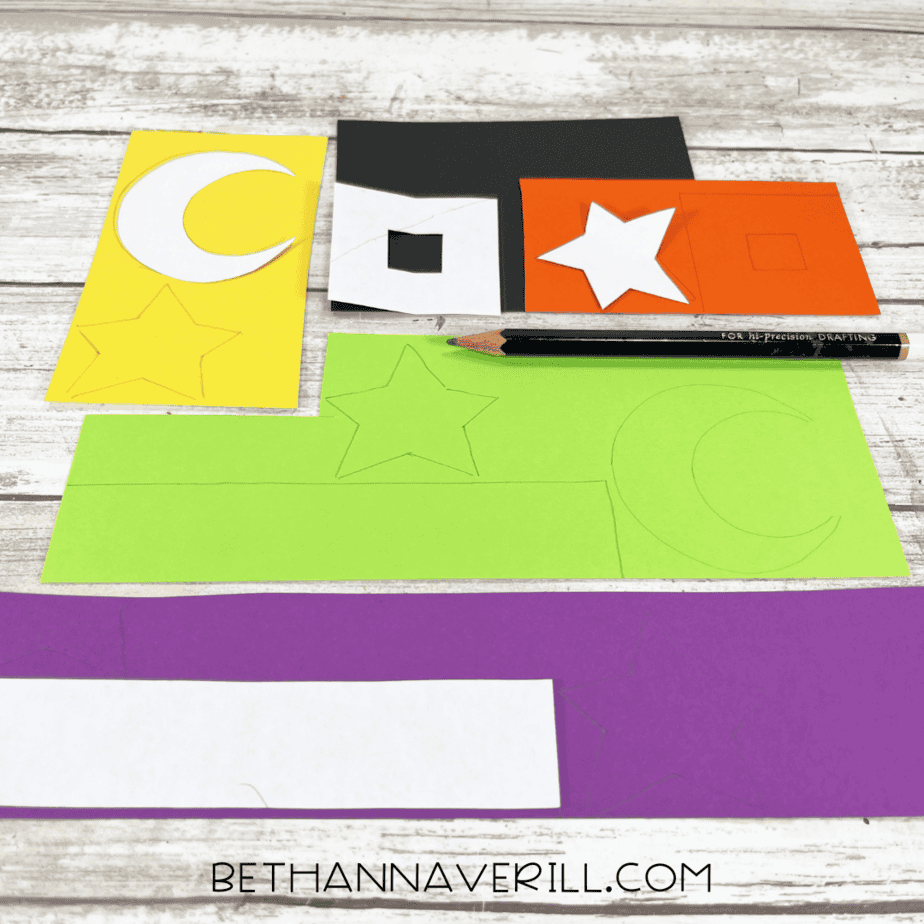
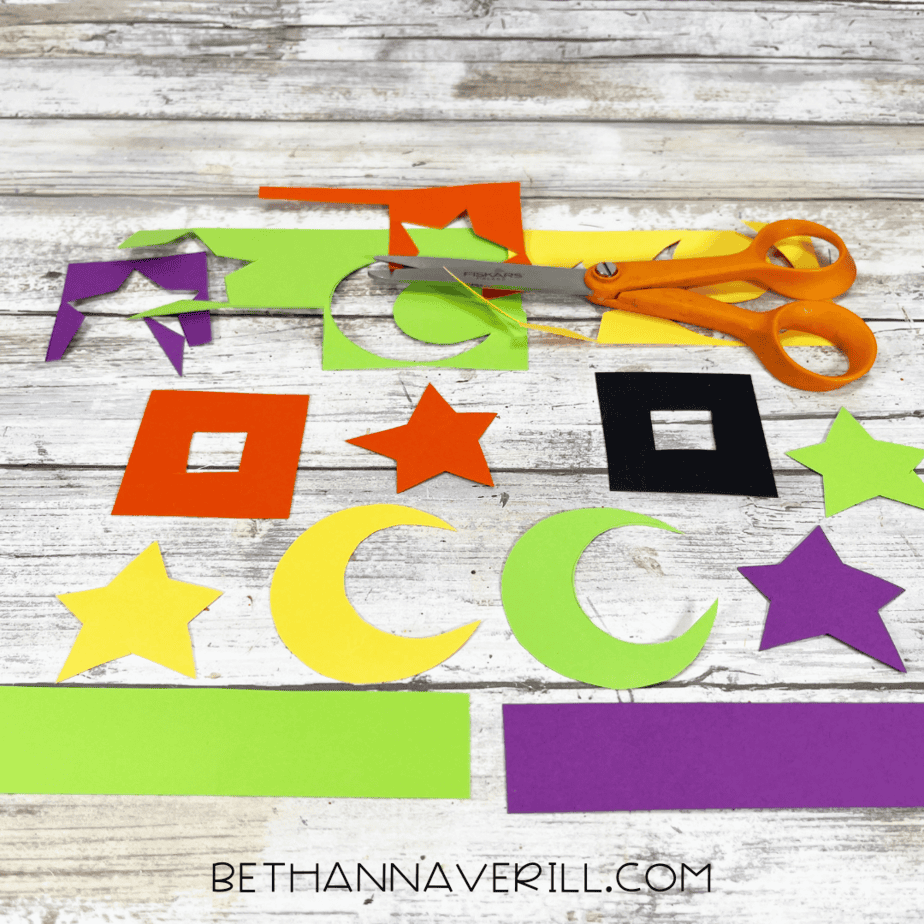
- Trace and cut colorful paper shapes — stars, moons, hat bands, and buckles — from construction paper.
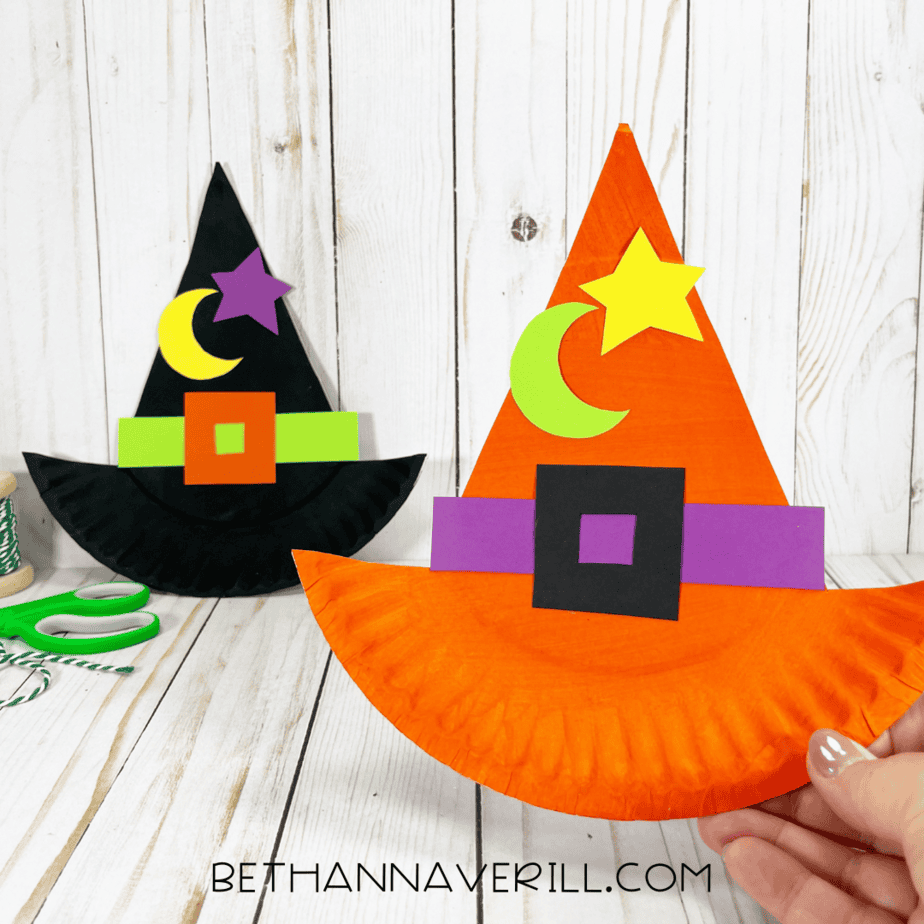
- Once your paint is dry, glue a colored hat band across the base of the hat.
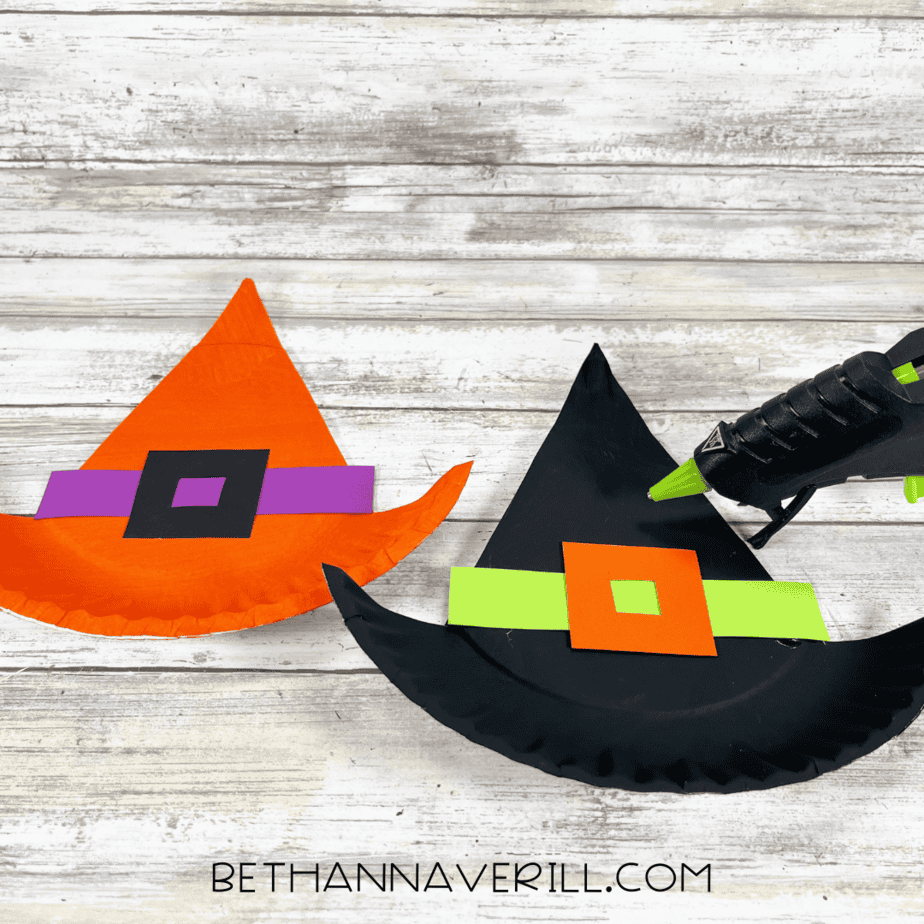
- Add a square buckle in a contrasting color on top of the band.
- Decorate the hat with paper stars, moons, or other Halloween shapes.
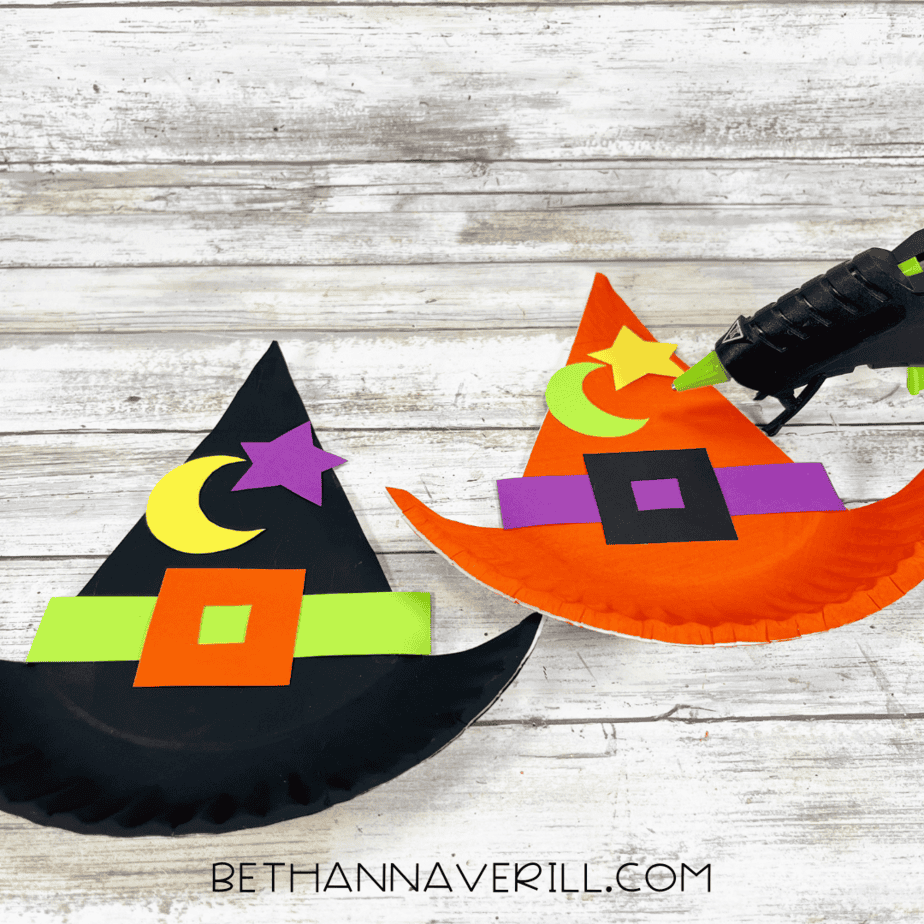
- Repeat the process with your second hat to make a matching set — one orange, one black!
- Let everything dry, then prop them up or hang them for festive Halloween fun.
Recommended Products
As an Amazon Associate and member of other affiliate programs, I earn from qualifying purchases.


Why Kids Love This Witch Hat Paper Plate Craft
This witch hat paper plate craft is all about creativity, no two hats ever look the same! It’s a great way for kids to explore colors, shapes, and design while practicing scissor skills and coordination.
Here’s why this craft works so well for little learners:
- Hands-on creativity: Painting, cutting, and gluing give kids plenty to do.
- Halloween spirit: Bright colors and fun shapes capture that playful spooky vibe.
- Easy to adapt: Make a whole classroom display or turn the hats into wearable art by gluing them to headbands!
It’s festive, flexible, and full of personality — everything a Halloween craft should be.
Get This Paper Plate Witch Hat Craftivity Now!
Please Share This Witch Hat Paper Plate Craft
If this witchy craft cast a creative spell on your kiddos, I’d love for you to share it! Post it to your favorite Halloween craft board on Pinterest or share it with teachers and parents looking for easy Halloween classroom ideas. Your shares help more families discover fun, low-prep crafts they’ll actually enjoy making together.


