
Winter Tree Paper Plate Craft
If you’re looking for a simple but beautiful winter craft that captures all the cozy, snowy vibes of the season, this winter tree paper plate craft is the perfect pick. Kids can paint, cut, and glue their way to a frosty little forest scene that’s as peaceful as a snowy afternoon. It’s great for classrooms, storytime, or any day you just want to add a little sparkle to your crafting table.

Materials You’ll Need for This Winter Paper Plate Craft
You don’t need fancy art supplies for this one, just a few basics you probably already have at home or in the classroom.
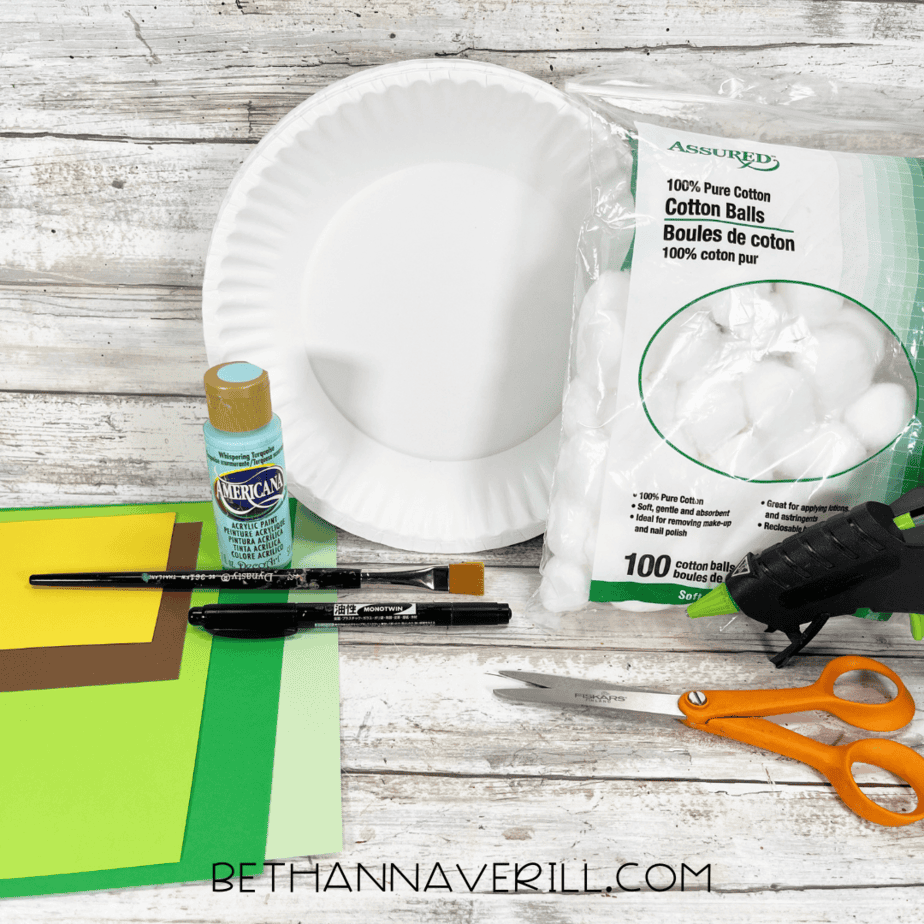
- Paper plate
- Blue acrylic paint
- Construction paper (green, light green, yellow, brown, white)
- Cotton balls
- Paintbrush
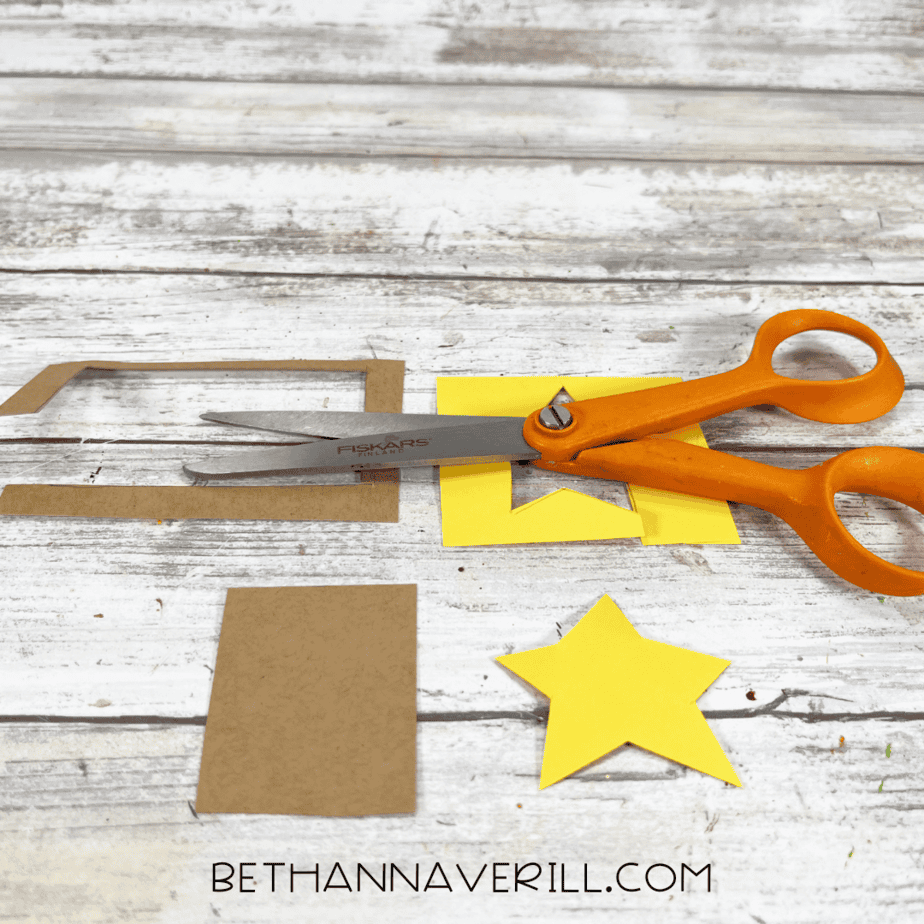
- Scissors
- Glue or hot glue gun
- Black marker (optional for extra details)

How to Make a Winter Tree Paper Plate Craft
Ready to get crafting? Find the instructions below!
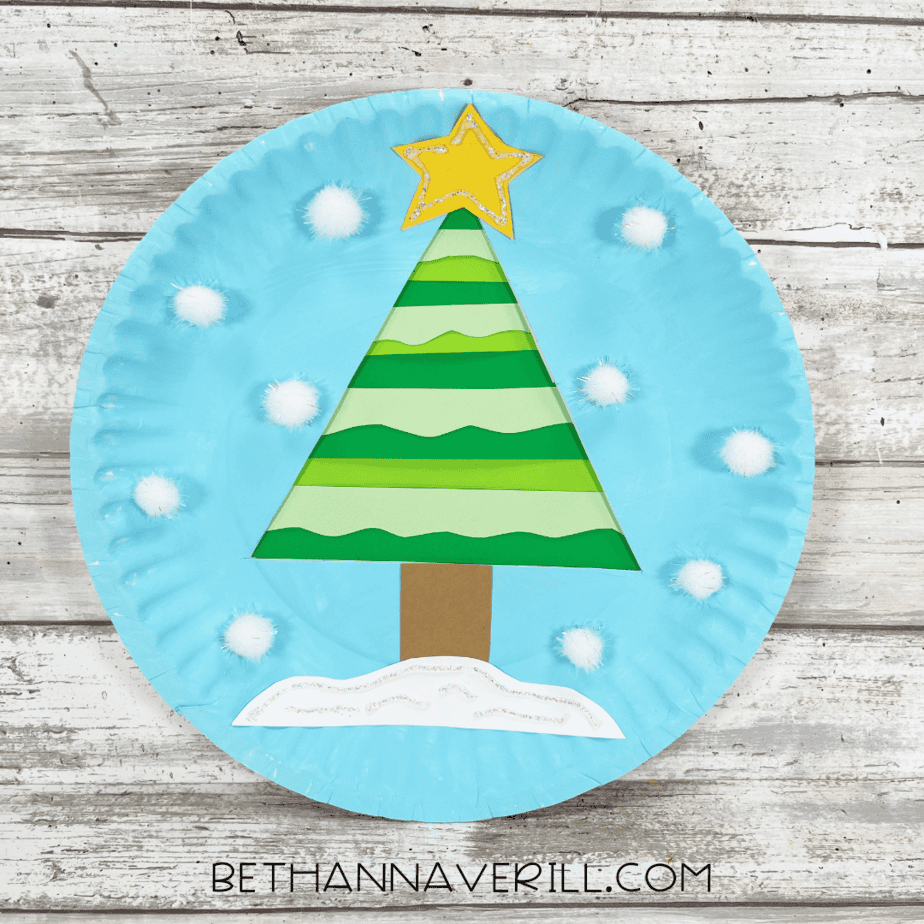
Winter Tree Paper Plate Craft

Make a beautiful winter tree paper plate craft using simple supplies like cotton balls, paint, and paper! This easy and fun winter craft for kids is perfect for classrooms, storytime, or a cozy afternoon activity.
Materials
- Paper plate
- Blue acrylic paint
- Construction paper (green, light green, yellow, brown, white)
- Cotton balls
- Glue or hot glue gun
- Black marker (optional for details)
Tools
- Paintbrush
- Scissors
Instructions
- Gather your materials, including a paper plate, paint, construction paper, scissors, and glue.
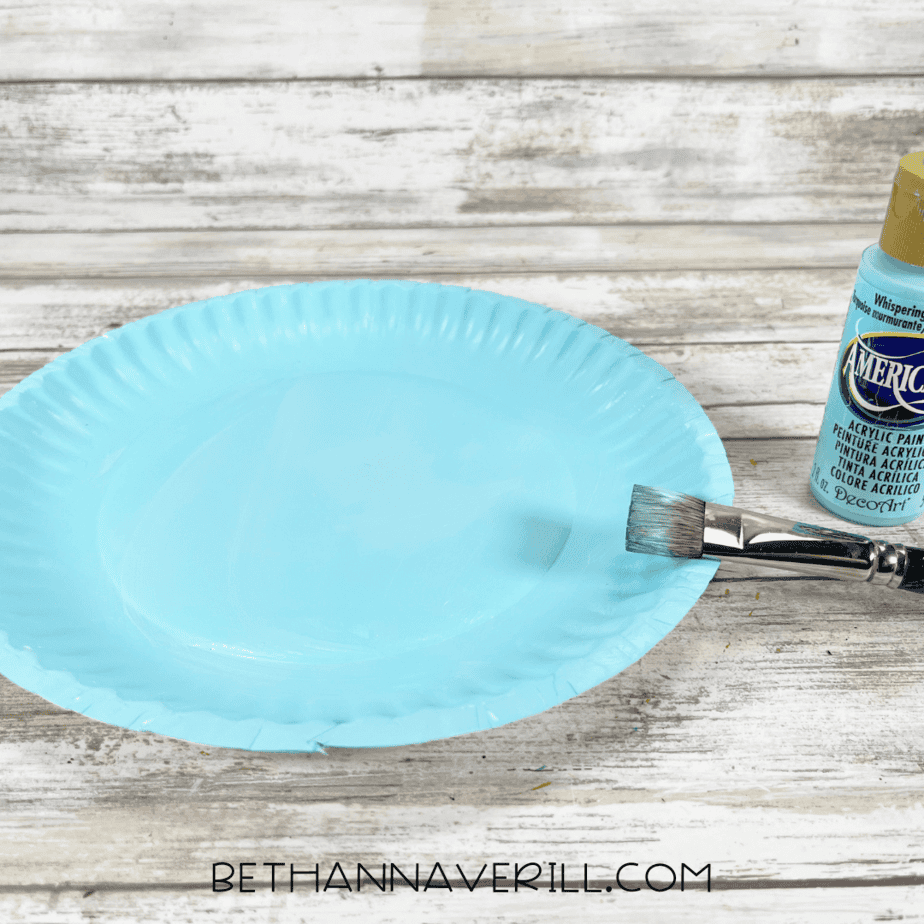
- Paint the front of the paper plate light blue to create the winter sky and let it dry completely.
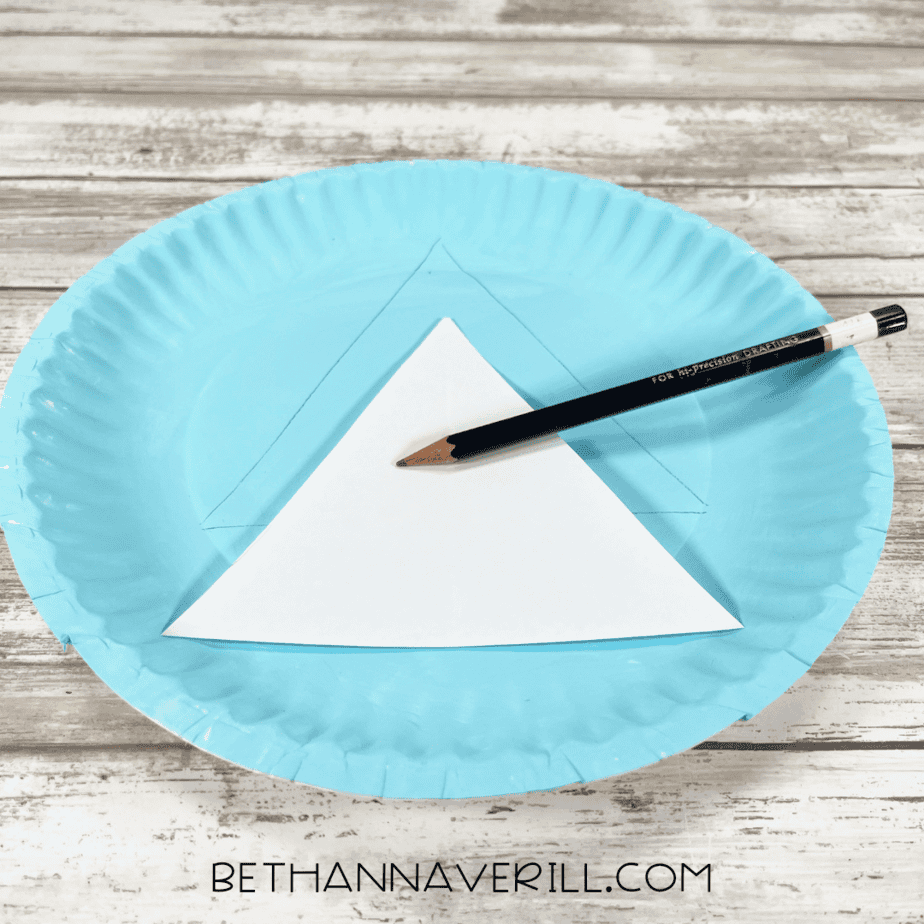
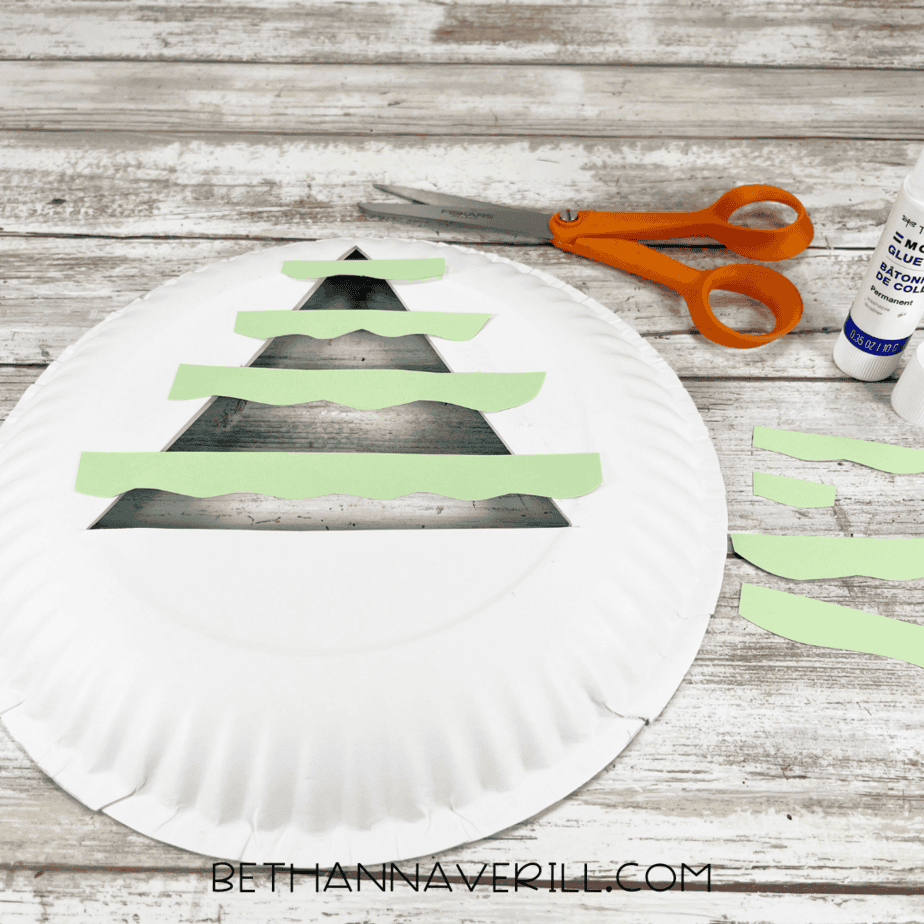
- Use a pencil and triangle template to trace a tree shape in the center of the plate.
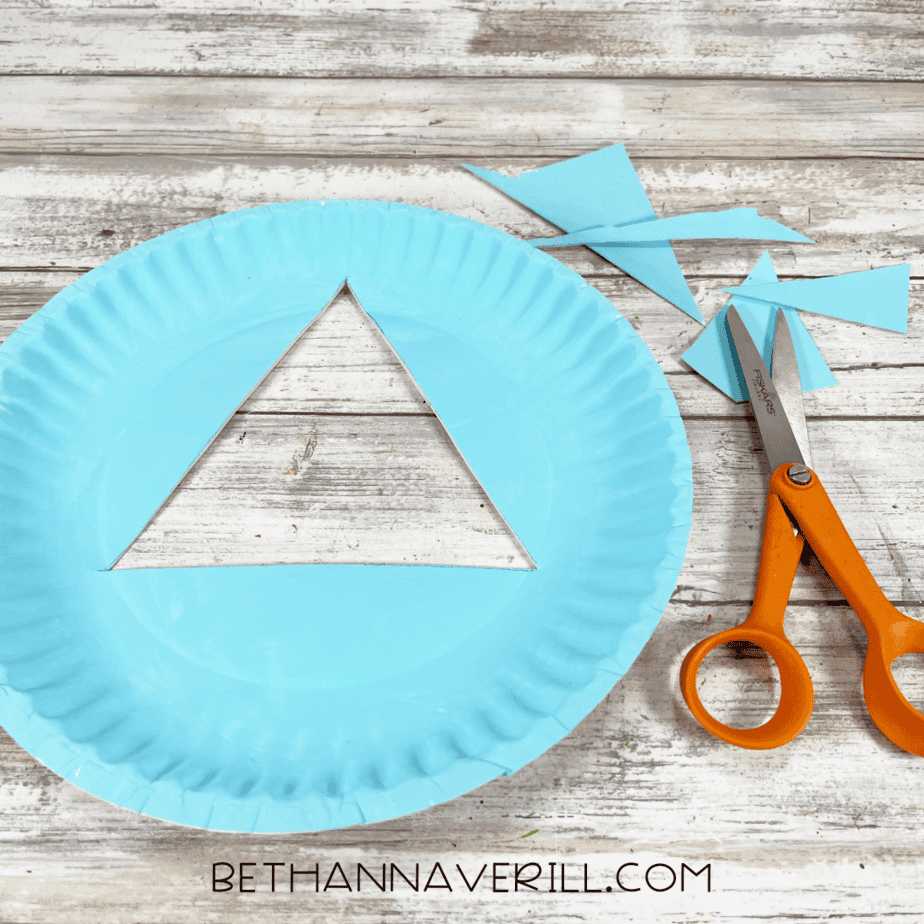
- Carefully cut out the triangle so it forms a window in the middle of your plate.
- Cut several strips of green and light green paper for your tree layers.
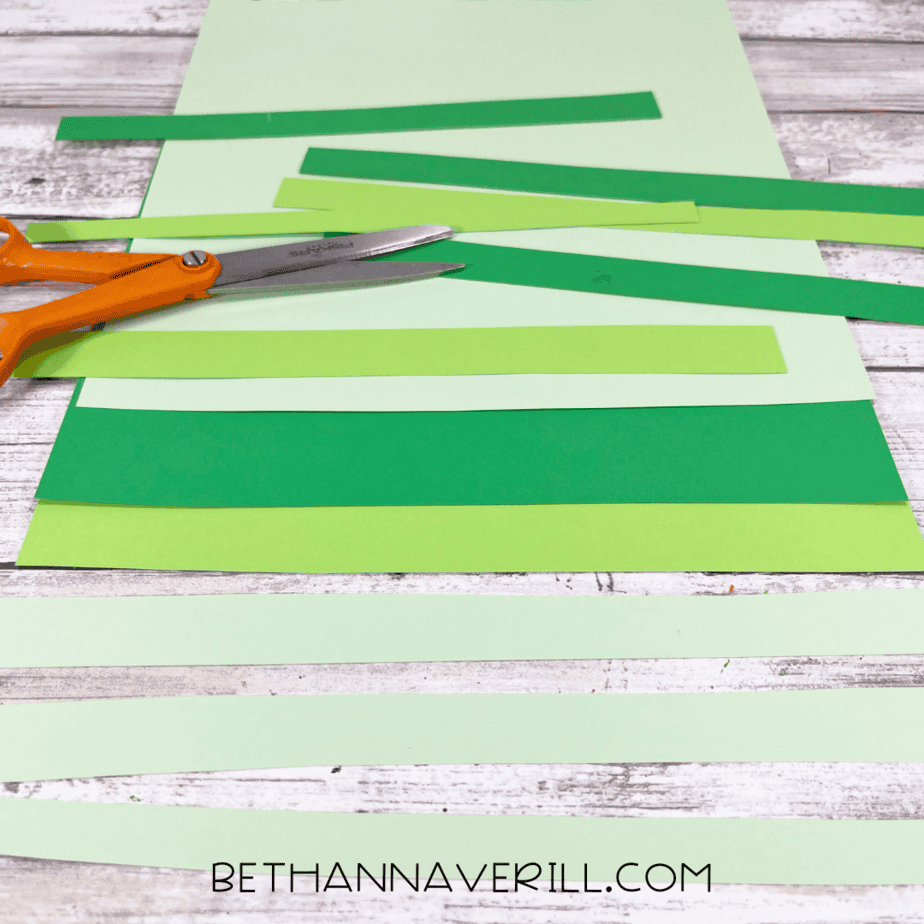
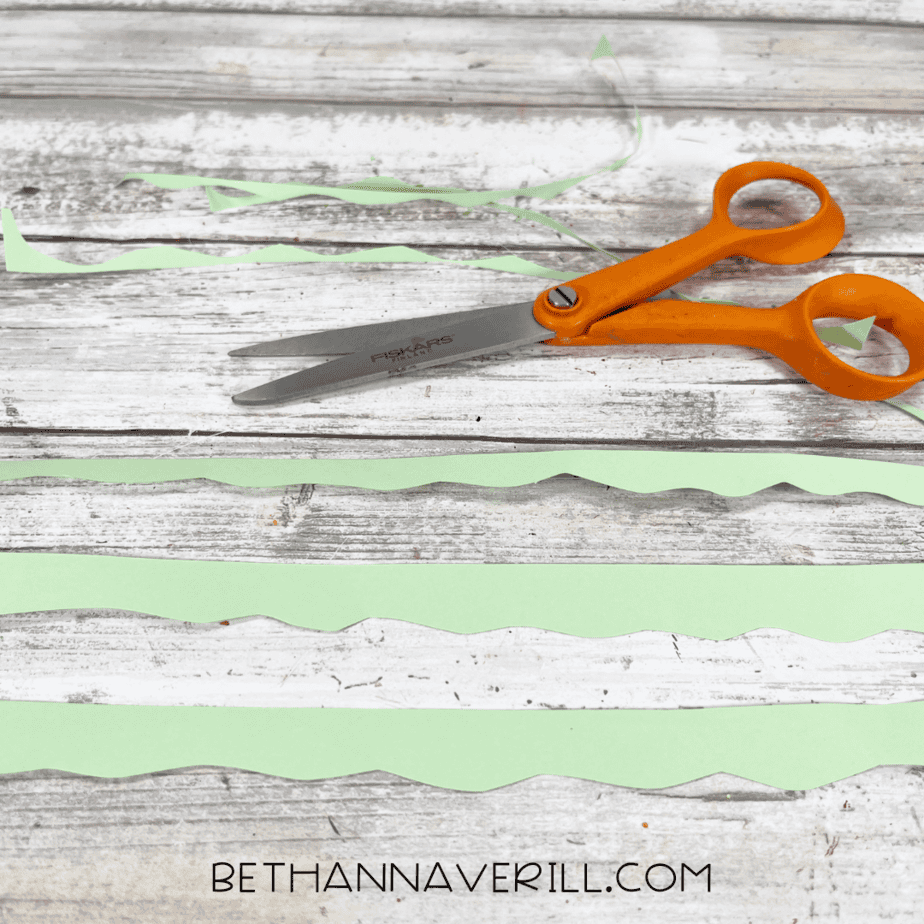
- Use scissors to add wavy edges to some of the strips to make them look like branches.
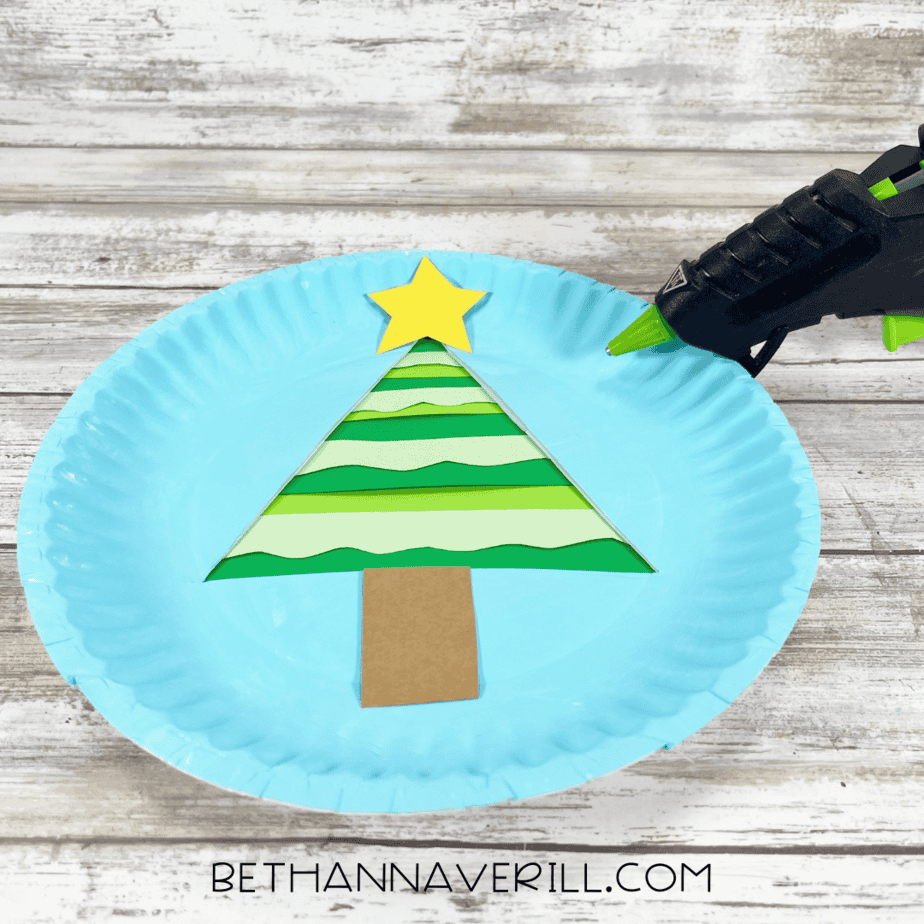
- Glue the strips behind the plate, alternating shades of green to build your tree. Make sure to glue the wavy strips down first so they are in the front.
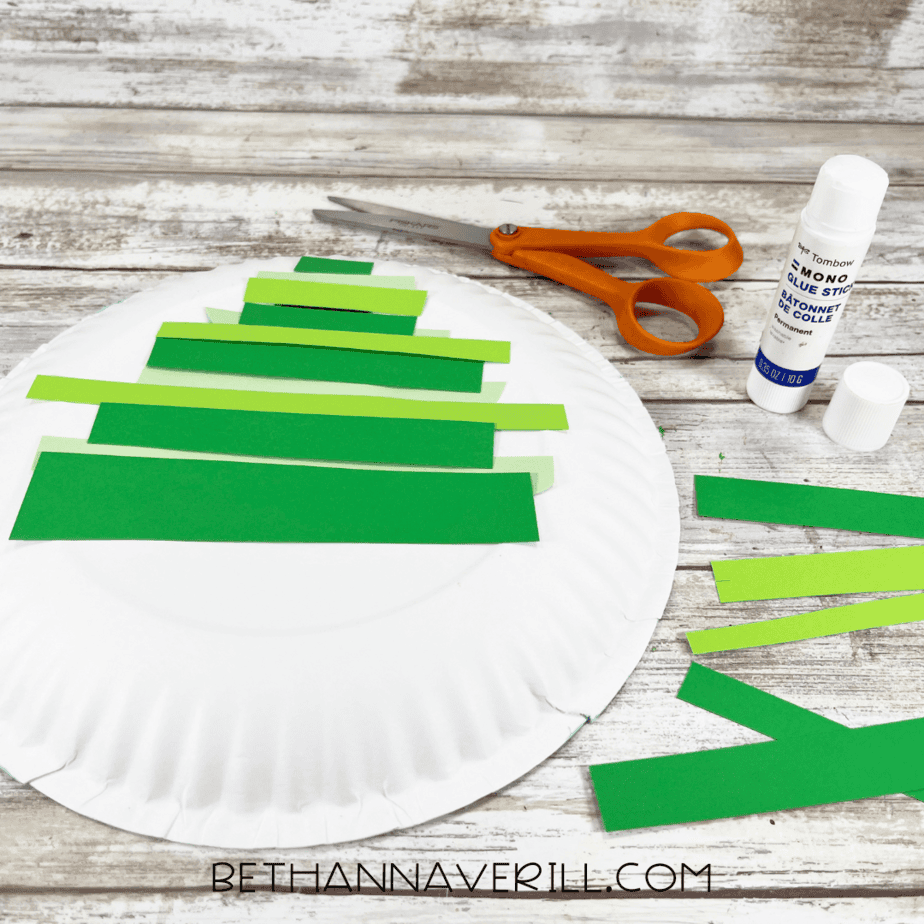
- Cut a small brown rectangle for the tree trunk and a yellow star for the top.

- Glue the trunk to the bottom and the star to the top of your tree.
- Add a white paper snowbank to the bottom of the plate for a snowy ground.
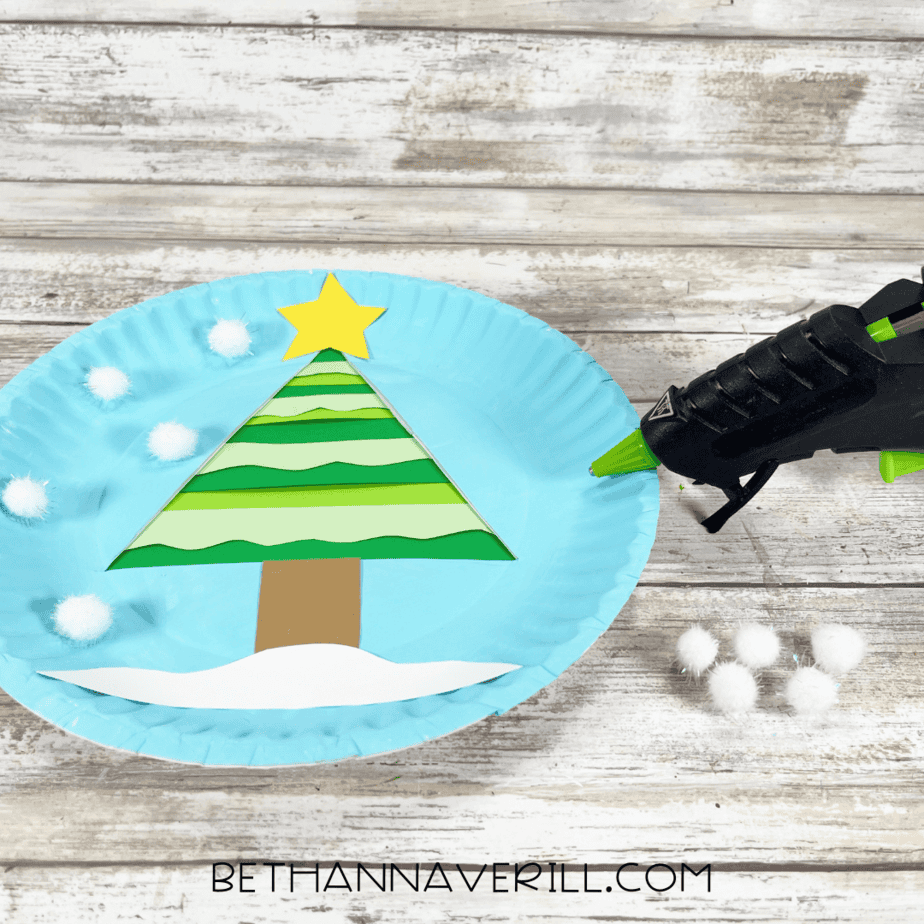
- Glue cotton balls around the tree and sky to look like fluffy snow falling.
- For a little sparkle, add glitter glue or stickles along the snowbank and star edges.
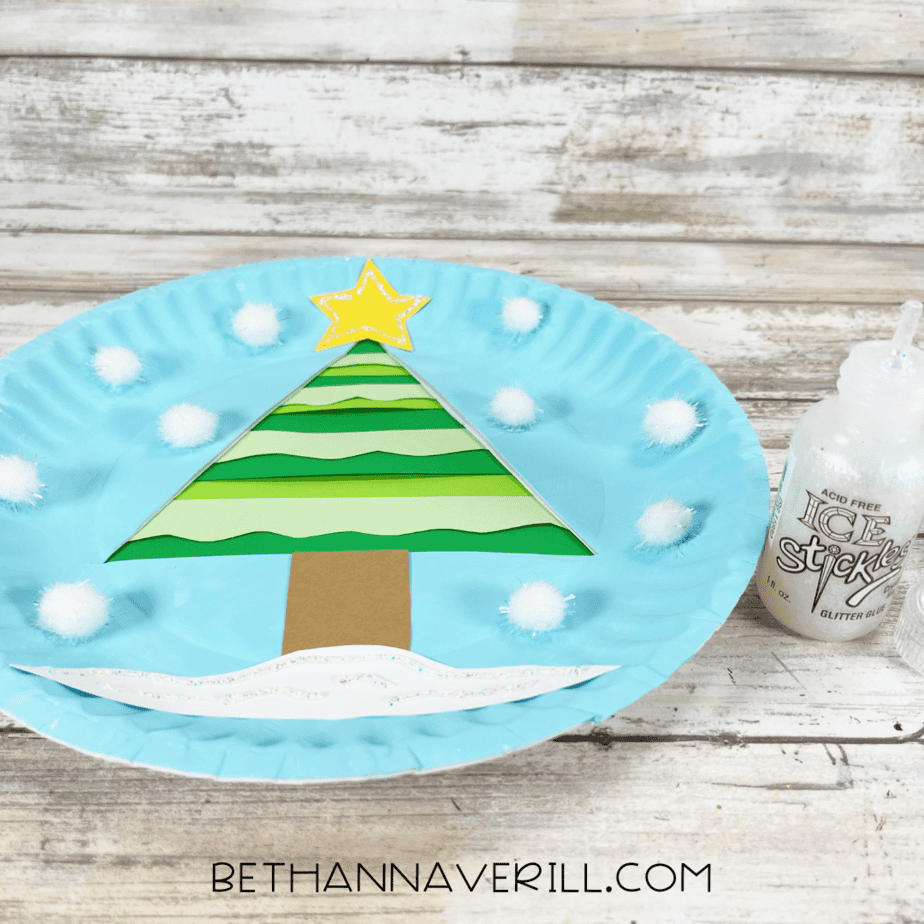
- Let it dry, then proudly display your winter wonderland masterpiece!
Recommended Products
As an Amazon Associate and member of other affiliate programs, I earn from qualifying purchases.


Why Kids Will Love This Winter Tree Craft
This winter tree paper plate craft combines creativity with hands-on fun. Kids can explore textures (cotton snow and paper layers), practice scissor skills, and learn about winter weather while crafting. Plus, it’s versatile enough to fit into:
- Seasonal units – Great for winter or holiday classroom themes.
- Fine motor practice – Cutting, layering, and gluing keep little hands busy.
- Art displays – These look stunning hung together as a snowy forest mural.
It’s cozy, creative, and wonderfully low-stress—exactly what winter crafts should be.
Get This Paper Plate Winter Tree Craftivity Now!
Please Share This Winter Tree Paper Plate Craft
Did this craft make your day a little brighter (and snowier)? Share it with a friend, pin it to your favorite kids’ craft board on Pinterest, or show off your version on social media! Your shares help other families and teachers discover easy, creative winter projects that make learning hands-on and fun.


