
St. Patrick’s Day Butter Slime Recipe
Get ready for a St. Patrick's Day filled with squishy, stretchy fun! This butter slime recipe is a perfect blend of creativity and sensory play, offering little ones an exciting way to dive into the holiday spirit. The smooth texture and festive colors make it irresistible, and the best part? It’s easy to make and endlessly entertaining. So, grab your supplies, roll up your sleeves, and let’s make some gooey, golden slime magic together!

What is Butter Slime?
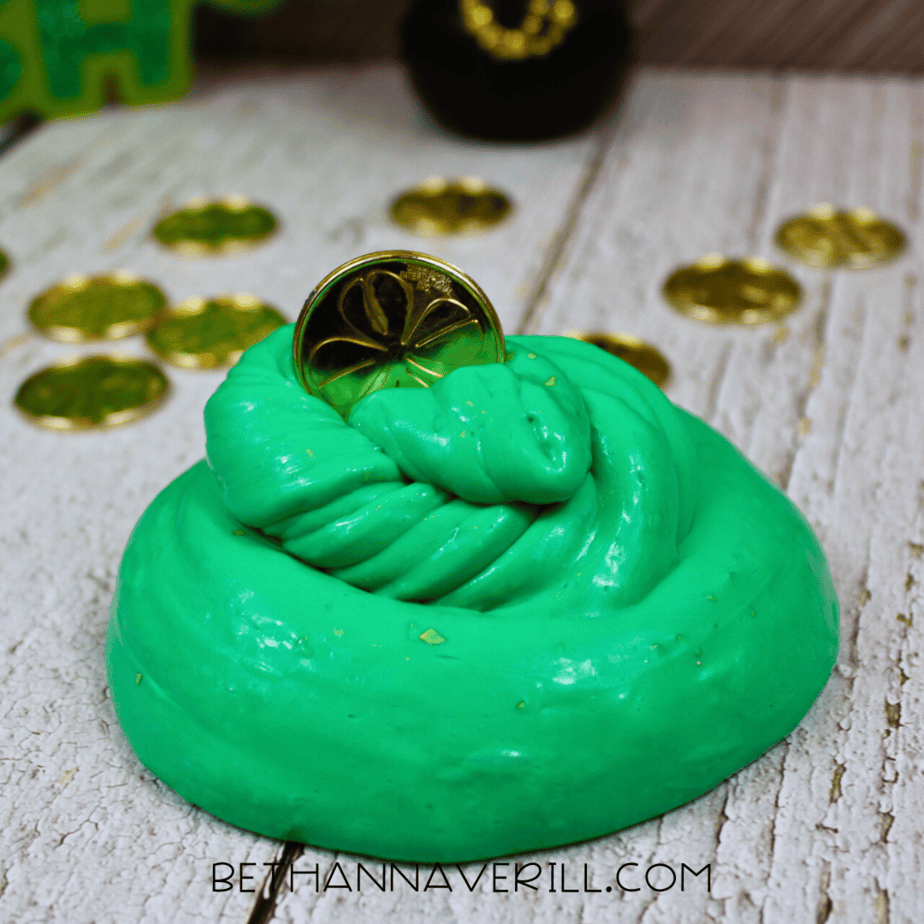
Butter slime is not just any slime—it’s the smoothest, most satisfying slime experience out there! With its soft, stretchy texture that mimics butter, kids love how easy it is to mold, squish, and play with. The velvety finish makes it different from the typical sticky slime, and when you add in St. Patrick’s Day colors and glitter, it turns into a sensory activity that’s as festive as it is fun. Whether your little ones are shaping shamrocks or just enjoying the sensory play, butter slime is a must-try for hands-on holiday fun!
Texture and Sensory Appeal
What really makes butter slime shine is its unique texture. Unlike other slimes that can be sticky or messy, butter slime is soft, stretchy, and super moldable—perfect for little hands that love to squish and sculpt. It doesn’t ooze or drip, but instead holds its shape, making it a fun, tactile experience for kids to enjoy.
Parents love that butter slime doubles as a calming sensory activity. It’s a bit like playing with a stress ball, but way more exciting! And the best part? It’s much less sticky than traditional slime, making clean-up quick and easy.
Why It's Perfect for St. Patrick's Day
Butter slime becomes even more exciting when paired with a festive theme, like St. Patrick's Day. With green model magic clay and a sprinkle of glitter, it transforms into something magical—perfect for preschoolers eager to explore the holiday. Imagine soft, stretchy dough that sparkles like a leprechaun's treasure!
It pairs perfectly with other holiday activities. Why not mix your slime fun with themed crafts or printables? For example, check out 7 Adorable St. Patrick's Day Printables for Preschoolers for ideas that will make the day extra special!
And it’s not just about fun—it’s educational too! Kids improve fine motor skills while exploring vibrant colors and textures that celebrate the holiday. From molding shamrocks to rolling tiny pots of gold, this sensory experience keeps little hands busy and imaginations soaring.
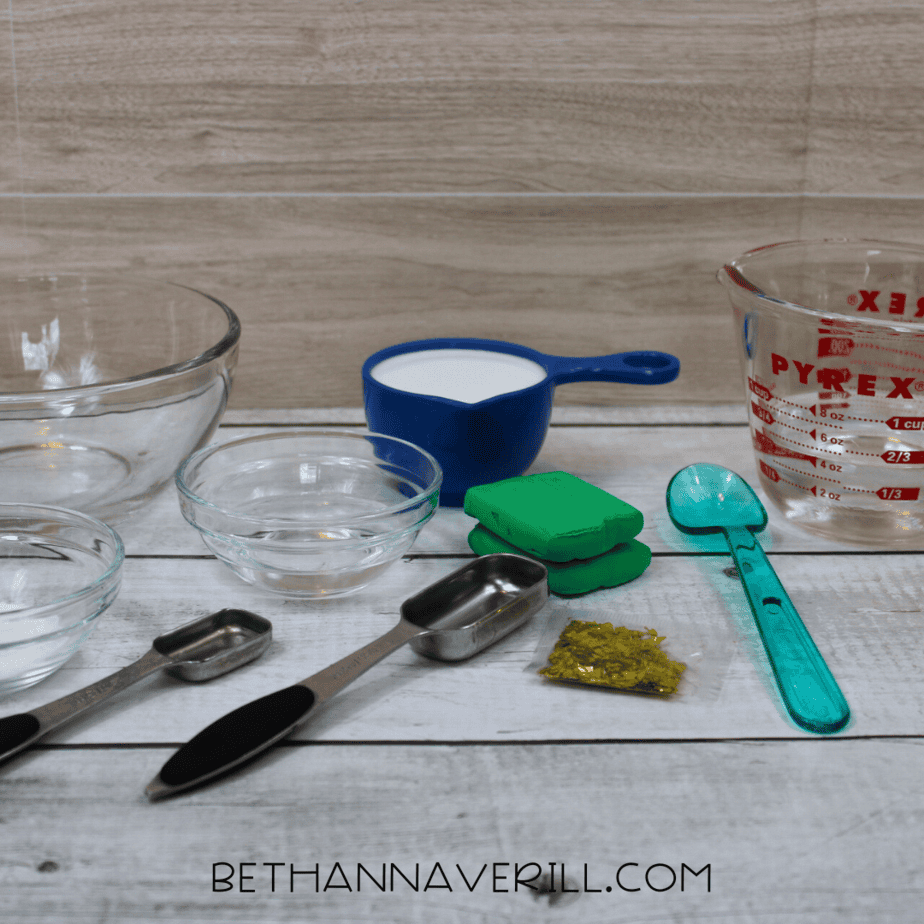
Supplies Needed for St. Patrick's Day Butter Slime Recipe
Before you dive into this fun activity, it’s essential to gather the right supplies to ensure a smooth and enjoyable experience for both you and the kids. Having everything prepped will keep everyone engaged and excited. Here’s a quick breakdown of the must-have ingredients, along with some optional extras to take your butter slime to the next level of St. Patrick’s Day fun!
Essential Ingredients and Tools
To make the perfect St. Patrick's Day butter slime recipe, you’ll need a mix of everyday items and specialty supplies. Here's what to gather:
- White School Glue: About ½ cup works perfectly. This is the base of your slime, so make sure you use a glue that’s safe and reliable.
- Green Model Magic Clay: You’ll need 1 oz of this to create that smooth, buttery texture and festive green hue.
- Water: Mix ½ cup of water with your glue to get the right consistency for your slime.
- Baking Soda: Just 1 teaspoon helps to activate the slime and make it stretchable.
- Contact Solution: You’ll use 2 tablespoons as this works as the essential activator that binds everything together.
- Gold Glitter: Add 1-2 teaspoons to achieve that iconic St. Patrick's Day sparkle—perfect for creating “leprechaun treasure.”
- Bowl and Spoon: Any medium-sized bowl and a sturdy spoon will do the trick for mixing everything together.
Having these items set out in advance keeps the process smooth and stress-free. Plus, no one wants to pause the fun to search for an ingredient!
Optional Add-ons for Extra Fun
Looking to make your slime a little more magical? Customization is the key. Add these optional items to bring an extra layer of creativity to your St. Patrick's Day butter slime recipe:
- Themed Sprinkles: Consider using shamrock-shaped sprinkles or ones with a green-and-gold color scheme to keep it festive.
- Different Glitter Colors: Experiment with other shades of green, gold, or even rainbow glitter to create a leprechaun-inspired masterpiece.
These add-ons are entirely optional, but they’re the perfect way to make the experience even more unique and memorable! Let your kids take the lead on how they want to customize their slime—it’s a great way to encourage creativity and make the craft truly their own.
By gathering your materials ahead of time, you’ll ensure a smooth, stress-free slime-making session. With everything ready to go, you’re all set to dive into the most festive and fun butter slime of the season! Let the gooey, glittery fun begin!
How to Make St. Patrick's Day Butter Slime
Making butter slime for St. Patrick's Day is a fun, festive activity that brings loads of sensory fun and smiles to your little one's world. This recipe uses bright green Model Magic clay and a sprinkle of gold glitter to give it that extra holiday sparkle. Here’s how to create the perfect St. Patrick’s Day butter slime, step by step!
St. Patrick's Day Butter Slime

This St. Patrick’s Day Butter Slime recipe is the perfect hands-on activity for kids! With vibrant green Model Magic clay and a touch of gold glitter, it’s a fun, sensory-rich way to celebrate the holiday. Follow the simple steps for stretchy, smooth, and moldable slime that will keep little ones entertained for hours.
Materials
- ½ cup white school glue
- ½ cup water
- 1 tsp baking soda
- 2 Tbsp contact solution
- 1 oz green model magic clay
- 1-2 tsp gold glitter
Tools
- Bowl
- Spoon
- Measuring Cups
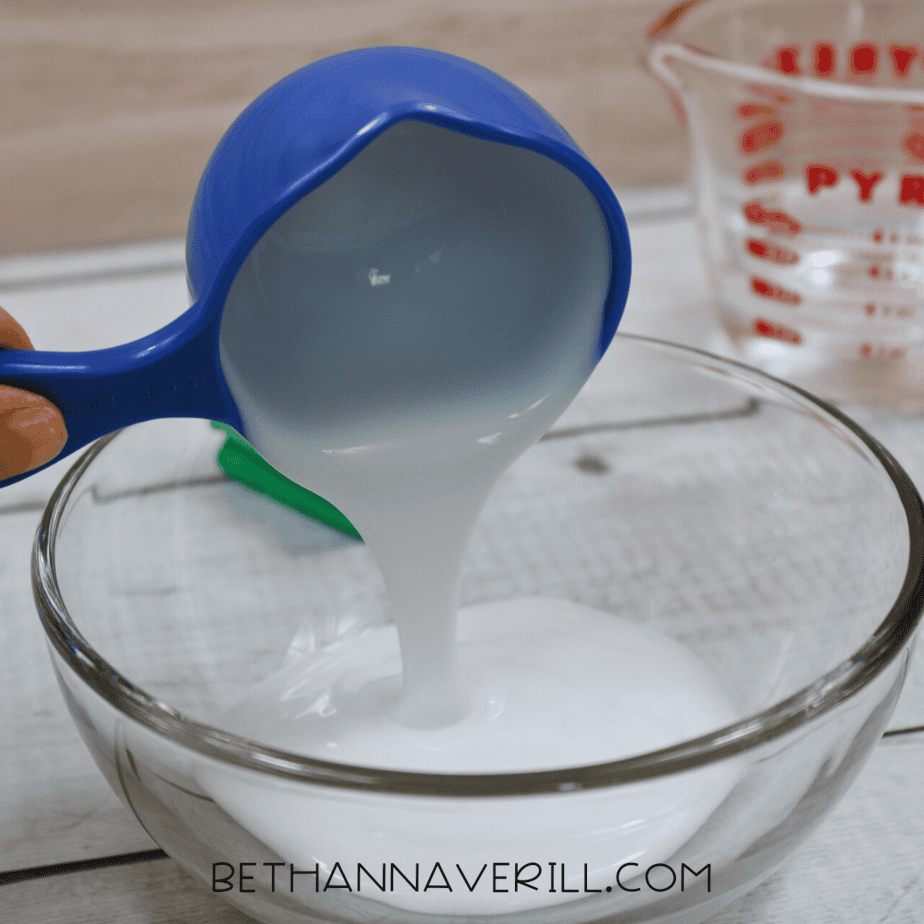
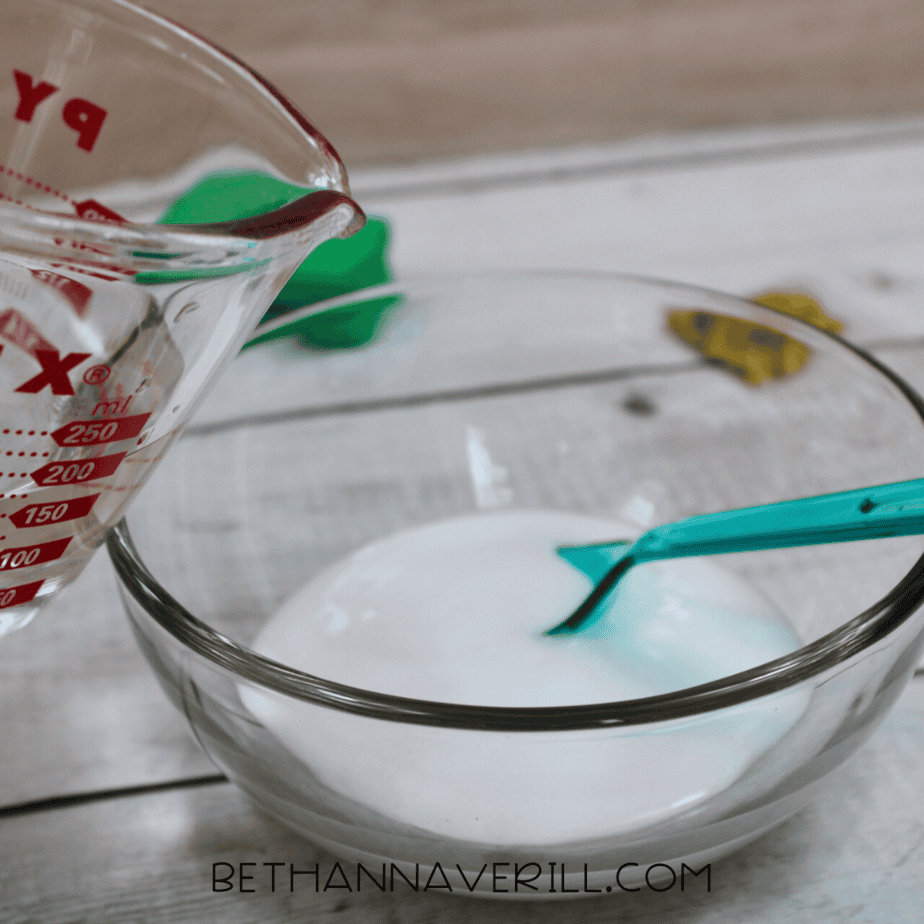
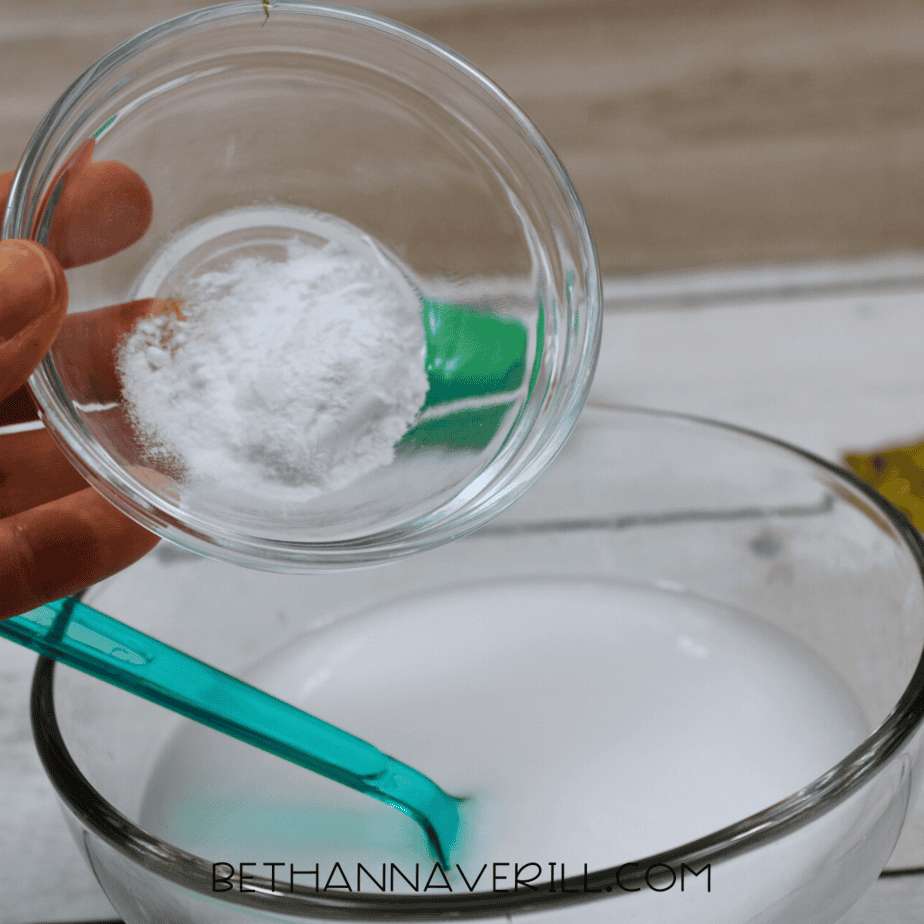
Instructions
- Gather your supplies needed to create Leprechaun butter slime.
- Mix glue and water. In a bowl, add the glue and water. Stir well with a spoon until fully combined.
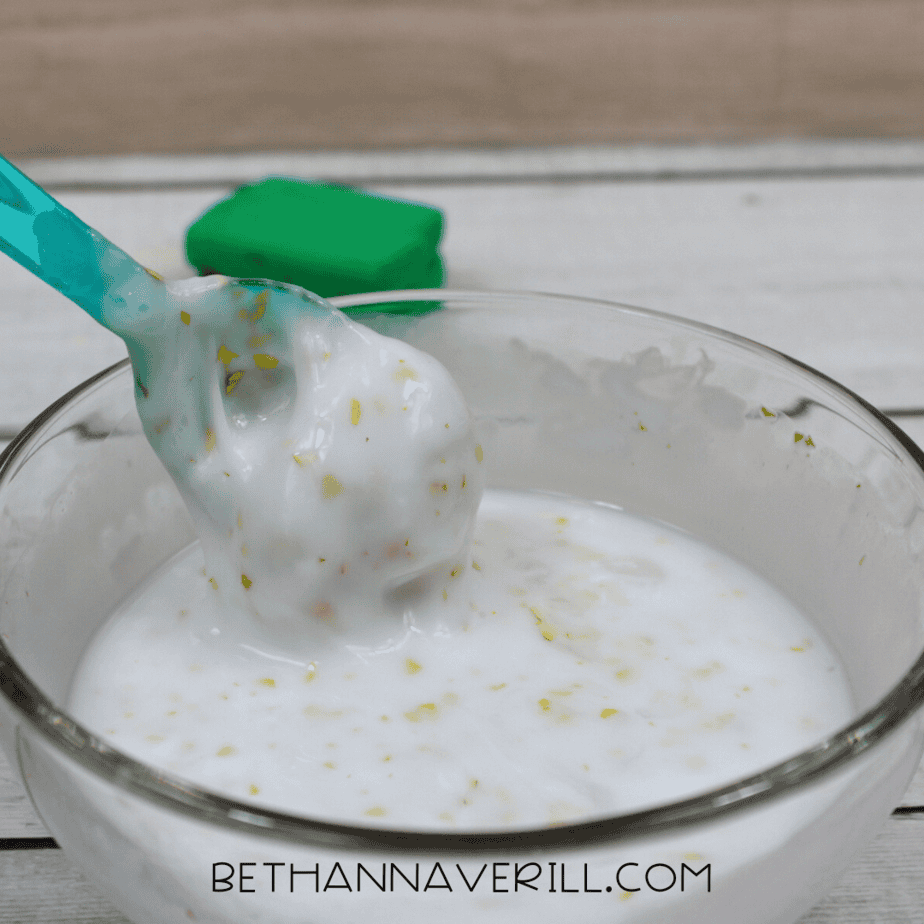
- Add baking soda and mix thoroughly. Then, add the glitter and stir to incorporate it.
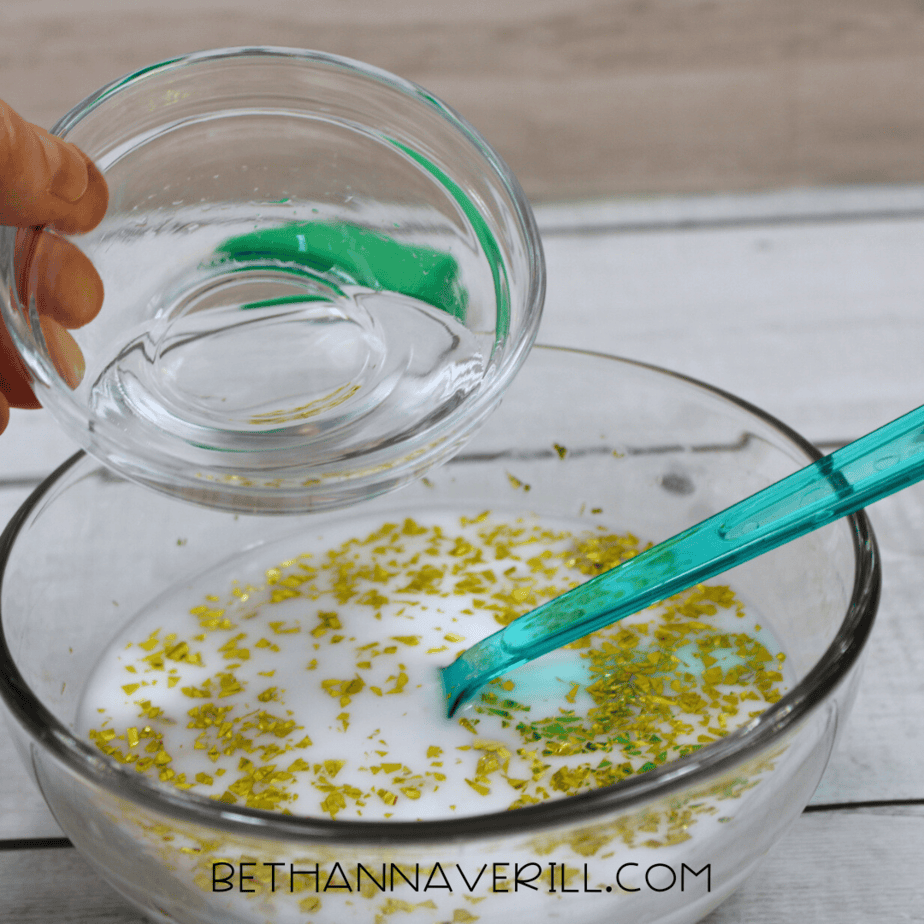
- Add the contact solution. Stir until the slime starts to pull away from the sides of the bowl.
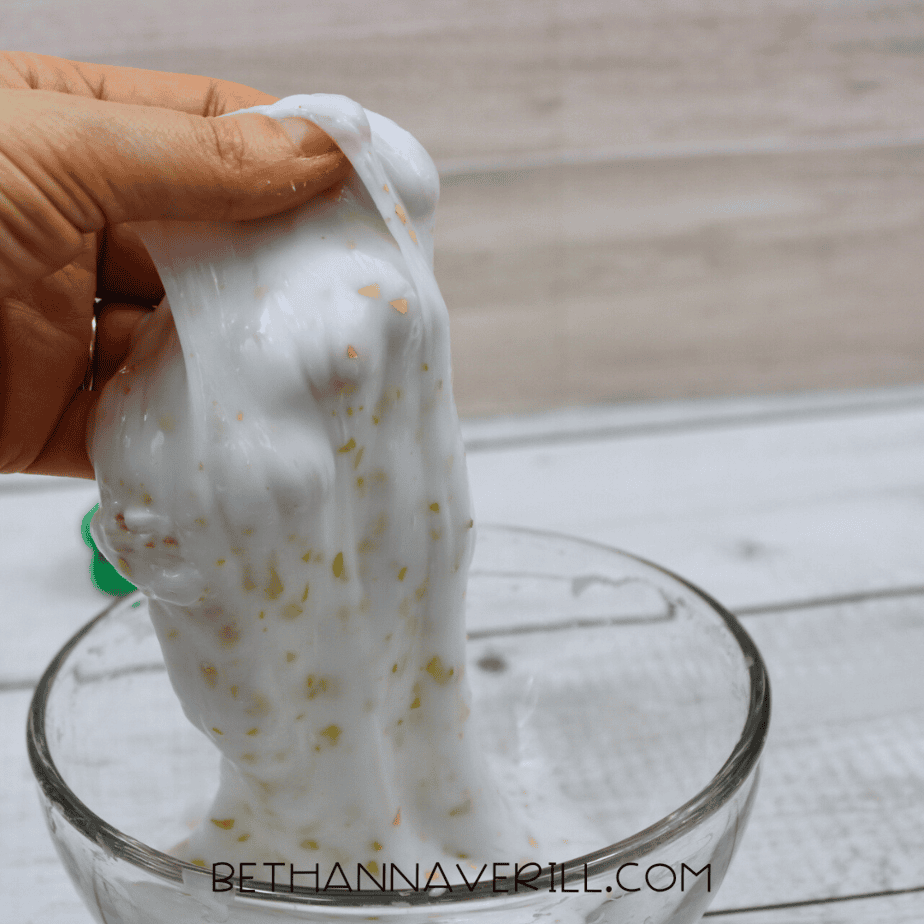
- Incorporate the clay. Add the green model magic clay to the slime and knead it until it’s fully combined with the slime.

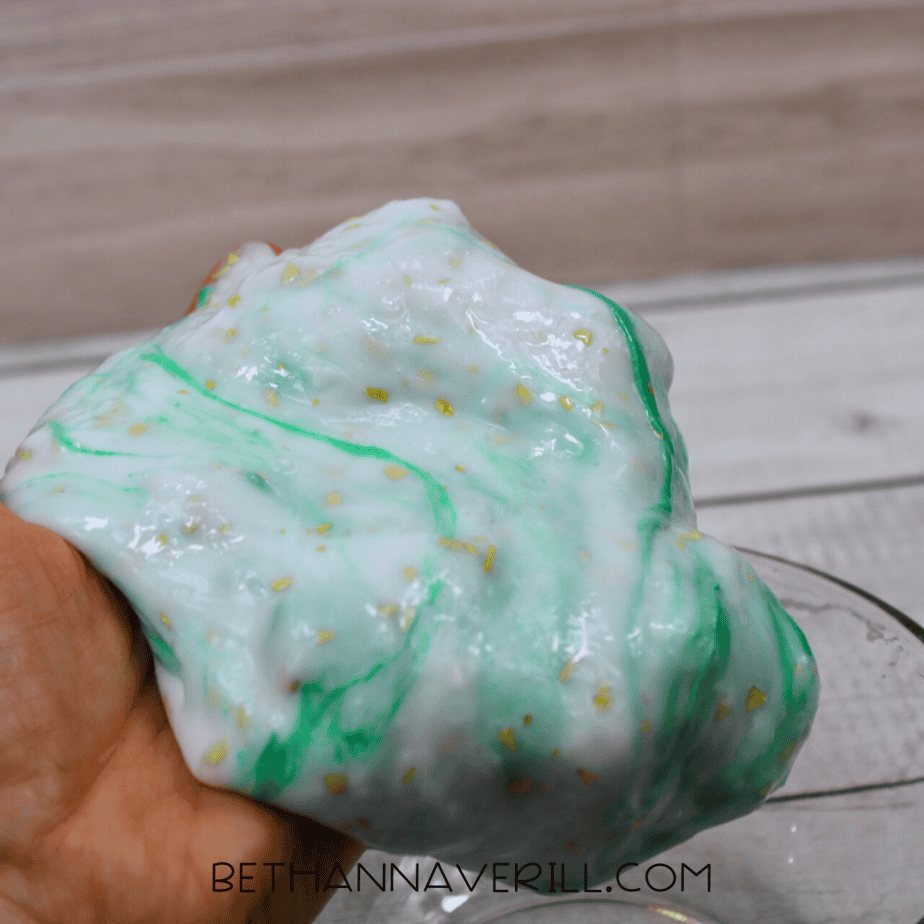
- Enjoy your St. Patrick’s Day butter slime!
Tips for Success and Troubleshooting
Making a festive St. Patrick’s Day butter slime can be a fun adventure, but if you end up with slime that’s too sticky or turning into a rock-hard mess, don’t worry! Fixing slime problems is easier than you think. Plus, knowing how to store your slime properly will keep it fresh and ready for play. Let’s dive into these simple tips to make sure your slime stays just right!
Adjusting Consistency
Getting the perfect butter slime consistency is a bit like baking cookies—sometimes it just needs a little tweaking! If your slime isn’t quite right, here are some simple fixes:
- Too Sticky?
Sticky slime can be endlessly frustrating, but not all is lost! Add a few drops of contact solution and knead it thoroughly. The boric acid in the solution works as an activator to bond the glue, creating a less sticky texture. Start small—add just a few drops at a time so you don’t overdo it. If it’s still sticking everywhere, sprinkle in a small pinch of baking soda and continue kneading. Think of it as balancing a recipe—you’re adding just the right amount of “spice” to tame the texture. - Too Stiff?
Overactivated slime can feel stiff and unusable, but there’s an easy way to bring it back. Add a small amount of warm water and knead it in. It might feel slightly messy at first, but the slime will absorb the moisture and become softer. Another option? Gently knead in a dollop of hand lotion to restore flexibility and make it squishy again.
Remember that butter slime should feel soft and velvety, not sticky or rubbery. Take your time adjusting until you’re happy with the result!
Storage Instructions
Once you’ve perfected your St. Patrick’s Day butter slime recipe, the next challenge is keeping it fresh for as long as possible. The key here is airtight storage and a little TLC.
- Use an Airtight Container
Butter slime dries out quickly when exposed to air, so seal it in an airtight container as soon as playtime is over. A small plastic container with a snapping lid or even a resealable zip-top bag works wonders. - Avoid Temperature Extremes
Storing slime in a cool, dry place helps preserve its texture. Extreme heat can cause it to break down, while frigid temperatures might turn it stiff. - Check for Contaminants
It sounds obvious, but make sure little hands are clean before playing, and avoid mixing in anything like dirt or food crumbs. This helps keep the slime hygienic and prevents unpleasant smells. If the slime starts to discolor or smell funky, it’s best to discard it and make a fresh batch.
For more creative St. Patrick's Day activities, you could pair your slime project with this Adorable St. Patrick’s Day Shamrock String Art Craft for a full day of festive fun!
With these simple tips, you’ll be able to create the perfect St. Patrick’s Day butter slime every time! Whether it’s adjusting the texture or keeping your slime fresh for future play, a little troubleshooting goes a long way. Now you’re all set for a fun-filled St. Patrick’s Day adventure—let the sensory play and creative fun begin!
Please Share This St. Patrick's Day Butter Slime Tutorial
Your shares are how this site grows and I am sincerely grateful. Know a friend who’d like this? Please share it on Facebook or save it to your favorite kids’ activity board on Pinterest.


