
Bee Handprint Craft
If your kiddo has energy to spare (and you’ve already said “no” to snacks three times before lunch), it might be time to break out a quick craft. This bee handprint project is an easy win. No fancy supplies, no glitter in your eyelashes, and you’ll end up with a keepsake that’s equal parts adorable and hilarious.
Use it during spring themes, insect lessons, or literally just because it’s Tuesday and your kid is spiraling into chaos.

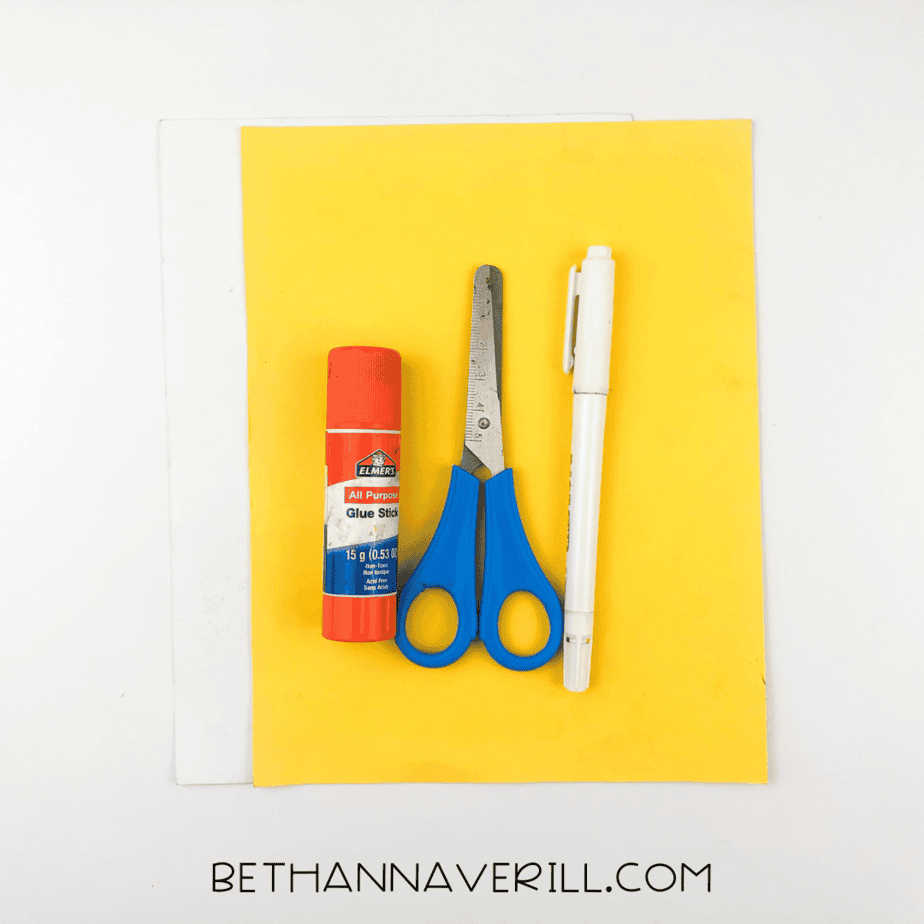
What You’ll Need for This Handprint Bee Craft
Nothing wild here. This is a use-what-you’ve-got kind of project:
- Yellow construction paper
- White paper
- Black marker
- Pencil
- Glue stick
- Scissors
How to Make This Bee Handprint Craft
Ready to get crafting? Find the instructions below!
Bee Handprint Craft

Buzz into crafting fun with this bee handprint craft! A quick and easy activity for kids using paper, glue, and markers—perfect for spring, insect themes, or fine motor fun.
Materials
- Yellow construction paper
- White paper
- Black marker
- Glue stick
- Pencil
Tools
- Scissors
Instructions
- Gather your supplies.
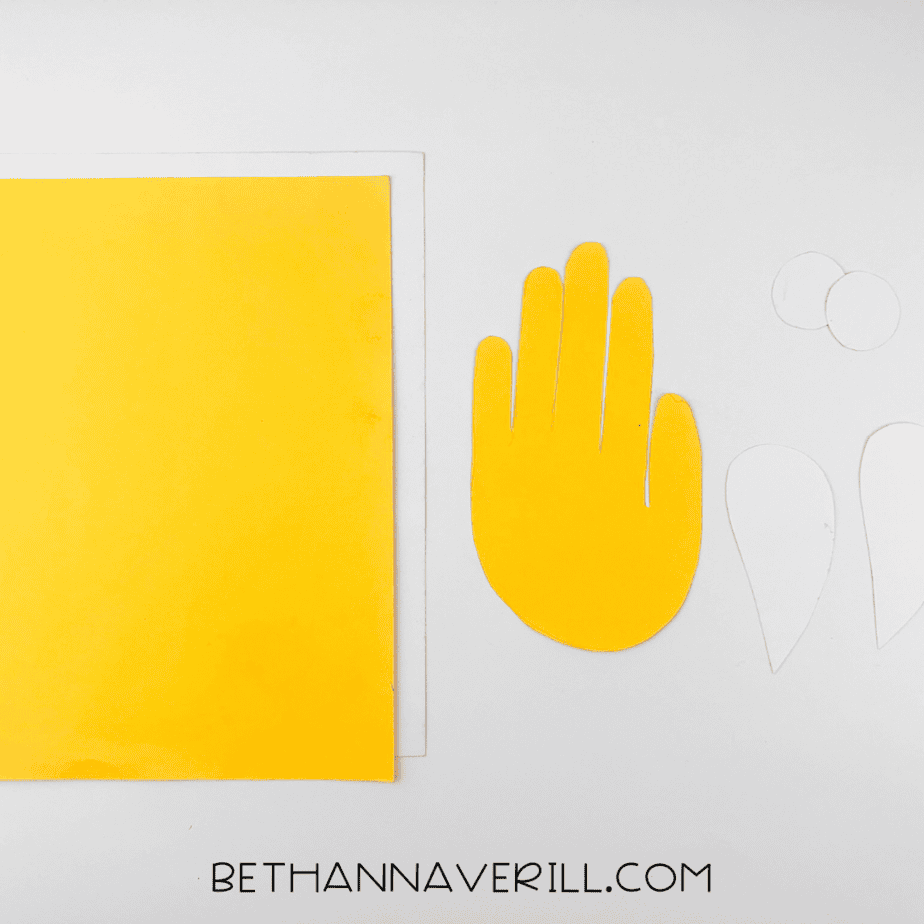
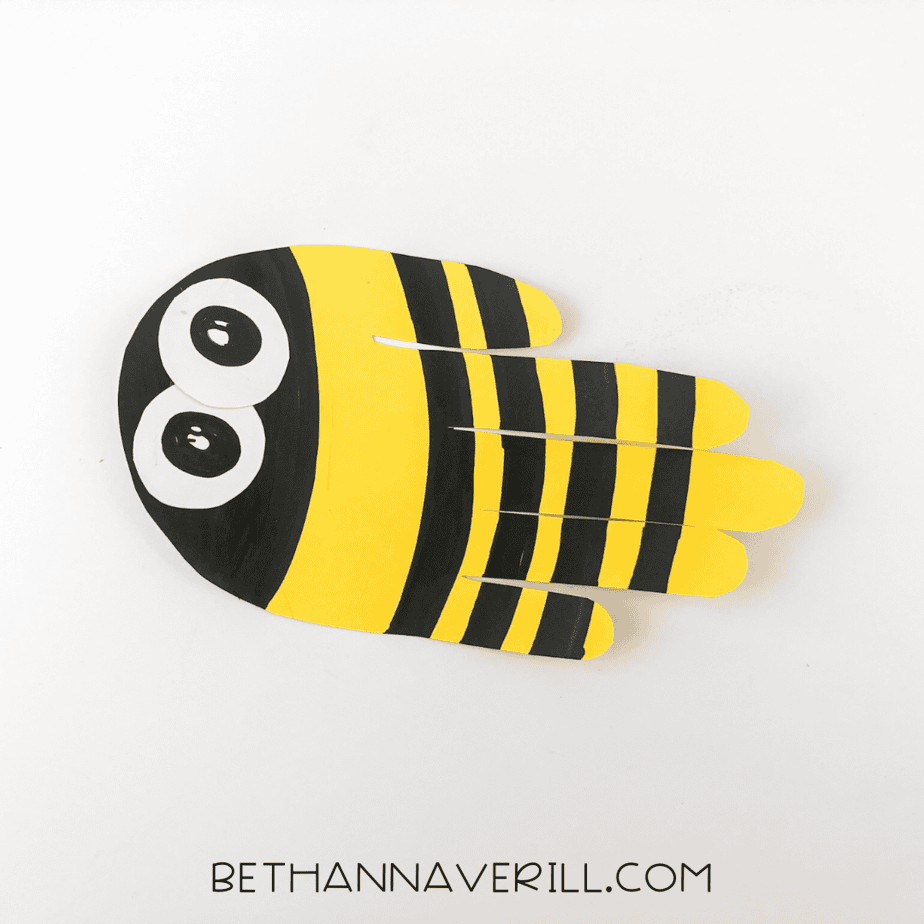
- Trace your child’s hand on yellow paper and cut it out.
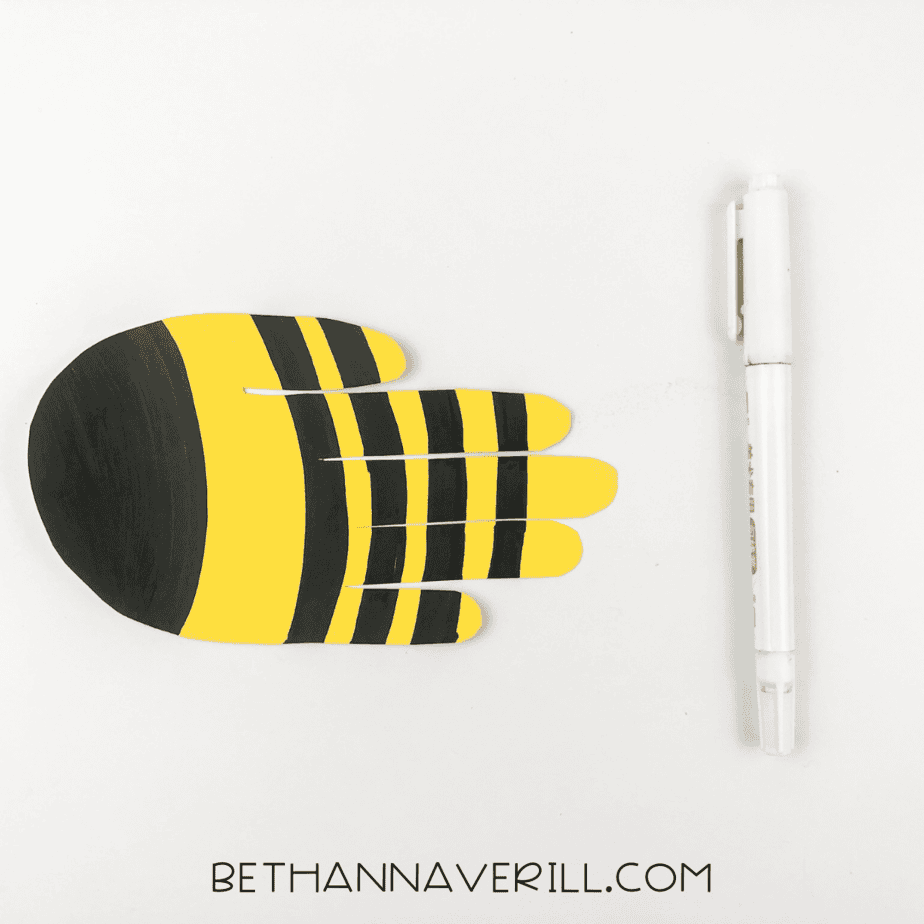
- Color the palm area black to create the bee’s head.
- Draw black stripes across the rest of the hand.
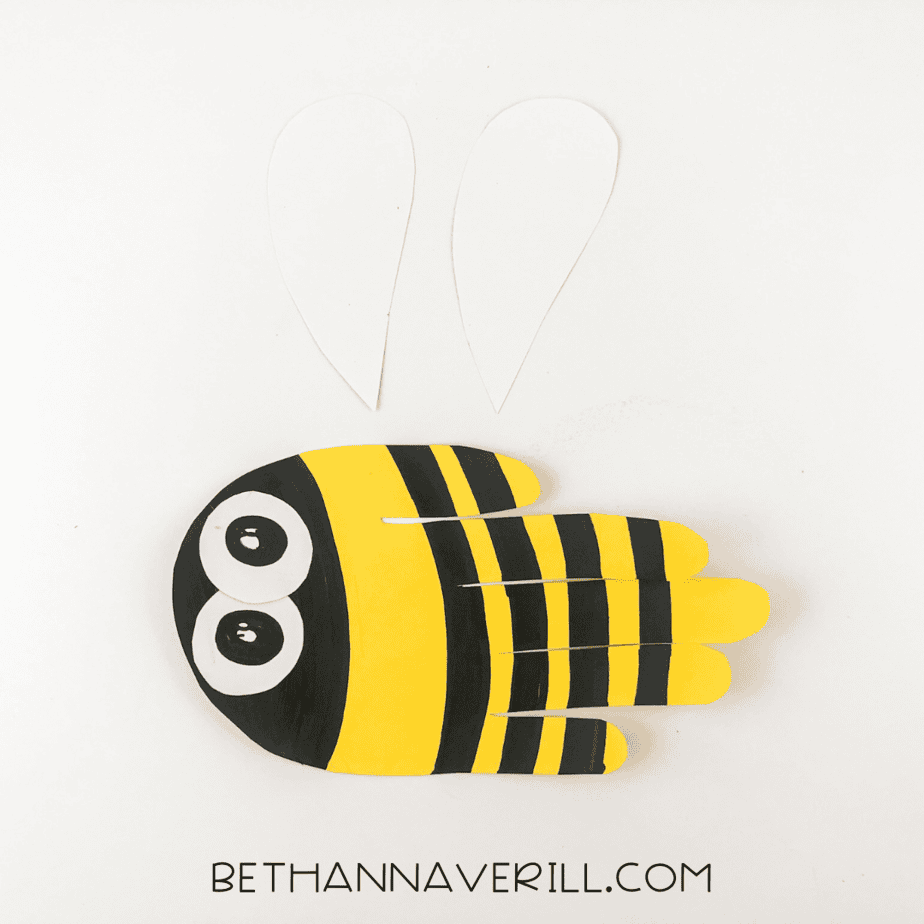
- Cut out two white circles for eyes and glue them on.
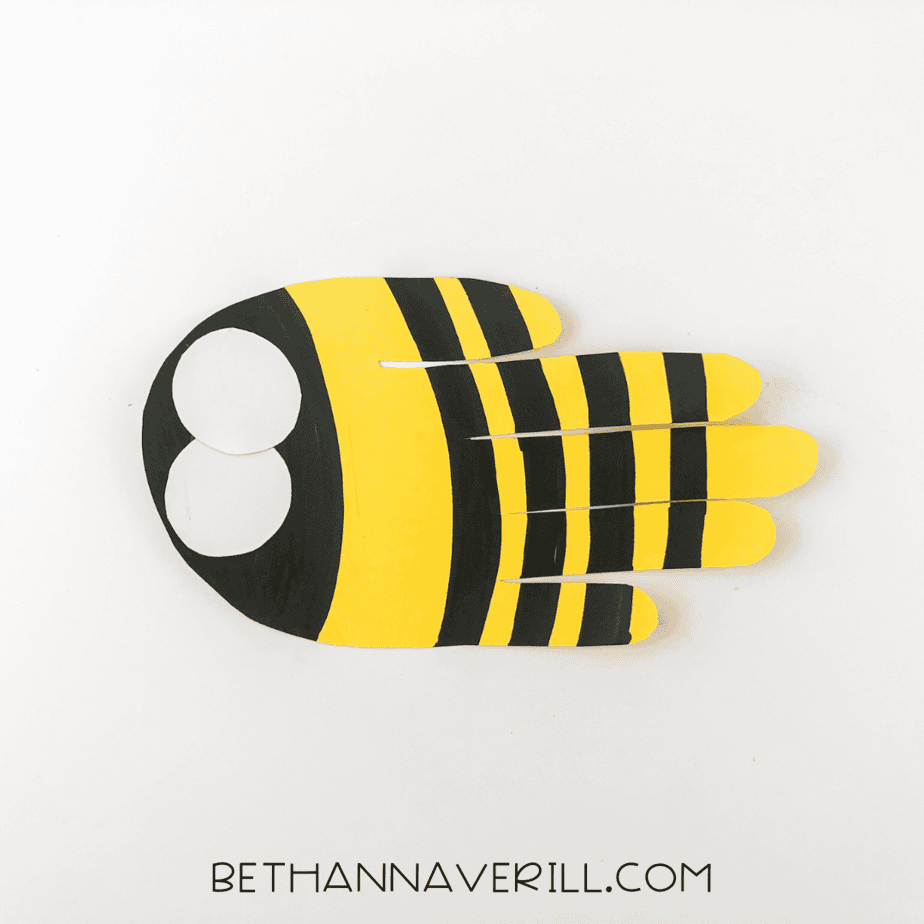
- Use a black marker to add pupils to the eyes.
- Cut out two wing shapes from white paper.
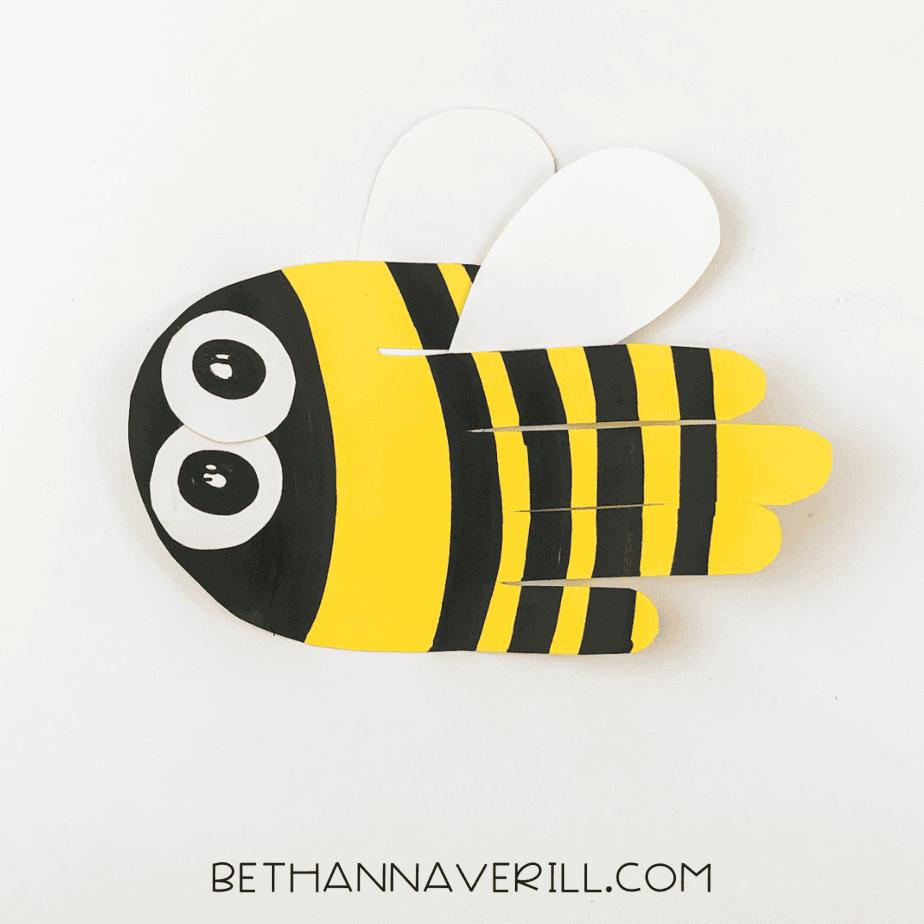
- Glue the wings to the back of the bee’s body.
- Hang your finished bee handprint on display!
Recommended Products
As an Amazon Associate and member of other affiliate programs, I earn from qualifying purchases.


Why This Craft is Secretly Genius
Sure, it’s cute, but this craft also packs in a ton of developmental goodies without your kid even realizing it. They’re practicing scissor skills, improving hand-eye coordination, learning how to follow steps, and using their creativity in a structured (but fun!) way.
Plus, when they see their own hand turned into a buzzing little bug, it’s a pretty sweet confidence boost.
What To Do With Your Bee
The real question is: where won’t you display it?
Stick it to the fridge. Tape it to the window. Mail it to Grandma (with dramatic flair). Or save it in a memory box because, let’s be real, those little hands are not going to stay little forever.
Need more crafts like this? Ones that are quick, cute, and don’t require twelve specialty tools and a master’s in art education? Our Handprint Craft Collection is full of stuff you can actually do with real kids and real life happening around you.
Please Share This Bee Handprint Craft
Your shares are how this site grows and I am sincerely grateful. Know a friend who’d like this? Please share it on Facebook or save it to your favorite kids’ activity board on Pinterest.


